
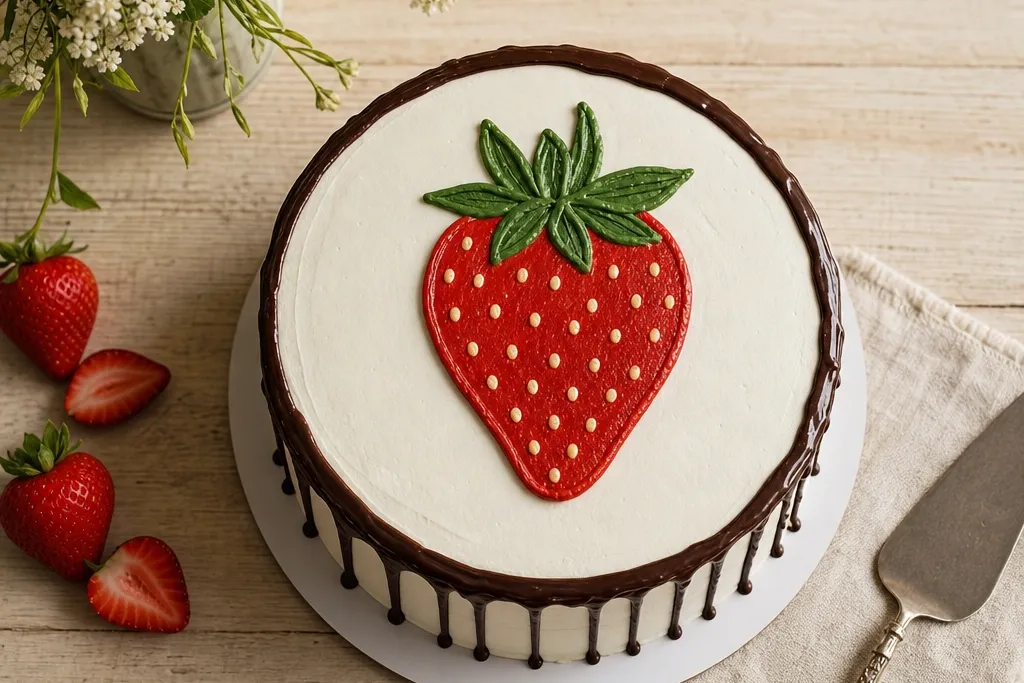

1. Single Hero Strawberry with Seed Speckles
This idea makes your cake look intentional because it gives the viewer one clear center point. Draw one strawberry large enough that the seed dots can be spaced evenly, not crowded. Use a bright strawberry red for the body, then add pale yellow or cream dots for the seeds so they pop against the red. Finish with a darker red outline or a slightly deeper red shadow line so the strawberry has shape instead of looking like a smear. This works best on cakes with a smooth top and clean sides because the simple design reads from across the room.
Start by sketching a teardrop strawberry on paper with a small star-shaped top for the seeds area. Transfer the outline lightly onto the cake using a toothpick-and-marker guide or a very faint edible marker. Pipe a thick outline in red, then fill the body with red gel or icing in smooth strokes. Add seed dots with a thin tip using a cream or pale yellow icing, and finish with one green leaf and two vein lines.
Pro tipKeep seed dots the same size — if you mix tiny and big dots, the strawberry stops looking “designed.”
AvoidDon’t cover the whole strawberry with seeds to the edges; leave a small smooth band for highlights.
2. Strawberry Corner Border with Tiny Leaves
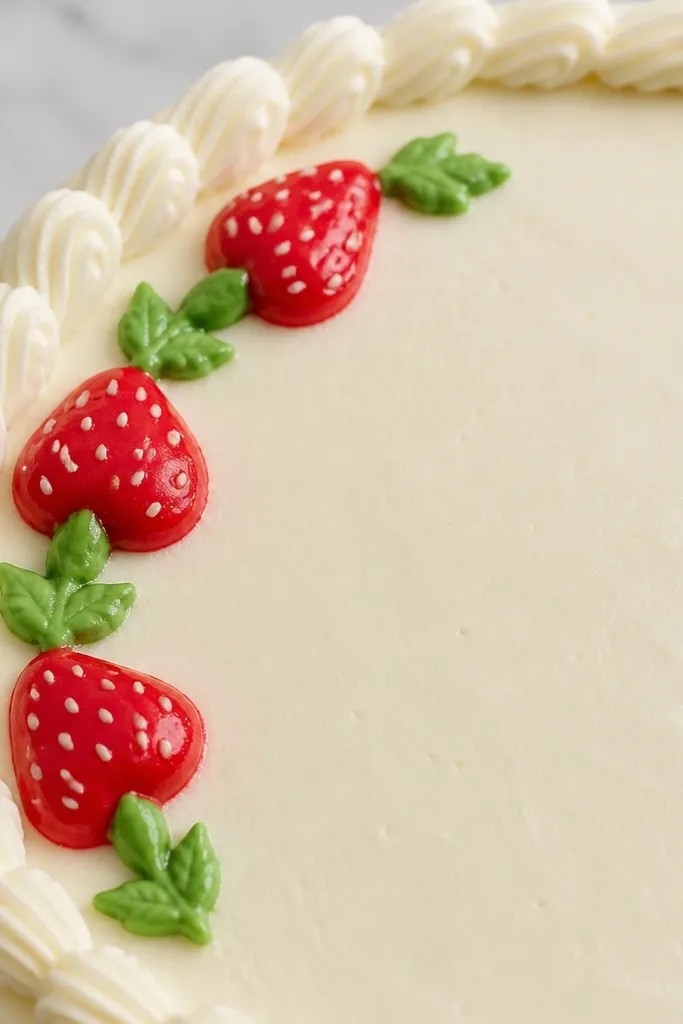
A corner border is the fastest way to make a cake drawing look finished without filling the whole surface. Place three small strawberries in a diagonal line along one edge, then tuck tiny green leaves between them. The look is photogenic because it frames the cake top and creates a clear reading path for the eye. Use a consistent strawberry size and spacing so the border doesn’t turn into random scatter. This works well for sheet cakes, mini cakes, and any cake with a clean border area.
Mark a simple guide line for the border 1.5-2 inches from the edge of the cake top. Pipe small strawberry outlines in red, each with a short green cap and a few seed dots, keeping them about the same width. Add leaves between strawberries using a thin green line and a few short vein strokes. Finally, connect the spacing with tiny red “blush” dots or light pink dots so the border looks cohesive.
Pro tipUse a stencil-style spacing — measure the gap between strawberries with a ruler once and repeat.
AvoidAvoid making one strawberry much bigger than the others; it breaks the border rhythm.
3. Watercolor Strawberry Drip Panel
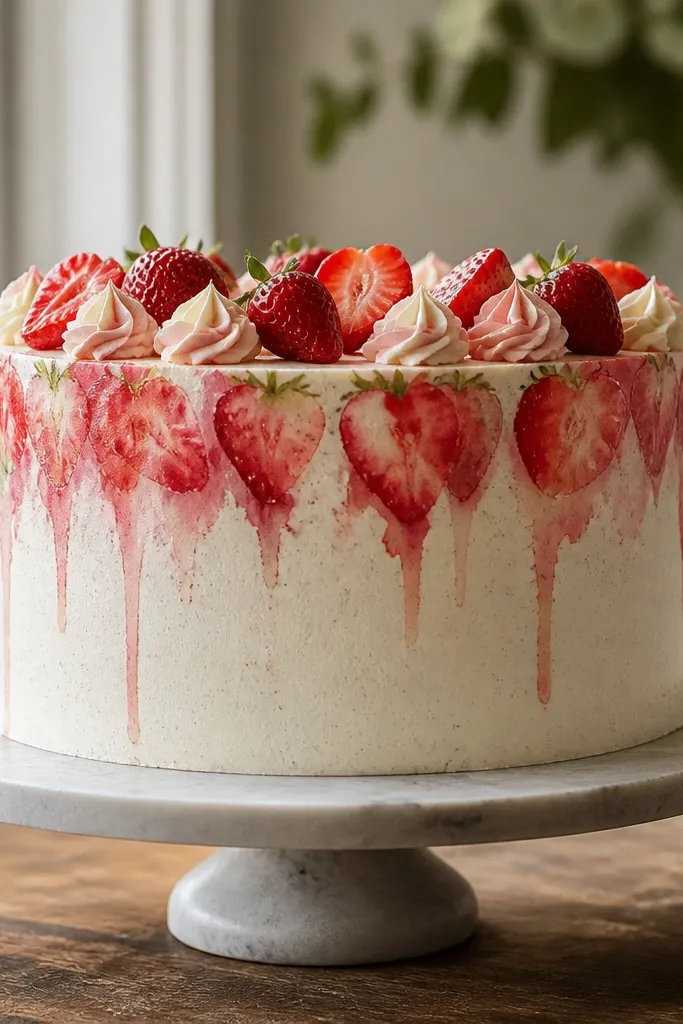
If you want a soft, artistic strawberry drawing that still looks crisp on camera, go for a watercolor drip panel. You paint the strawberries with diluted red food coloring or watercolor-style gel, then let a few edges fade into drips. The aesthetic comes from controlled blur at the edges, not messy bleeding. Pair the soft fruit with clean, dark seed dots and a deep green leaf outline so the seeds stay readable. This looks best on cakes with a smooth buttercream or ganache surface where drips can sit cleanly.
Brush a light base wash of diluted red (or thinned red coloring gel) onto a rectangular area on the cake top, using a small food-safe brush. While it’s still slightly wet, add strawberry shapes with darker red and let the paint edges soften. Pipe seed dots with pale cream icing once the red layer sets enough not to smear. Add 2-3 short drips downward with a darker red wash, then finish with green leaves drawn in a clean outline.
Pro tipTest your dilution on a spare plate first; watercolor food color should look like ink wash, not thick paint.
AvoidDon’t add seed dots while the red wash is too wet or the dots will bleed into the background.
4. Strawberry Garland Across the Top
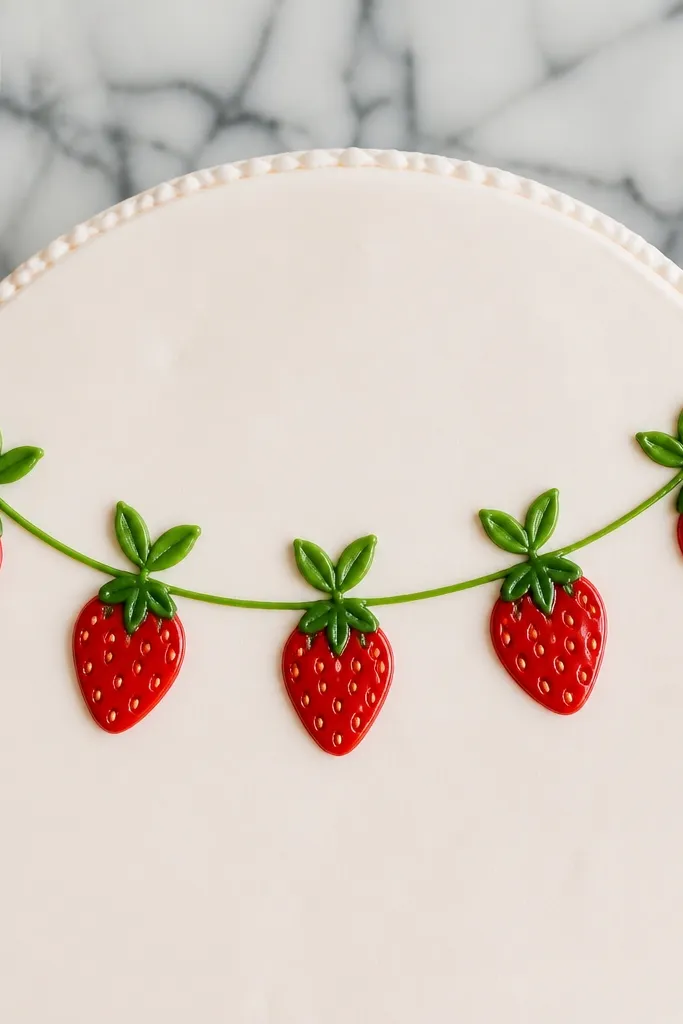
A garland gives you movement and a “designed line” that reads well even if your drawing isn’t perfect. Draw a gentle curve across the top, then hang strawberries from it like little ornaments. The key is consistent leaf shapes and a repeating strawberry silhouette, so the garland looks like a pattern rather than scattered fruit. Use a darker red outline and lighter red fill for each strawberry, and keep seeds minimal — a few rows is enough. This is great for celebration cakes where you want the top to look styled, not flat.
Lightly mark a curved path across the cake top with a toothpick and edible marker. Pipe a thin dark green line to form the garland string, then draw matching small leaf clusters at intervals. Hang strawberries from the string with red outlines and light red fill, keeping each strawberry roughly the same height. Add pale seed dots and two tiny highlight strokes on each strawberry so they look glossy in photos.
Repeat the same strawberry angle on every fruit; one rotated style makes the garland look sloppy.
Don’t overcrowd the garland — keep it to 6-9 strawberries across the top for a clean look.
5. Strawberry Slice Cross-Section
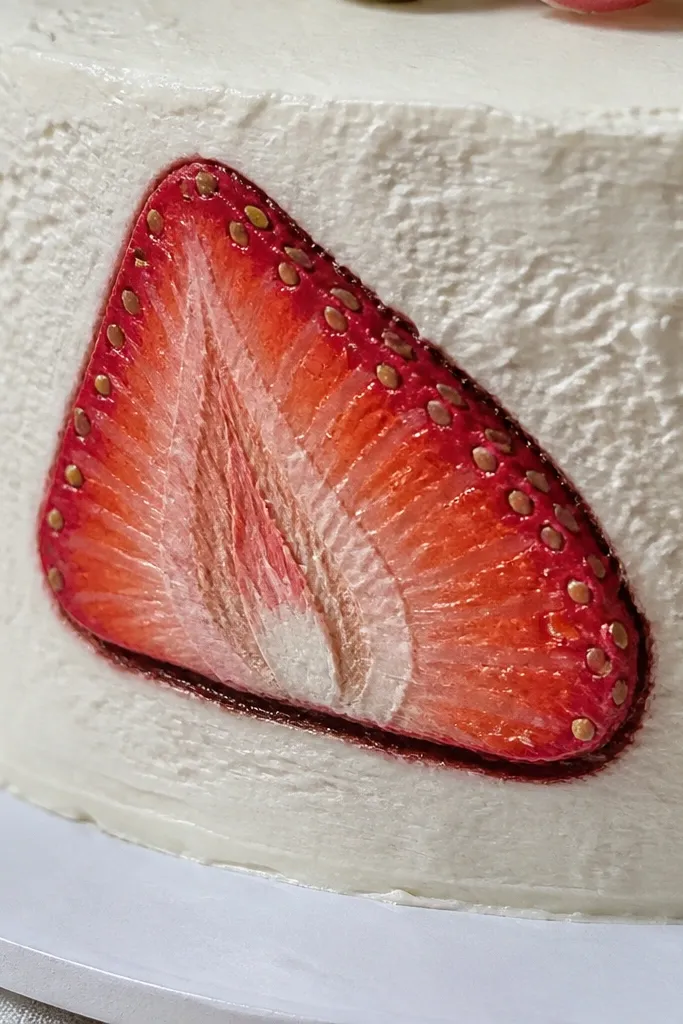
This one is a cheat code for looking advanced without being complicated. A slice cross-section turns strawberries into layered shapes, so your drawing has structure and depth. Use a wedge shape with darker red outer rind and lighter red inner area, then add seed dots that follow the curve of the slice. Add a small pale cream highlight band along one edge. It looks striking because the viewer immediately understands the fruit, and the layered red tones photograph beautifully. Works best on cakes with a smooth top and enough space for the slice to be a focal piece.
Sketch a wedge slice shape on paper with a slightly curved outer edge. Transfer the outline to the cake and pipe the outer darker red border first. Fill the inside with lighter red, leaving a thin gap for the highlight band. Add seed dots with pale cream icing, then draw two short green leaf hints at the top edge for context.
Pro tipChoose two reds only — one dark and one light. More than two shades can make it look muddy.
AvoidDon’t draw seeds as a flat circle pattern; place them to match the slice curve.
6. Strawberry Crown on Chocolate Drip Base
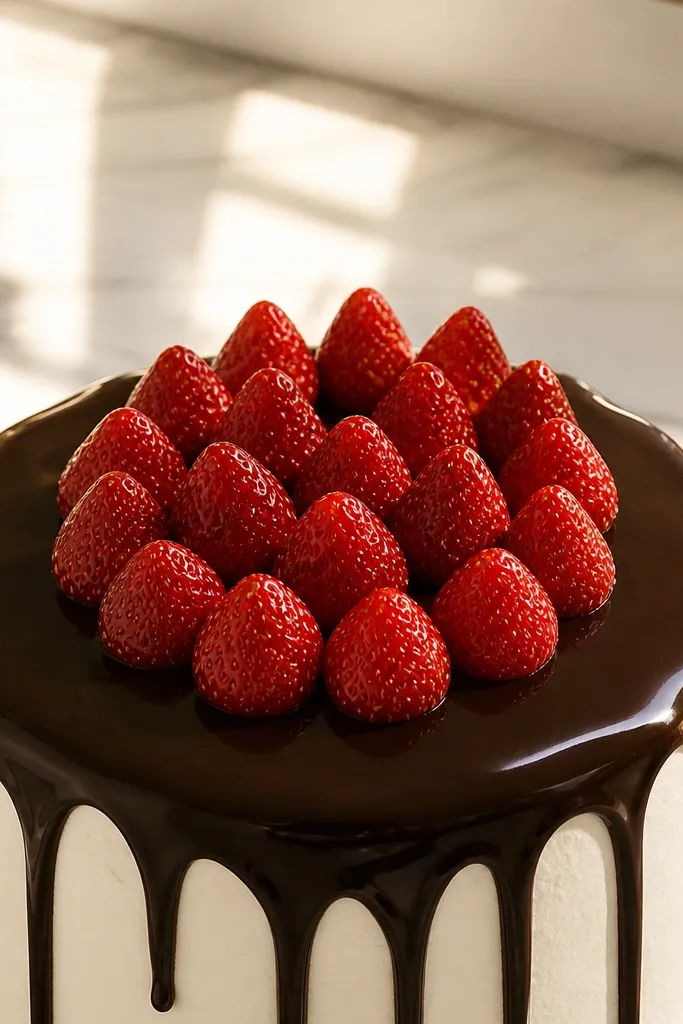
Chocolate drips plus strawberry drawings look extra photogenic because you get two strong color families. Create a chocolate drip base on the cake top edge, then place a crown of small strawberries over the center. Each strawberry should have a clean outline and a few seed dots, not full detail everywhere. The crown shape makes the arrangement look intentional and lifts the design higher in the frame. This works well for cakes that already have a chocolate element, or for anyone who wants strawberry to feel richer instead of pastel.
Pipe a ring of chocolate-colored icing around the top perimeter, then add short drips downward with a spoon or piping tip. In the center, arrange 7-11 small strawberries in a crown arc, spaced evenly. Outline each strawberry in red, fill lightly, and add seed dots with pale cream icing. Finish with green leaf caps and a tiny darker red shadow line under each strawberry so they sit “on” the chocolate.
Keep drip lengths under 1 inch — longer drips swallow the strawberries visually.
Don’t make the strawberries too small; if they’re tiny, the seed dots disappear in photos.
7. Strawberry Frame Around a Message Space
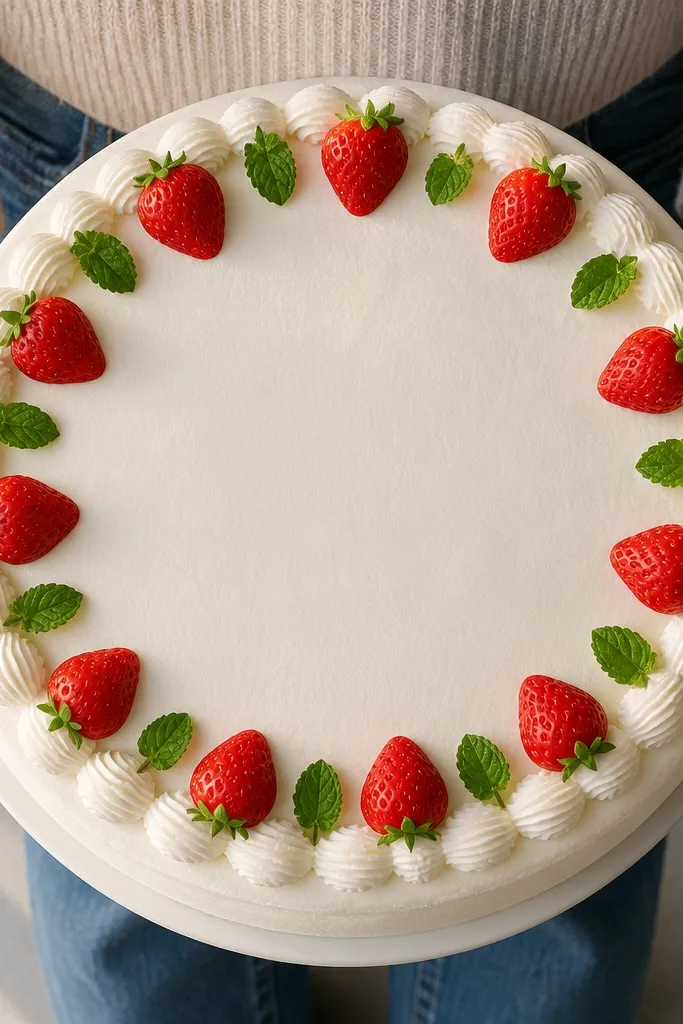
If you want a drawing that looks clean with writing, this frame layout is the answer. The strawberries form a border, but the center stays smooth and uncluttered for a name or date. That balance is what keeps the design from looking busy. Use alternating strawberries and leaves, and keep seeds simple. The frame also makes the cake look more “graphic,” which photographs well even in busy party lighting. This is ideal for birthday cakes and shower cakes where you add a topper or write on the surface.
Mark a rectangle or oval center area for the blank panel, leaving at least 2 inches of space around it. Pipe strawberries around the outer edge in a repeating pattern, each with a red outline, red fill, and 4-6 seed dots. Add green leaves between strawberries to connect the pattern. Leave the center untouched, then add your message on the clean panel using black or dark brown icing.
Use consistent strawberry spacing around the frame corners; corners show mistakes first.
Avoid drawing seeds on the leaves or border background; keep seeds only on strawberries.
8. Minimal Line-Art Strawberries with Pink Fill
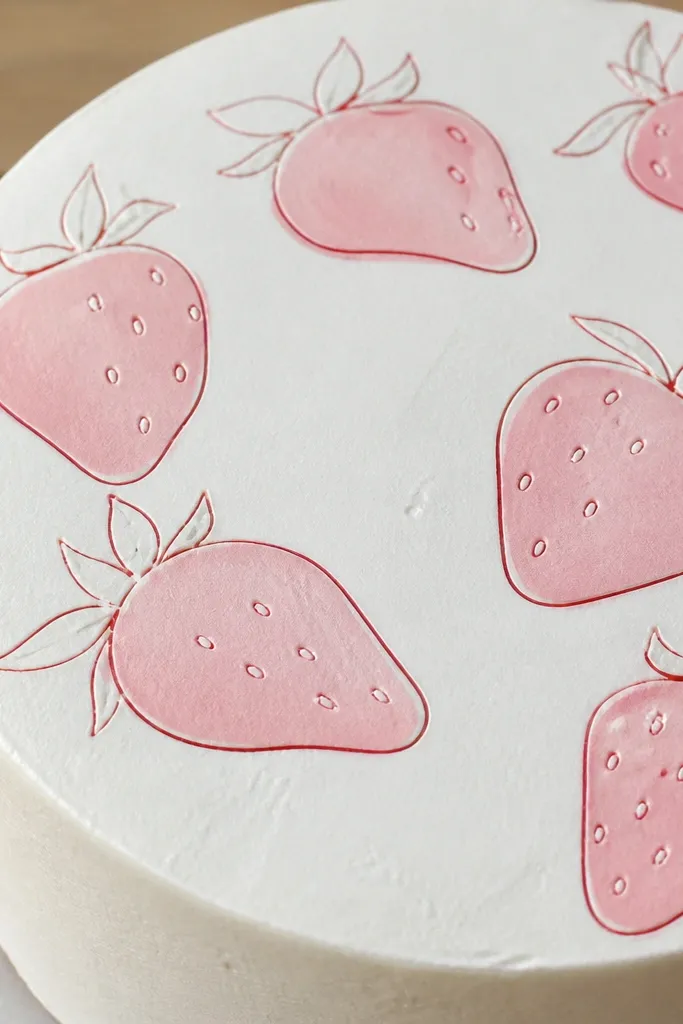
This style looks modern and tidy because it limits detail to line work and a soft fill. Draw strawberries with thin red outlines, then fill with a pale pink glaze or icing wash. Add only a handful of seed dots and one or two leaf veins. It reads as “a drawing” rather than “a frosting sculpture,” and that difference is what makes it aesthetic. This works best on smooth buttercream or fondant tops where the line-art doesn’t blur.
Use a thin piping tip or edible marker to draw strawberry outlines on the cake top lightly. Fill each strawberry with pale pink icing using a small spoon or piping in short strokes, keeping edges clean. Add 5-7 seed dots per strawberry with a cream color, then draw a small green leaf with one center vein. Finally, add a tiny white highlight line near the top curve of each strawberry.
Pro tipThin your red outline slightly if it’s clogging; clean lines matter more than thick ones here.
AvoidDon’t add heavy shading or thick outlines; minimal line-art loses its look.
9. Strawberry Polka Dot Confetti Top
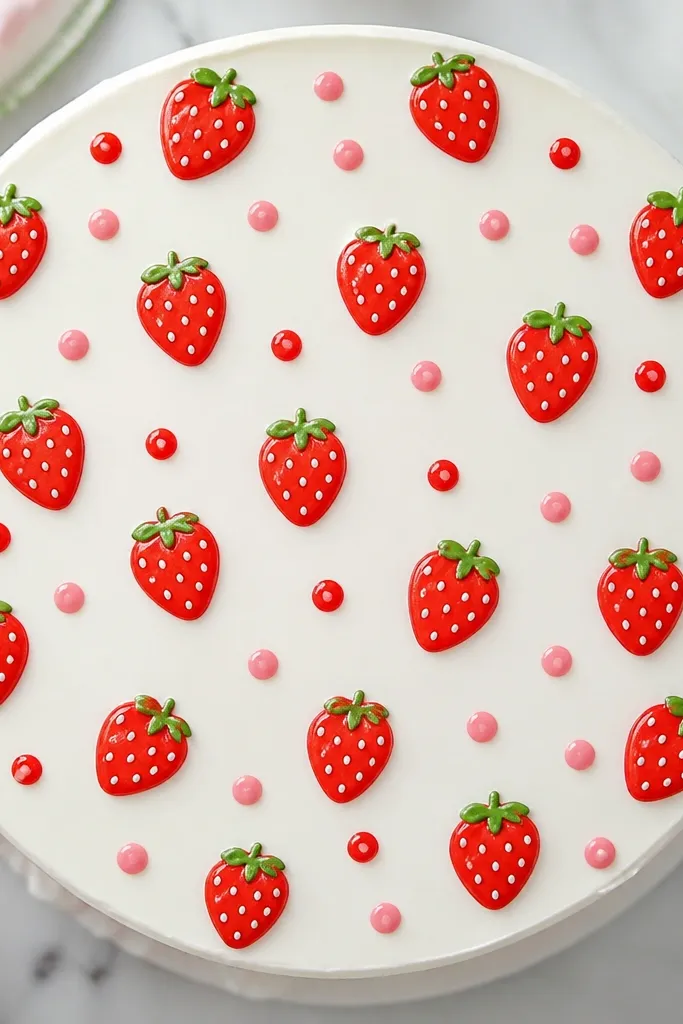
A confetti layout turns strawberries into a pattern, which looks great in overhead photos. Draw small strawberry icons (simple teardrop with a cap) and sprinkle them across the top like stamps. Then add pink and red dots and tiny green leaf marks to fill gaps. The aesthetic comes from repeating shapes at consistent sizes, not from detailed realism. This is a perfect choice when you want a cute strawberry look but don’t have time to build a big focal piece.
Pick a grid spacing for your cake top so icons stay uniform, like 2.5 inches between strawberry centers. Pipe small red strawberry outlines, fill with light red, and add 3-5 seed dots each. Add green leaf caps on some strawberries and leave others as just the fruit outline for variation. Finish by piping small dot confetti in pink and red between the strawberries.
Pro tipUse the same tip size for every icon; mixing tip sizes makes it look accidental.
AvoidDon’t overcrowd — leave some frosting visible so the pattern breathes.
10. Strawberry Macaron-Themed Doodles
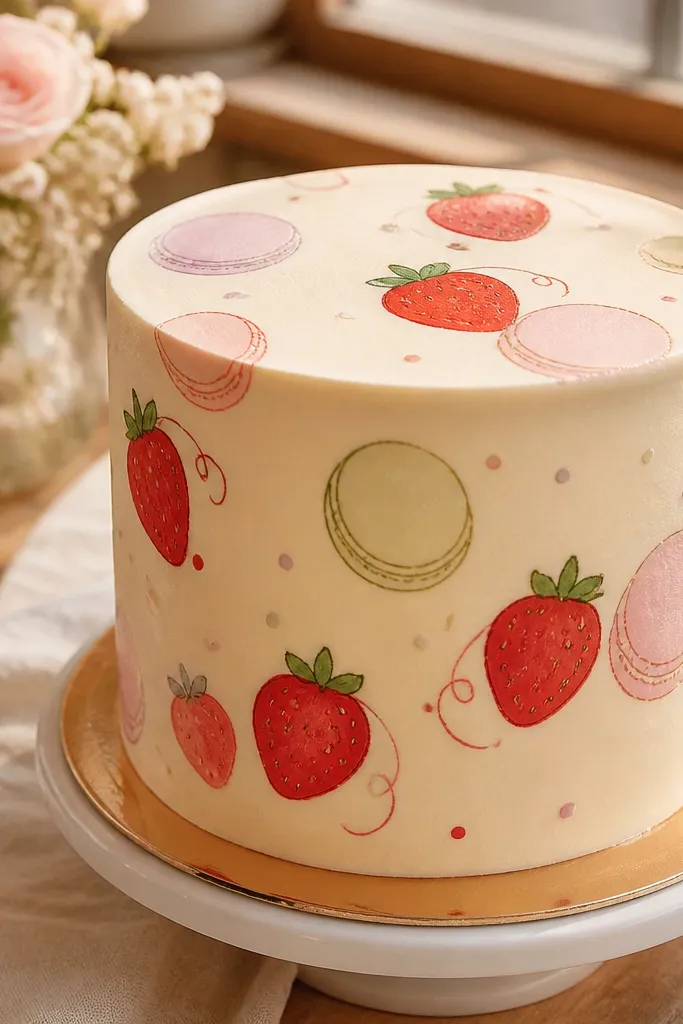
This idea looks themed without adding a ton of effort because you combine recognizable shapes. Draw strawberries that sit on or alongside macaron-like circles or shells, then add tiny dots and swirls. The circles create a softer, dessert-shop vibe and give your strawberry drawings a frame. Keep the strawberries slightly simplified so the circles do the heavy lifting for structure. It’s photogenic because the repetition of circles creates a tidy pattern in photos.
Draw 6-10 macaron-like circles across the cake top using a light pink outline, then fill them with pale pink icing. Place a small strawberry on top of every other circle, outlined in red with light red fill. Add seed dots and one green leaf to each strawberry, keeping seeds minimal. Finish with tiny swirl marks and dot accents in cream icing around the circles.
Pro tipLet the circle outlines dry slightly before placing strawberries so the strawberry edges stay sharp.
AvoidAvoid full-size strawberries next to large circles; the scale mismatch makes it look off.
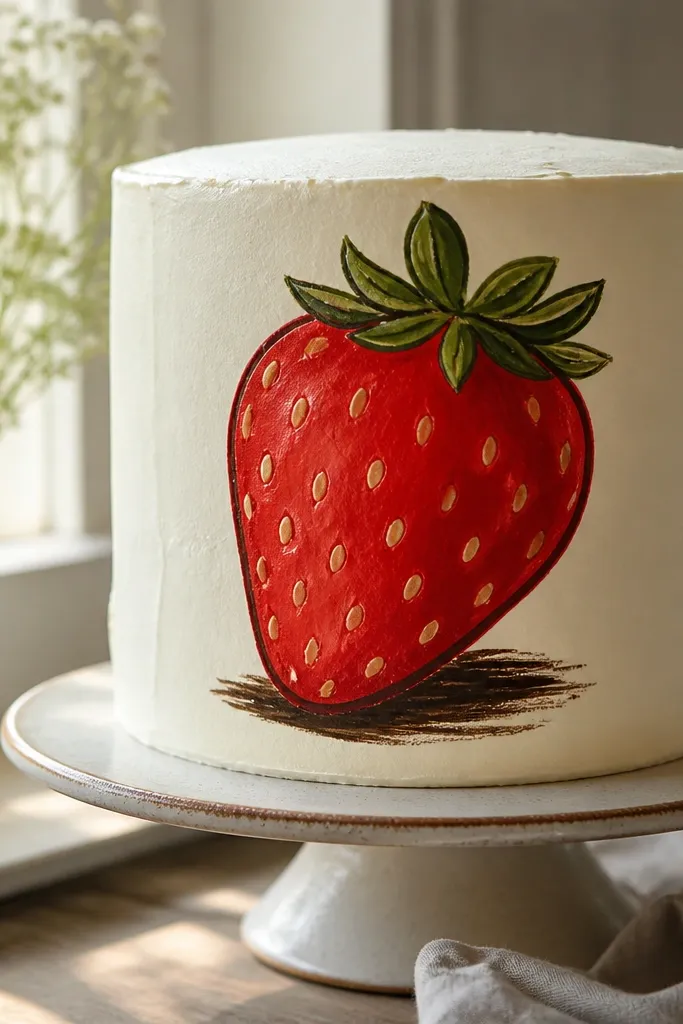
11. Chocolate Outline Strawberries with Cream Seeds
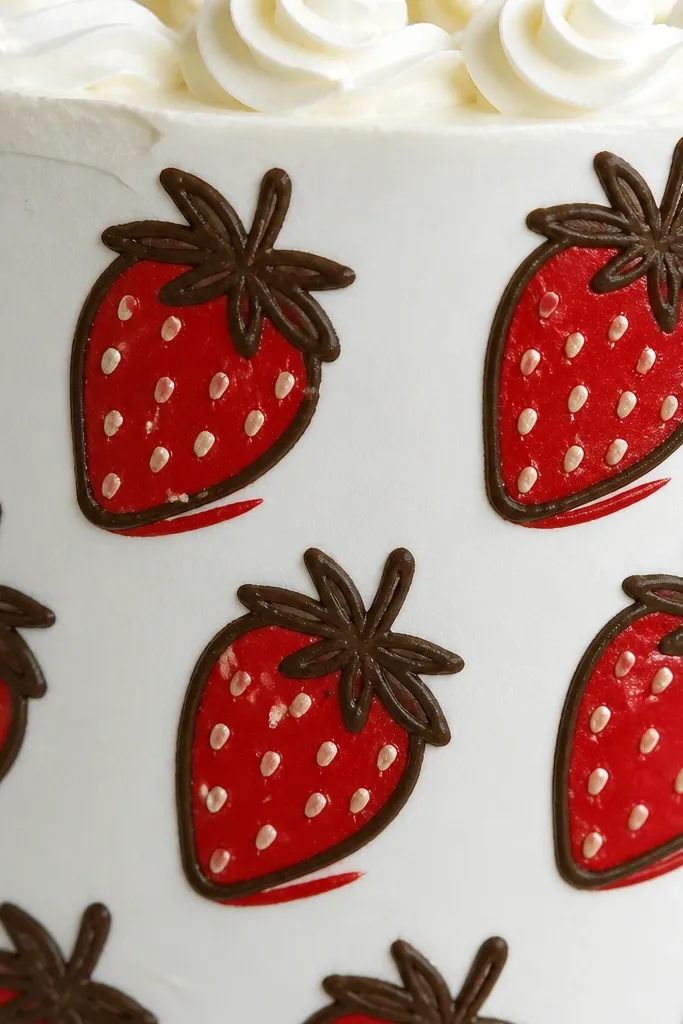
This style is clean and high-contrast, and it makes strawberries look graphic instead of candy-red. Outline the strawberry in chocolate brown, fill with red, and keep seeds cream-colored for a crisp look. The brown outline makes the fruit pop on both white and pastel backgrounds. Add a thin darker red shadow line under the strawberry body to separate it from the frosting. This is a strong option if you want something that looks “designed” even when your piping skill is average.
Outline each strawberry shape in chocolate brown first so you lock the silhouette. Fill inside with red icing using a small spatula or piping in short, even strokes. Add cream seed dots with a thin tip, placing them in 2-4 rows. Finish with green leaf caps outlined in dark green and a tiny highlight dot near the top of the strawberry.
Pro tipUse chocolate brown outline only — skip the extra black outlines or it turns harsh.
AvoidDon’t blend the brown into the red fill; keep the outline crisp.
12. Strawberry Bouquet with Stems and Dots
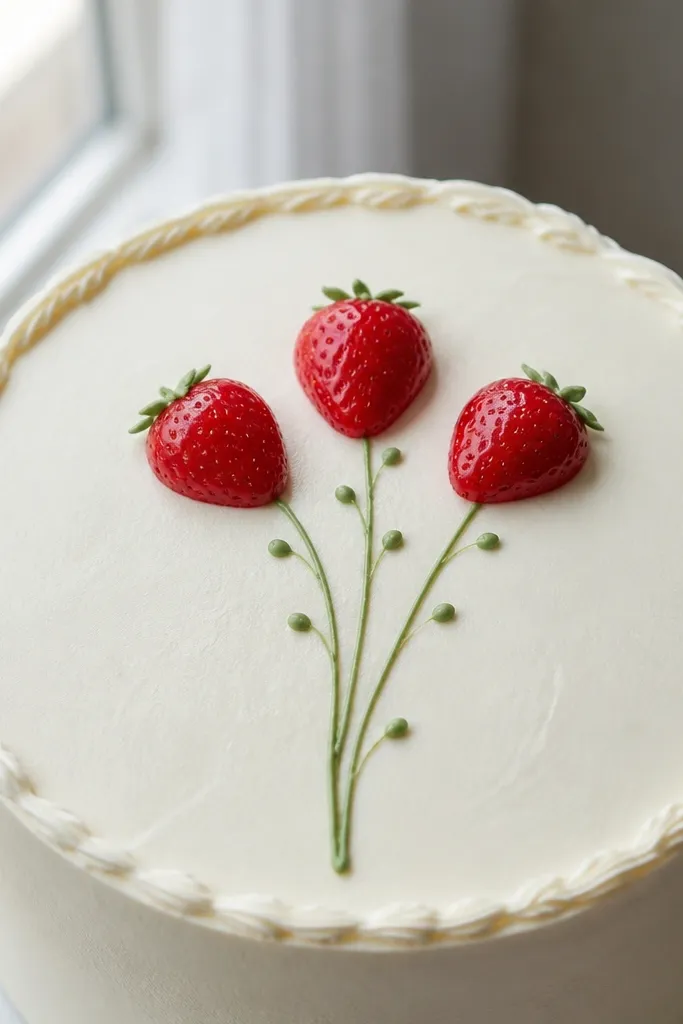
A bouquet layout gives you height and structure, even on a flat cake top. Draw three or five strawberry heads clustered together, then extend thin stems downward with curving lines. Add small green dots or tiny leaf sprouts between stems for texture. The strawberries themselves stay simple: red fill, a few seed dots, one leaf each. This looks sweet and styled, and it’s especially photogenic on cakes with a smooth top where the stems create a clear vertical rhythm.
Sketch a clustered strawberry group in the center, then add 3-5 thin stem lines radiating downward. Pipe red outlines for each strawberry head, fill with red icing, and add cream seed dots. Draw one small green leaf cap on each strawberry, then add a few small sprout dots in green along the stems. Finish by adding scattered tiny cream dots around the bouquet so the center doesn’t feel empty.
Pro tipKeep stems thin and consistent width; thick stems make it look like weeds, not a bouquet.
AvoidDon’t add too many strawberries; five heads is enough for a strong bouquet look.
13. Strawberry and Cream Swirl Ribbon
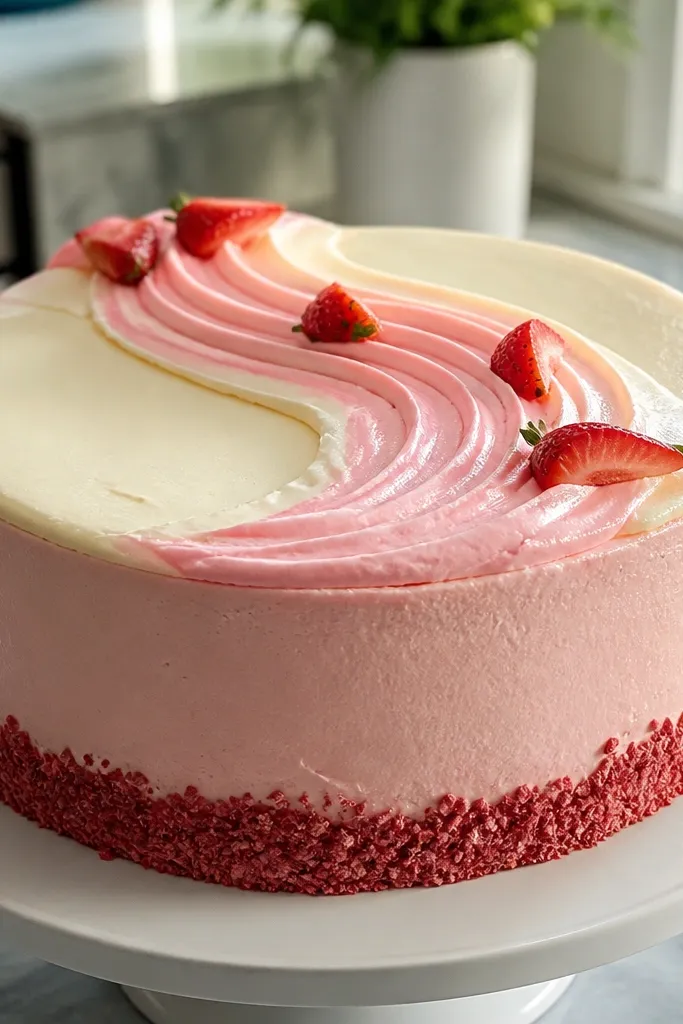
Swirl ribbons make a cake drawing look dynamic without needing realistic fruit. Draw a thick ribbon curve across the top using pale cream or light pink icing, then place small strawberries on top of the ribbon. The swirl creates a sense of motion, and the strawberries act like anchors. Keep strawberry details minimal but crisp: outline, fill, seed dots, and one leaf cap. This works great on round cakes because the ribbon naturally follows the curvature of the surface and photographs cleanly.
Pipe a smooth ribbon curve across the cake top in light pink or cream icing, about 1 inch wide. Add 5-7 small strawberries along the ribbon, spaced evenly so they don’t overlap. Outline strawberries in red, fill with red, then add cream seed dots and a green leaf cap. Add a few tiny white highlight swirls inside the ribbon to make it look glossy.
Pro tipUse gentle pressure on the piping bag for consistent ribbon width — uneven width reads messy in photos.
AvoidDon’t let the ribbon cover the whole cake top; keep it as one strong diagonal or curved band.
14. Strawberry Stemless Caps with Seed Constellations
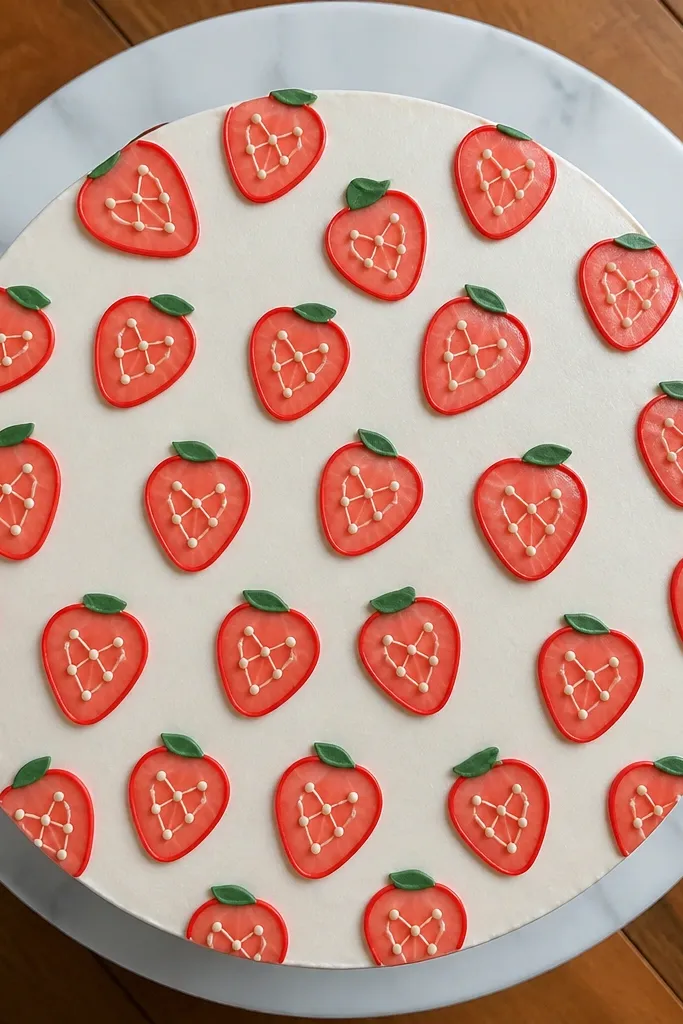
This is a playful, graphic look that still reads clearly as strawberries. You draw the berry body as a simplified cap shape, then treat the seeds like a constellation — dots arranged in a pattern instead of scattered. Use a bright red cap outline, pale red fill, and cream dots. Add a single green leaf mark for each cap so the viewer knows what they’re seeing. It looks great for small cakes, cupcake cakes, and side-top combinations where you want strawberries but not bulky detail.
Draw a small cap silhouette for each strawberry, like a rounded triangle with a flat bottom edge. Pipe a red outline, then fill with pale red icing, leaving the center a touch lighter for a highlight. Add cream seed dots in a curved cluster pattern rather than random dots. Place the caps in a cluster of 9-15 units across the top, then add tiny green leaf marks on every third cap.
Pro tipTreat seed dots like a “row” pattern. Three curved rows look better than 20 random dots.
AvoidDon’t make the caps too flat; keep a slight curve so they look like fruit, not stickers.
15. Strawberry Slice Stack with Overlapping Layers
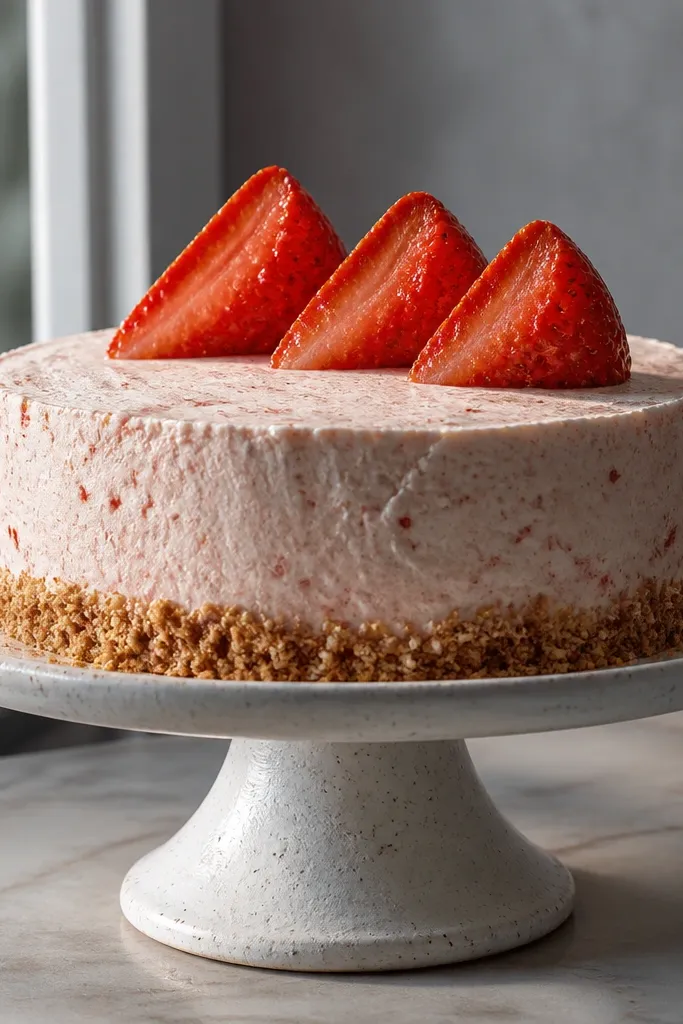
Overlapping slices create instant depth, and they photograph better than a single flat slice. Layer three wedge slices with staggered edges so you see dark red outer tones and lighter inner tones. Seeds should follow each slice’s arc, and a thin highlight band on each wedge makes the layers look glossy. This style looks great on tall cakes or cakes with a simple background because the overlapping wedges create their own structure. It’s also a good choice if you want something that looks “illustration-like” without being cartoonish.
Sketch three wedge slices on paper with staggered positions, then transfer to the cake top. Pipe the darkest red outer borders for each slice first, then fill inside with a lighter red. Add cream seed dots placed along the curved inner edge of each wedge. Finish with a thin pale highlight band on each slice and a small green cap detail at the top of the top slice.
Stagger by about 1/2 inch so the layers separate clearly in photos.
Don’t overlap slices too tightly; if edges merge, the depth disappears.



