
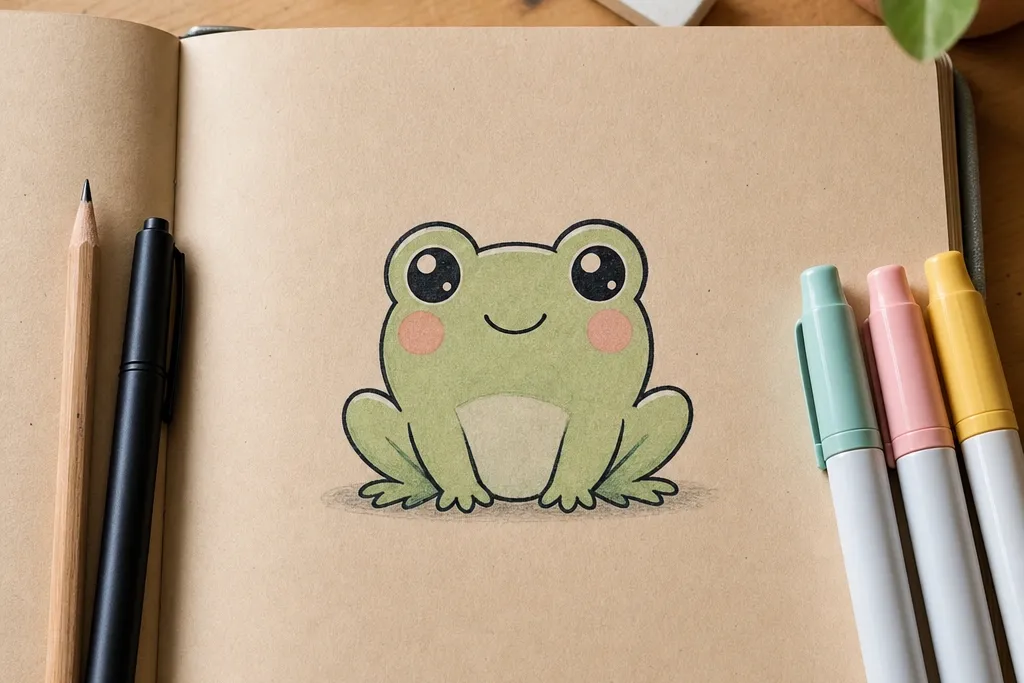
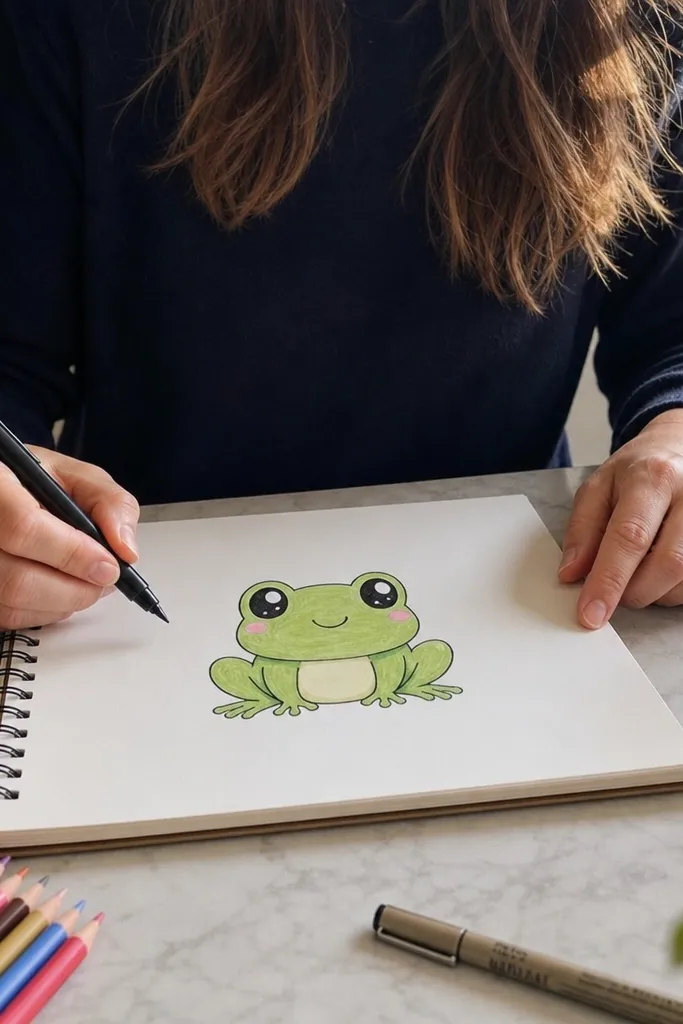
1. Bubble-Blush Sitting Frog on a Lily Pad
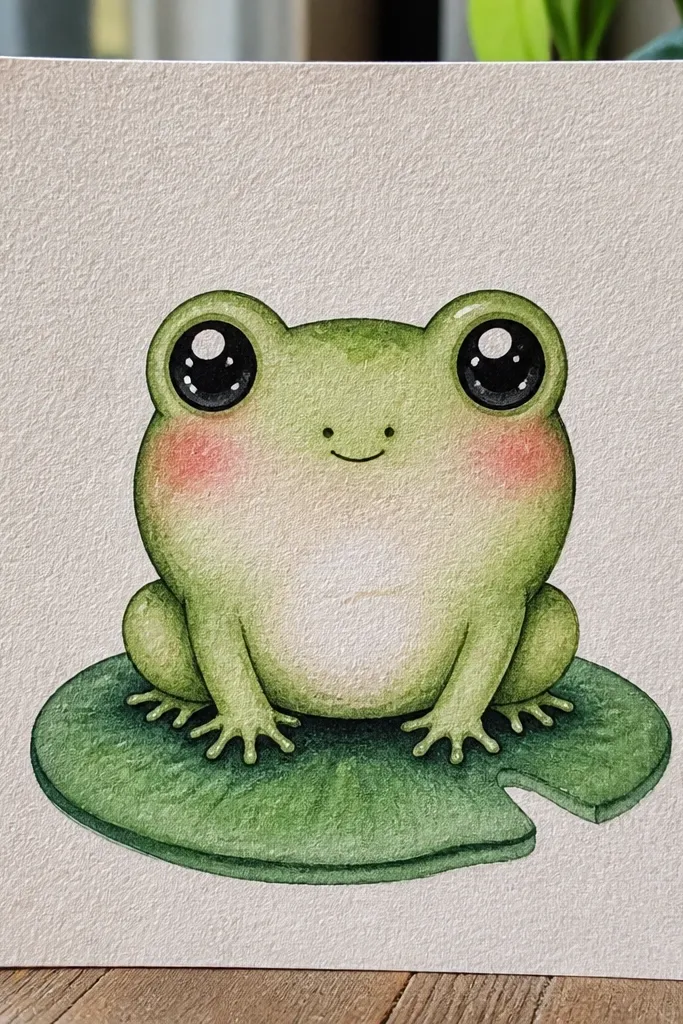
This one is cute because the face is doing the work. Draw a round head, then put the eyes high and slightly angled inward so the frog looks calm and sweet. The blush goes on the upper cheeks, not the sides, and the mouth is a tiny curved line that sits under the nose. Color the lily pad with a darker green shadow ring under the frog’s feet, then add three translucent bubble circles above the head to make it feel alive and airy. It’s a fast page filler that photographs well because the bubbles give you bright highlights and clear focal points.
Pro tipKeep bubble spacing even — three bubbles looks balanced, five starts to feel busy.
Start with a lily pad first: draw a teardrop pad shape, then add a few simple vein lines from the center. Next, sketch the frog sitting on top with two short legs tucked in and small arms reaching toward its own belly. Then ink the outline with a 0.3 fineliner, color the frog with two greens (main + shadow), and add blush circles in a light pink. Finish by drawing three bubble outlines and leaving the bubble centers white so they look glossy.
AvoidDon’t color the bubble centers; leaving them white makes the whole drawing look cleaner.
2. Heart-Eyed Frog Peeking From a Flower Pot
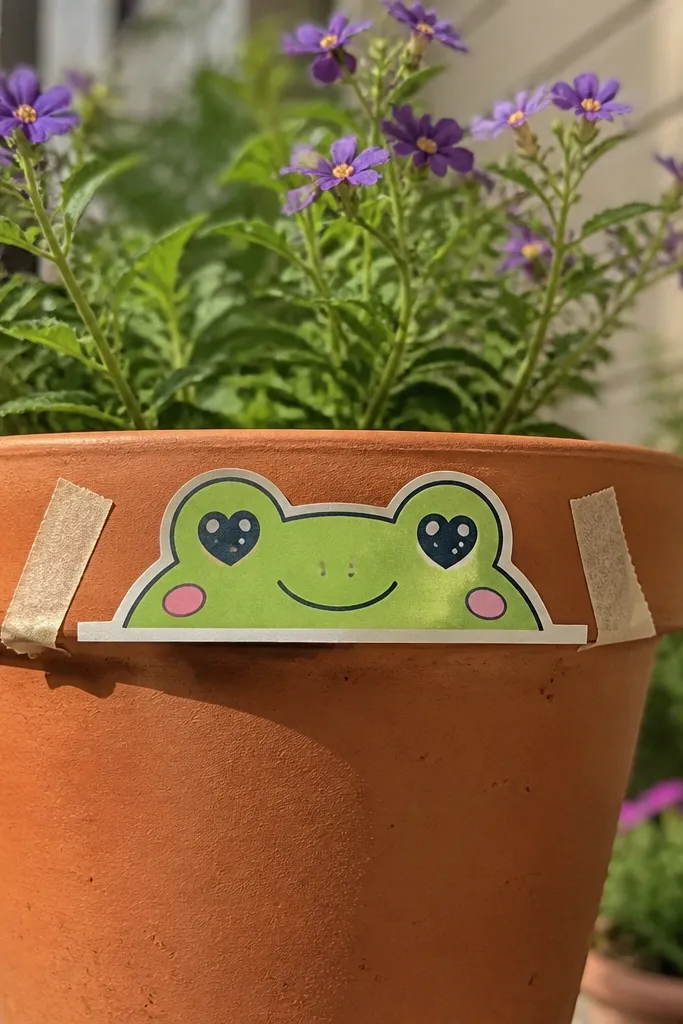
This idea is photogenic because the hearts instantly read as emotion. The frog’s head should only show from the top half of the pot, like it’s peeking out shyly. Use heart-shaped eyes with small highlights so they look like cute stickers, not anatomy. The pot gives you an easy foreground shape to ground the character, and you can add a tiny soil texture with short dashes. Color the pot in a warm terracotta and the frog in a bright mint green so the scene pops on white paper.
Pro tipMake the hearts taller than they are wide; wide hearts look more like balloons than eyes.
Draw a simple flower pot: a rounded rectangle with a slightly flared rim. Place the frog head so it sits behind the pot rim, then add two heart eyes and a small smile. Ink everything using a thicker line for the pot rim and a slightly thinner line for the frog face. Color the pot terracotta with a darker shade under the rim, then add a few soil dots in brown. Finally, add a tiny leaf or flower at the side of the pot to frame the composition.
AvoidSkip detailed soil patterns — a few dots are enough, or it turns into clutter.
3. Kawaii Frog With a Tiny Umbrella and Rain Drops
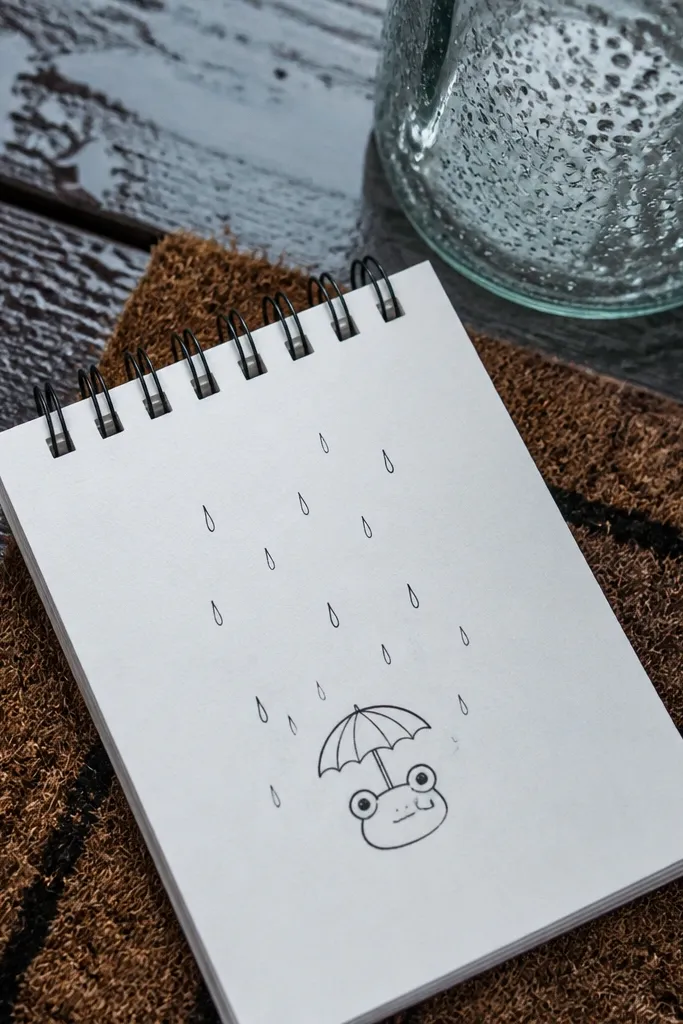
Umbrellas make frog drawings look instantly “designed” because they add a clear silhouette and a strong arc. The frog stays kawaii when the umbrella is small compared to the head, so the frog looks protected but still adorable. Draw the umbrella canopy as a simple half-circle with a few spokes, then add rain drops that vary in size for a lively feel. Color the umbrella in a pastel color (soft blue or pink) and keep the frog’s outline crisp so the rain doesn’t blend into the background. This is perfect for seasonal journal pages or greeting cards because the composition feels dynamic.
Sketch the umbrella first with a half-circle canopy and a short handle that angles down to the frog’s hand. Draw the frog under it with a round head, tiny arms gripping the handle, and a small closed-mouth smile. Add 6-10 raindrops falling vertically, with a couple slightly tilted to break monotony. Ink outline with 0.5 fineliner for the frog and 0.3 for the umbrella details. Color the umbrella with one main pastel and a darker shade along the underside, then lightly shade under the frog’s chin. Leave the raindrop centers white and add a tiny shadow where drops hit the page.
Use one rain color only — light blue ink lines look better than multicolor rain.
Don’t draw heavy rain shading; raindrops should look like line highlights, not filled blobs.
4. Sushi-Style Frog Noodle Bowl
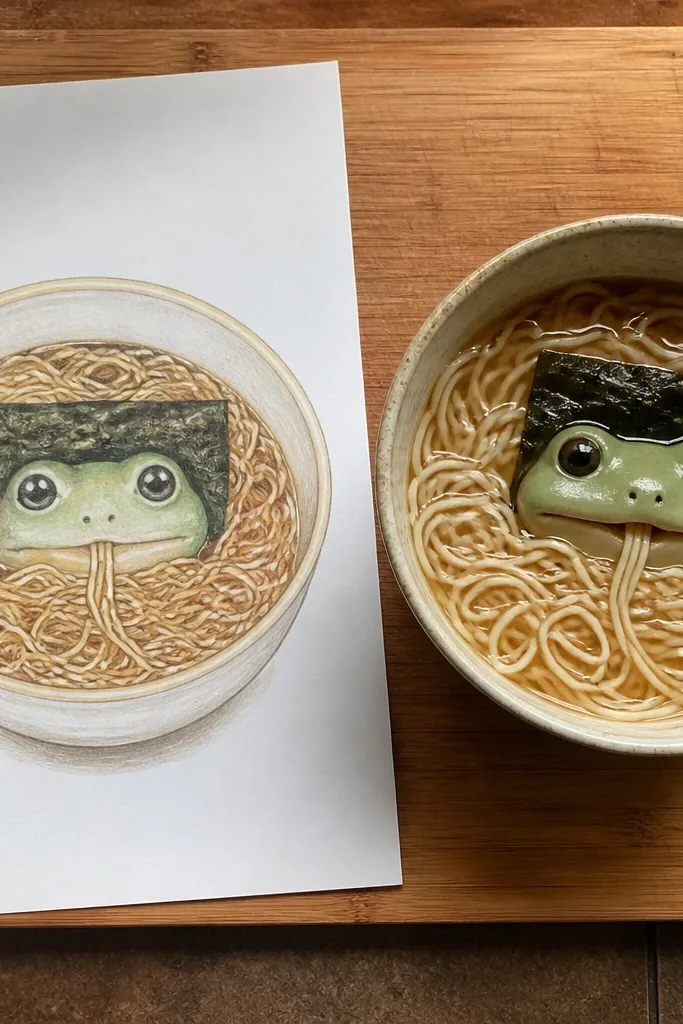
This is a cute mashup that works because the frog face is the same kawaii formula, but the bowl gives you lots of shapes to decorate. Think: a round bowl, a few noodle curls, and a strip of seaweed that frames the face. The frog looks extra adorable when it has a tiny open mouth or a single “slurp” line. Use warm beige noodles and deep green seaweed to create strong color contrast against the frog’s mint body. The final drawing looks like a sticker panel because the bowl is a clear boundary for everything.
Draw a round bowl with a slightly thick rim and a shallow inner curve. Place the frog head inside the bowl opening so only the face and a bit of cheeks show. Add noodle curls across the bowl bottom using thin curved lines, then draw one seaweed strip diagonally behind the frog’s cheeks. Ink with 0.3 for bowl outlines and 0.1 for noodle lines. Color the bowl light cream, noodles warm tan, seaweed dark green, and the frog mint with a darker green shadow under the chin. Finish with a small steam curl above the frog’s head.
Steam looks best as 2-3 thin curls, not a big cloud.
Don’t add too many toppings; keep it to noodles + one seaweed strip so the face stays readable.
5. Starry Night Frog Sitting on a Moon
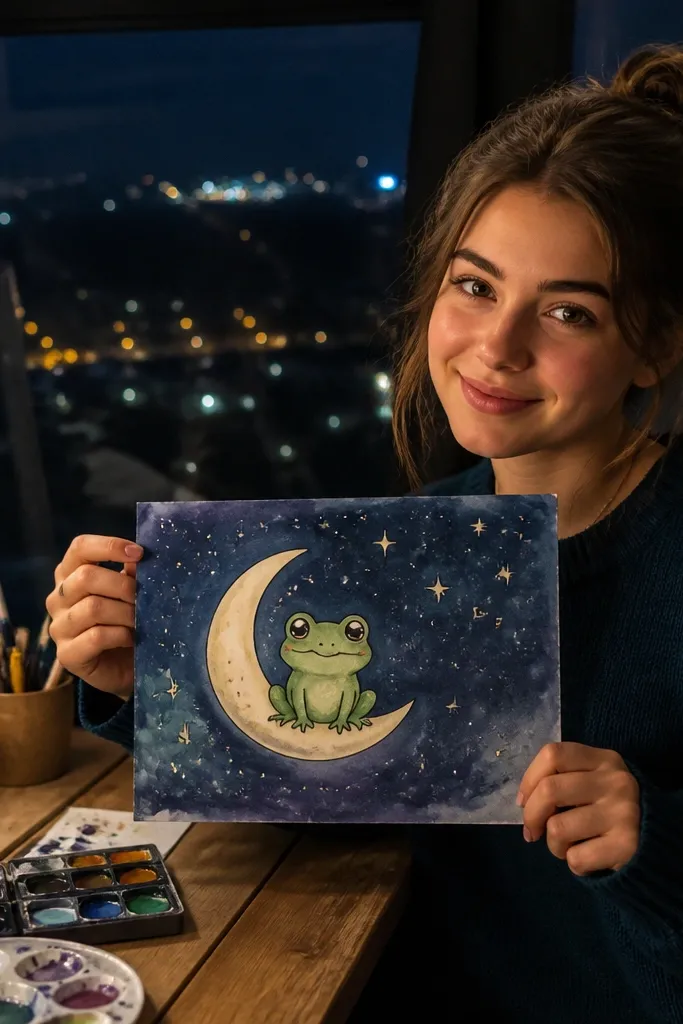
Moon + stars make this instantly “cute galaxy” without needing complicated backgrounds. The frog stays kawaii by keeping the body compact and the eyes large, with tiny sparkle highlights. Use a crescent moon behind or beneath the frog so the silhouette is clear in a photo. Color the sky with a soft gradient using watercolor or layered colored pencil, then add tiny star dots around the frog. This drawing is a good choice when you want a more magical look but still want to keep the frog simple.
Pro tipIf you use watercolor, paint the sky first, then ink the frog once the paper is fully dry.
Sketch a crescent moon shape, then draw the frog sitting on the flat edge of the crescent. Add big round eyes with small white highlights and a tiny smile. Create a handful of star dots around the frog, keeping them mostly in the open space so they don’t crowd the face. Use a darker fineliner for the moon outline and a thinner line for the frog facial details. Color the moon pale yellow or light peach, then paint the sky with a deep blue gradient and let it dry. Finally, add white gel pen sparkles and a few larger star dots for contrast.
AvoidDon’t cover the whole page in stars; leave breathing room around the eyes.
6. Retro Pop Art Frog With Halftone Dots
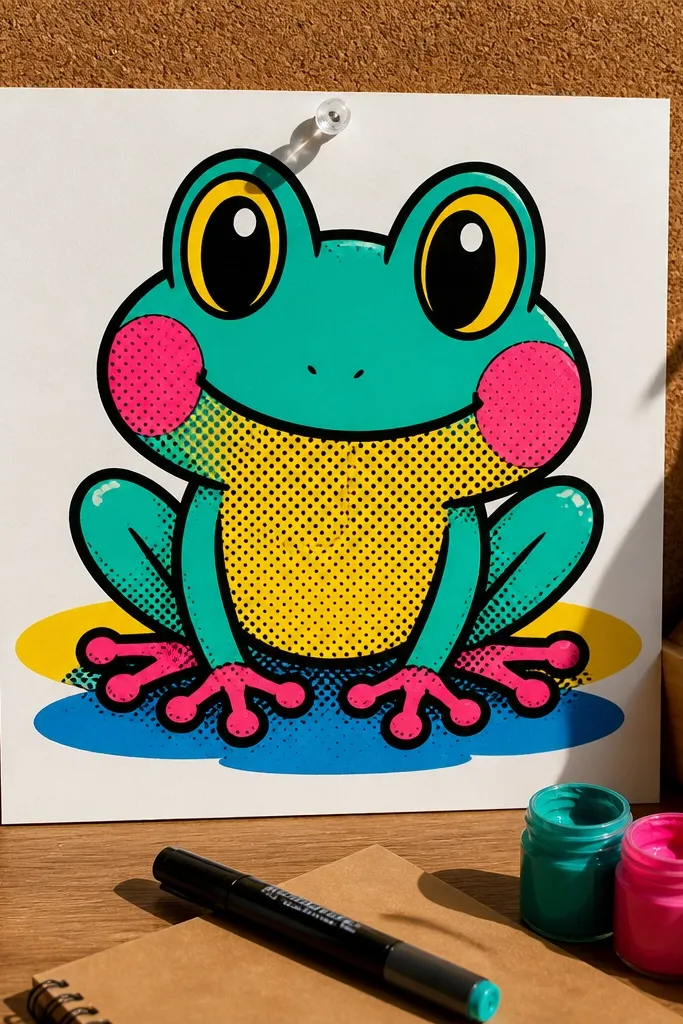
Pop art works because it gives you a graphic style that makes simple shapes look intentional. Use thick black outlines, then fill the body with bright flat color blocks plus halftone dots on the cheeks or belly. A kawaii frog in this style looks clean and bold even when your drawing skills are still improving. Choose two strong colors for the frog body and one accent color for blush and highlights. It’s also a great way to practice line weight because the thick outline makes the face pop.
Draw the frog in a simple front-facing pose with a big round head and small body. Outline everything with a 0.5 fineliner, then add halftone dot patterns inside the belly area using a 0.1 pen. Color the frog with flat marker or colored pencil in two tones, leaving a small highlight area unshaded. Add blush circles and a tiny mouth line, then color the dots using one accent color. Finish by going over the outer outline with a darker pen if the lines look uneven.
Keep halftone dots to one area — belly or cheeks — so the face stays the focus.
Don’t mix three patterns at once; halftone + stripes + hearts makes the frog look chaotic.
7. Gingham Scarf Frog With Pocket Patterns
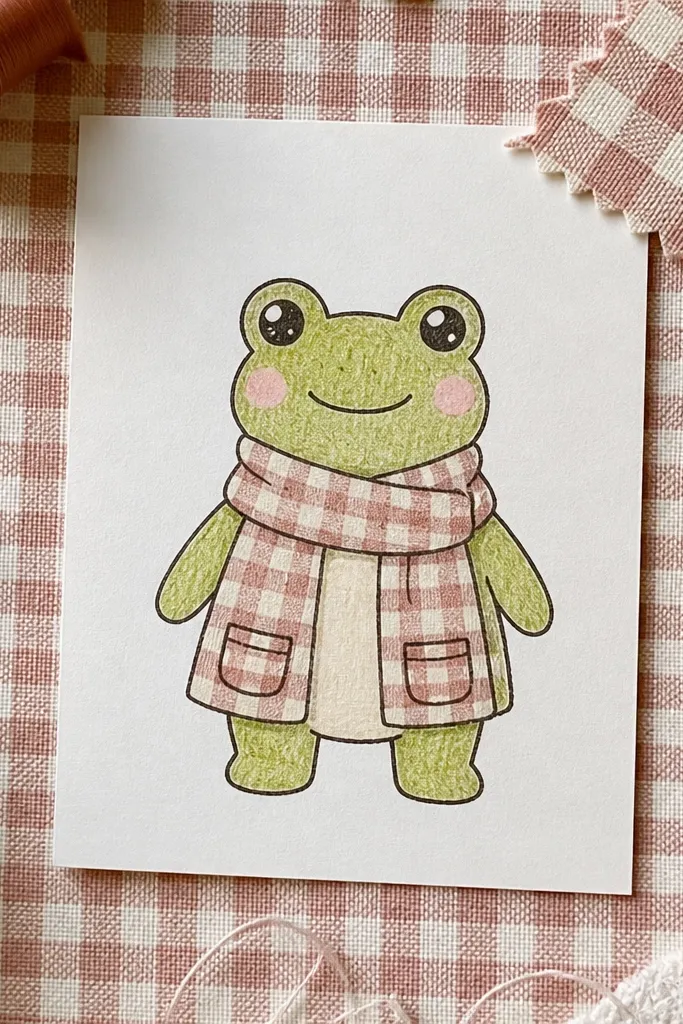
Clothing details make frog drawings look “styled,” and gingham is the easiest pattern to control. The frog’s cuteness stays because the scarf is simple — wrap it around the neck like a loop, then keep the face front and centered. Use a light gingham (soft pink and cream or blue and cream) and add two tiny “pocket” squares on the scarf ends. The pattern gives you lots of photogenic texture without turning the drawing into a busy mess. This one is great for making a character sheet page where each frog wears a different accessory.
Pro tipUse a pencil grid first; erasing after inking is messy if you skip the pencil guide.
Draw the frog body with a round head and an oval belly, then sketch a scarf loop around the neck. Add two scarf tails, each ending in a small rounded tip. For the gingham, lightly pencil a grid, then ink the vertical and horizontal lines with a 0.1 fineliner. Color the grid intersections with two colors, and keep the frog body in a single mint tone with a darker green shadow under the chin. Finish by adding tiny blush and a small smile, then darken the scarf outline for separation.
AvoidDon’t color every scarf tail corner — leave a tiny highlight gap to keep it from looking flat.
8. Frog Reading a Book With Page Hearts
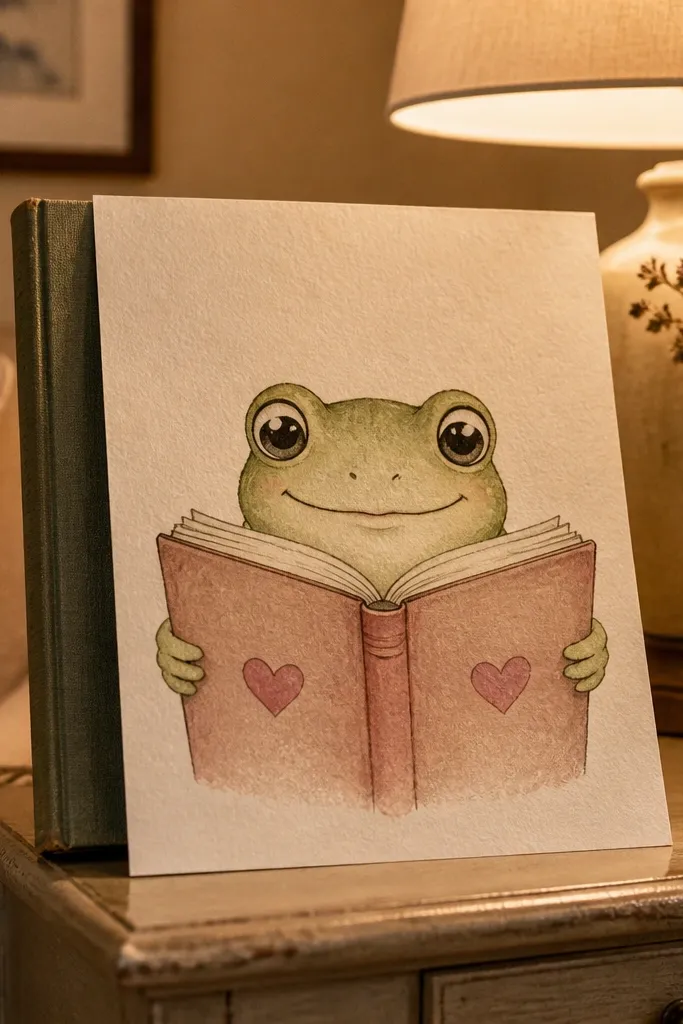
Books make a frog drawing feel cozy, and hearts on the pages add instant kawaii charm. The trick is to draw the book as a simple open rectangle with a clear spine and then show just enough pages to imply reading. Keep the frog’s arms relaxed and tucked near the book edges so it looks like it’s concentrating. Use soft pastel shading and add tiny heart doodles inside the page shapes, not floating everywhere. This is one of the best ideas for a journaling layout because it creates a clear “scene” area for text if you want to add a caption.
Pro tipMake the hearts smaller than the page height; large hearts make it look like decoration, not reading.
Sketch a seated frog with knees bent and hands near the book. Draw an open book in front using two curved page rectangles and a thin spine line. Add small heart shapes inside each page area, plus a couple of simple bookmark lines. Ink with 0.3 for the frog outline and 0.1 for page edges and hearts. Color the book in warm beige or pale yellow, then shade under the book with a light gray/purple. Color the frog with two greens and add blush cheeks and a calm smile.
AvoidDon’t draw tiny text — blank pages with hearts look cleaner and cuter.
9. Frog Wearing Huge Sunglasses and Smiling
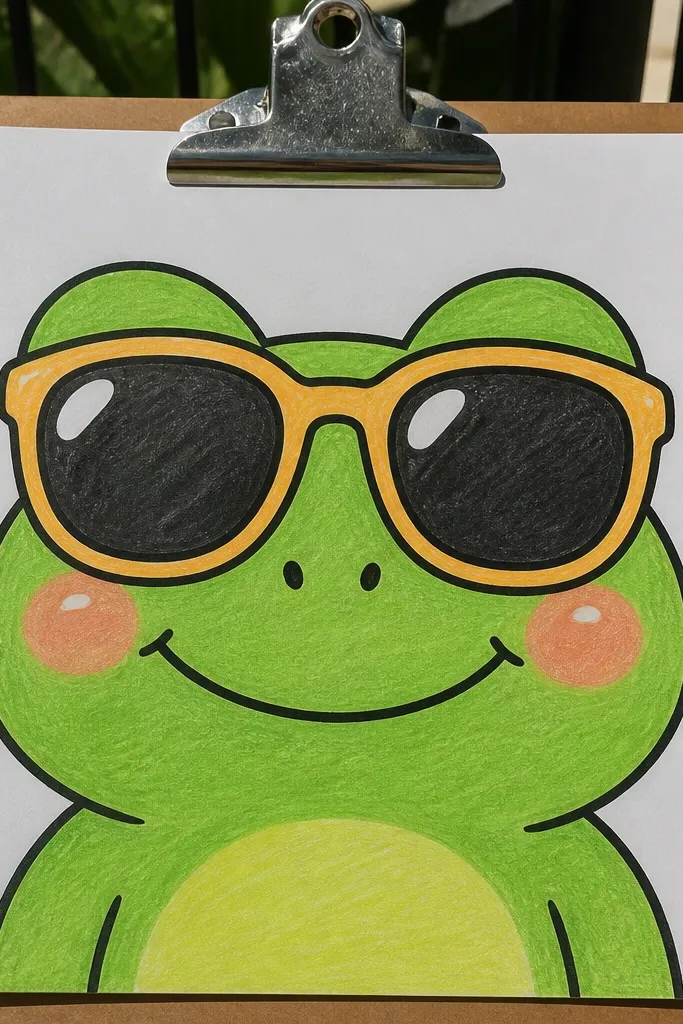
Oversized sunglasses are the fastest way to make a frog look cool and cute at the same time. The kawaii part comes from the wide smile and the rounded cheeks, while the sunglasses create a strong graphic shape. Place the sunglasses across the upper half of the face, then keep the nose and mouth smaller so the expression reads sweet, not goofy. Use dark frames and a bright lens highlight to make it pop in photos. This is a good choice when you want a bold character that still works with minimal shading.
Draw the frog face first: big round head, tiny nose dot (or a short line), and a wide curved smile. Add two large sunglasses frames as smooth rounded rectangles and leave a small gap between them for the nose. Draw a simple lens shine as a white teardrop shape inside each lens. Outline everything with 0.5 for the outer silhouette and 0.3 for glasses edges. Color the frames black or deep charcoal, lenses light blue or gray, then add a light green shadow under the sunglasses area. Finish with blush dots on both cheeks and a small sparkle above the mouth.
Keep the lens highlight shape consistent on both sides for a cleaner look.
Don’t add eyelashes or heavy eyelashes; it makes the frog look more like a doll than kawaii.
10. Frog in a Strawberry Costume
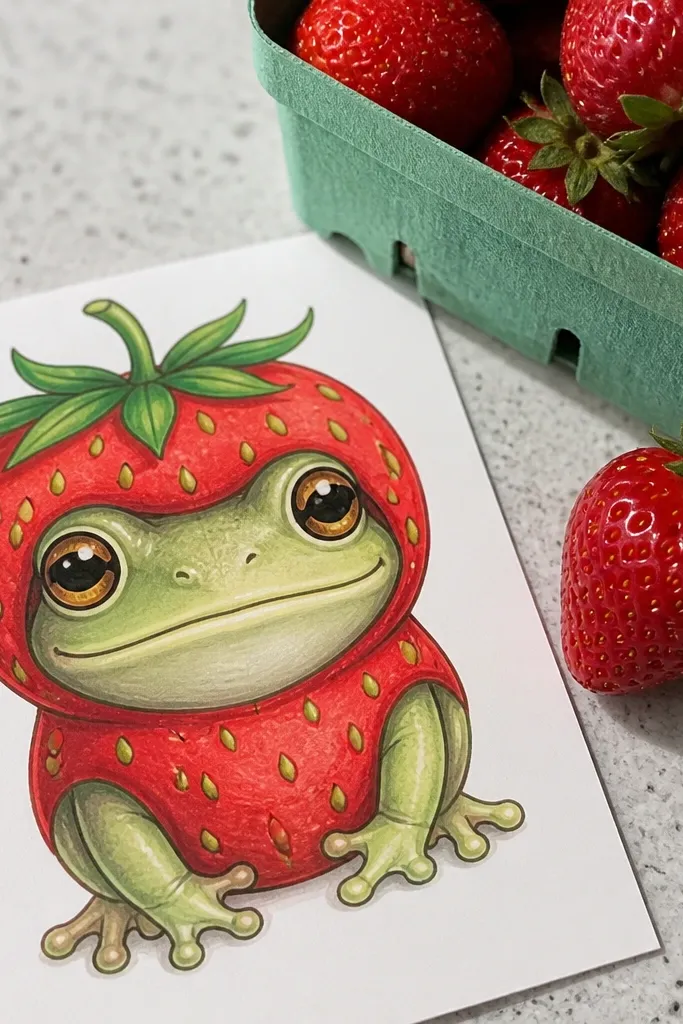
A strawberry costume is cute because it gives you clear colors and a recognizable pattern without complicated detail. Draw the frog’s head normally, then wrap the strawberry shape around the body like a hood or small suit. Add tiny green seeds as short teardrop dots, and keep the strawberry outline thick so it reads as a costume. The frog’s blush and small smile keep it kawaii even when the outfit is bold. This drawing looks great on a white background because red and green make strong contrast.
Sketch the frog head with big eyes and a tiny smile, then draw the body as a small oval. Add a strawberry hood around the body: a rounded red shape that covers the shoulders and leaves the frog face visible. Draw a curved strawberry leaf at the top and add seed dots along the red area. Ink with 0.3 for the strawberry outline and 0.5 for the frog outer silhouette. Color the strawberry with red and a darker red shadow along the underside, then add seeds in dark green. Finish with two blush circles and a small highlight on the strawberry edge.
Seed dots look better as short teardrops, not perfect circles.
Don’t cover the whole strawberry with seeds; spacing them keeps it readable.
11. Chibi Frog on a Rainbow Slide
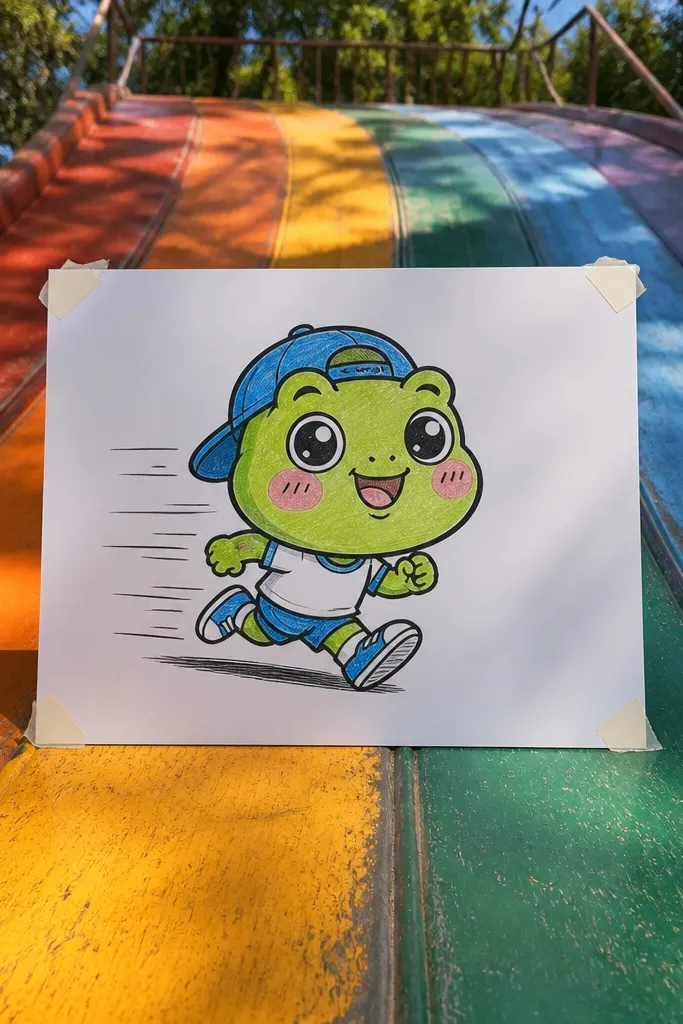
This one is cute because it uses motion cues. A chibi frog has a bigger head than body, which instantly reads as kawaii, and the rainbow slide gives you clean, bright bands that photograph well. Add a few curved motion lines behind the frog to imply speed without drawing complicated backgrounds. Keep the rainbow bands thick and evenly spaced, then color the frog with a simple mint and a darker shadow under its feet. It’s a playful drawing for sticker sheets and doodle pages.
Draw a curved slide shape as a thick arc from top left to bottom right. Add rainbow bands inside the slide using 5-6 parallel curved rectangles, each with a clean edge. Place a chibi frog near the bottom of the arc — small body, big head — and draw its legs tucked as if sliding. Ink outer slide edges with 0.5 and rainbow band lines with 0.3. Color each rainbow band with one solid color, then color the frog with two greens. Add 3-5 motion lines behind the frog in a light gray or darker green.
Keep the rainbow band widths equal; uneven bands make the slide look wobbly.
Don’t add too many motion lines; five max looks lively, twenty looks messy.
12. Frog Holding a Small Balloon With a Ribbon
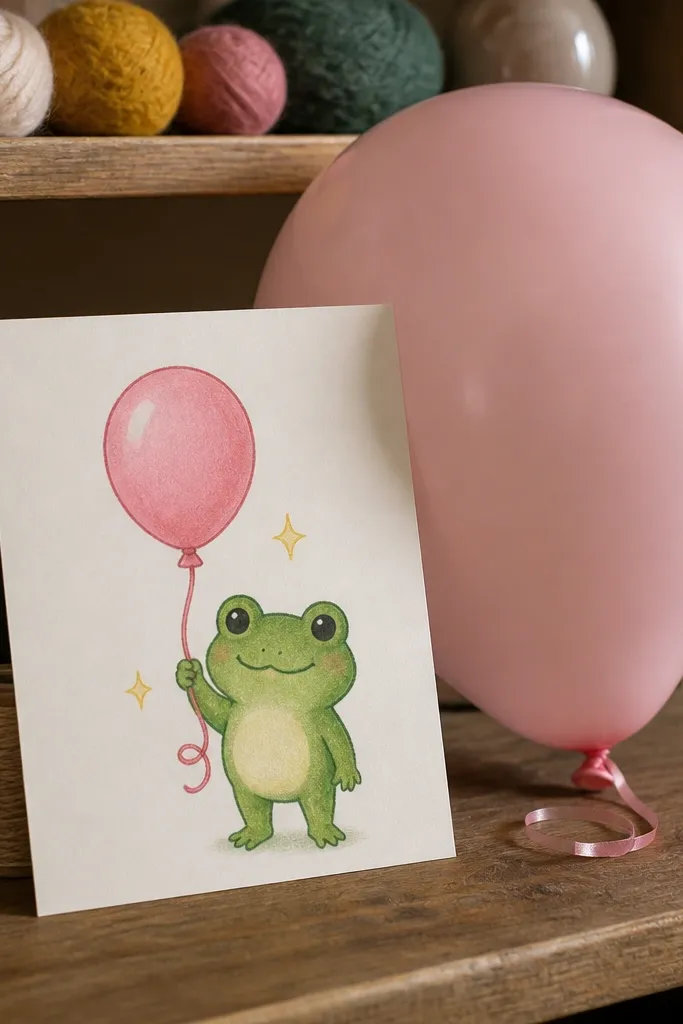
Balloons are basically a cuteness cheat code because they create a smooth round highlight and a clear vertical shape. The frog looks extra sweet when it holds the balloon with tiny hands and a slight lean toward it, like it’s excited. Draw a ribbon that curls once, then add one or two little sparkle stars near the balloon string. Use a pastel balloon color and keep the frog’s blush visible under the balloon shadow. This drawing is perfect for gift tags and birthday-themed pages.
Pro tipMake the balloon highlight on the same side as your light source so it looks consistent.
Sketch the frog first: round head, small body, tiny hands near the center. Draw a balloon above the hands as a circle with a slightly flattened bottom. Add a ribbon line from the balloon knot down to the frog’s hands, and draw one small curl at the bottom. Ink with 0.3 for the balloon outline and 0.5 for the frog outer edge. Color the balloon in one pastel color and add a white highlight teardrop. Shade under the frog chin lightly, then color blush and add a tiny smile. Finish with two small sparkles near the balloon string.
AvoidDon’t shade the balloon fully; leaving the highlight white makes it look shiny.
13. Frog in a Teacup With Floating Tea Bubbles
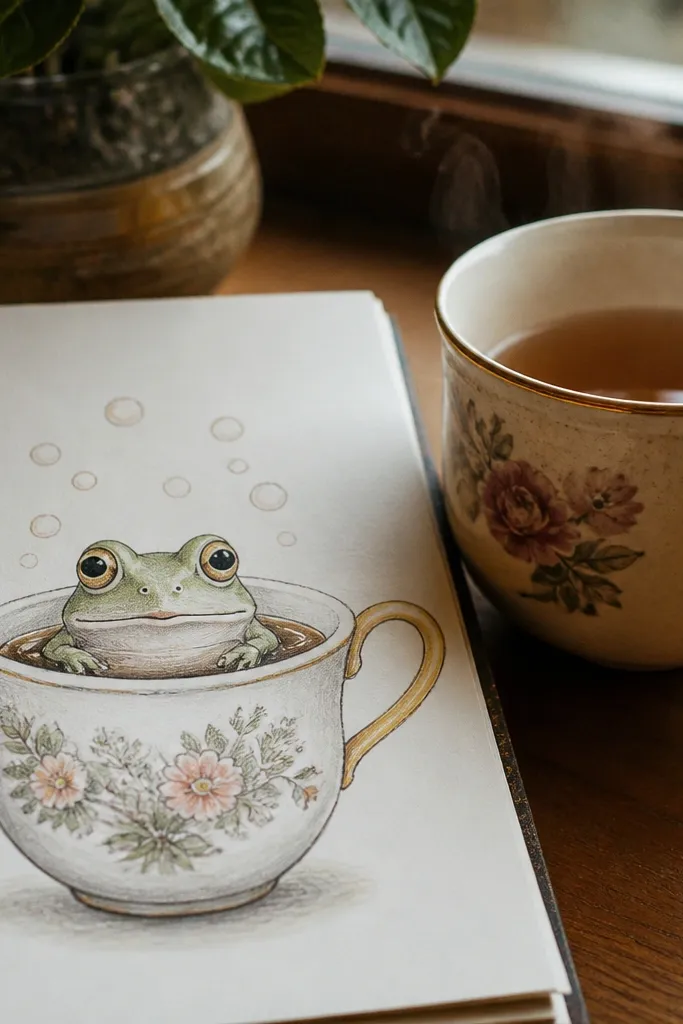
This is cozy kawaii with a clean layout. A teacup provides a strong frame, and the frog peeking out creates instant charm. Tea bubbles add movement without needing a complex background, and the cup’s handle gives you an extra shape that reads clearly in photos. Keep the frog face simple — big eyes, tiny mouth — and add blush so it looks warm and relaxed. Use a light warm palette for the tea and keep the frog’s shadow under the cup rim so it looks grounded.
Pro tipUse fewer bubbles near the face; more bubbles around the edges look balanced.
Draw a teacup silhouette: a rounded cup body, a small handle on one side, and a saucer line if you want. Place the frog head so it rises from inside the cup, with only the face and upper cheeks visible. Add 5-7 tea bubbles above the frog face, drawn as small circles with tiny gaps for highlights. Ink the cup with 0.3 and the frog face with 0.5. Color the tea in a soft amber or light brown, shade under the rim, and color the frog in two greens. Finish with a tiny steam curl above the cup and blush cheeks on the frog.
AvoidDon’t make the bubbles the same size; varying sizes keeps it cute instead of mechanical.
14. Frog With a Bowtie and Polka-Dot Belly
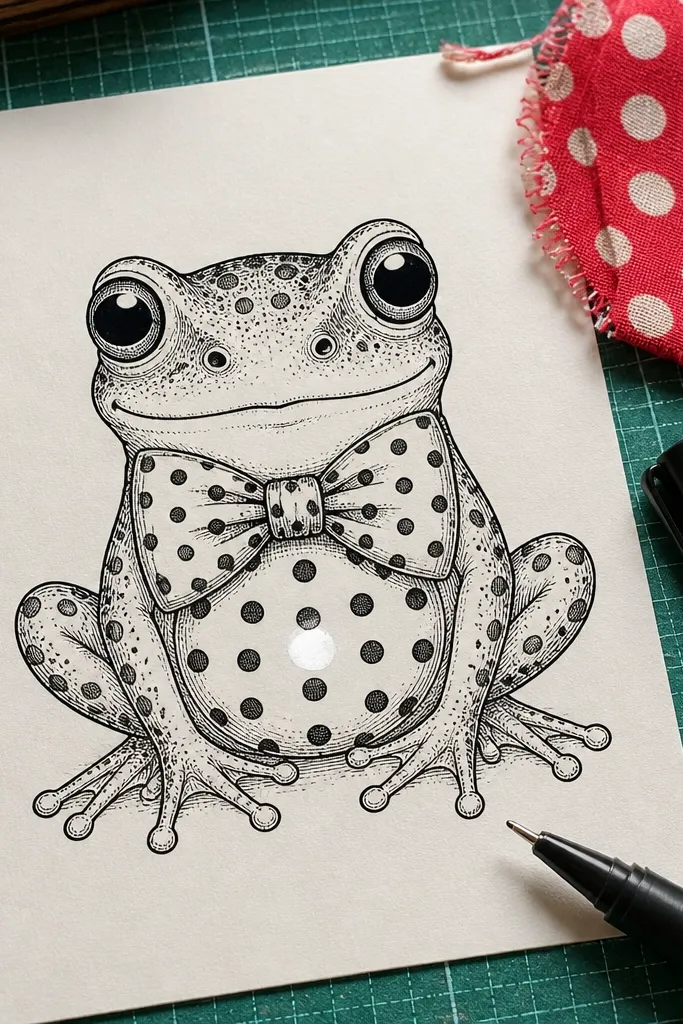
Bowties instantly make a frog look dressed up, and polka dots add a playful pattern that reads well in close shots. Keep the bowtie symmetrical — left and right loops the same size — so it looks neat. The frog stays kawaii when you draw the belly dots centered and leave a small highlight area on the belly. Use a contrasting dot color like cream dots on green or light green dots on pale mint. This one is a strong choice for a “character lineup” page where each frog has a different outfit.
Pro tipIf dots feel too hard, use a small round template made from a hole punch paper scrap.
Sketch the frog front view with a round head and a slightly wider belly oval. Draw the bowtie at the neck using two loops and a small knot center. Add polka dots on the belly using a simple grid guide with 0.1 fineliner so the spacing stays even. Outline with 0.5 for the outer edges and color with markers or colored pencil. Shade under the chin and behind the bowtie lightly. Finish with blush cheeks and a tiny curved smile, then add two small highlights on each eye.
AvoidAvoid random dot sizes all over — keep the dot size consistent in one drawing.
15. Frog Sitting on a Book Page With Page Corner Fold
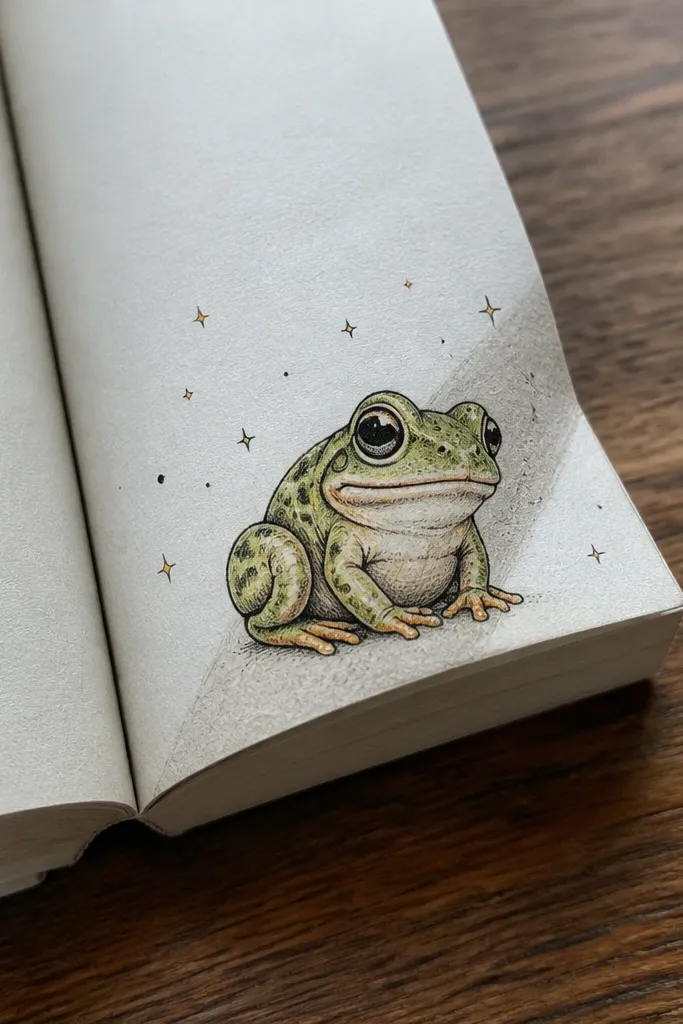
Paper props make drawings look more “designed” than plain characters. A curled page corner gives you a clean diagonal shape that adds depth, and stars floating near it make the scene feel fun. The frog looks cute when it sits on the page corner like it’s a little platform, with feet planted and body compact. Draw the page lines as simple folds and add a light shadow under the page curl so it looks lifted. This is a great idea for making a sticker-style illustration because the page corner acts like a frame.
Start by drawing a page rectangle and curl the top-right corner upward using two curved fold lines. Place the frog sitting on the curled corner, with its legs on the raised area and arms resting near its belly. Add 3-6 tiny stars around the curled area, keeping them mostly above the frog’s head. Ink the page edges with 0.3 and the frog outline with 0.5. Color the page in a pale cream and shade the underside of the curl with a light gray. Color the frog with two greens and add blush and a small smile. Finish by adding a thin highlight line on the page fold.
Shade the underside of the curled page first, then ink the frog so the frog stays crisp.
Don’t over-render the paper — simple fold lines look cuter and cleaner than heavy texture.



