
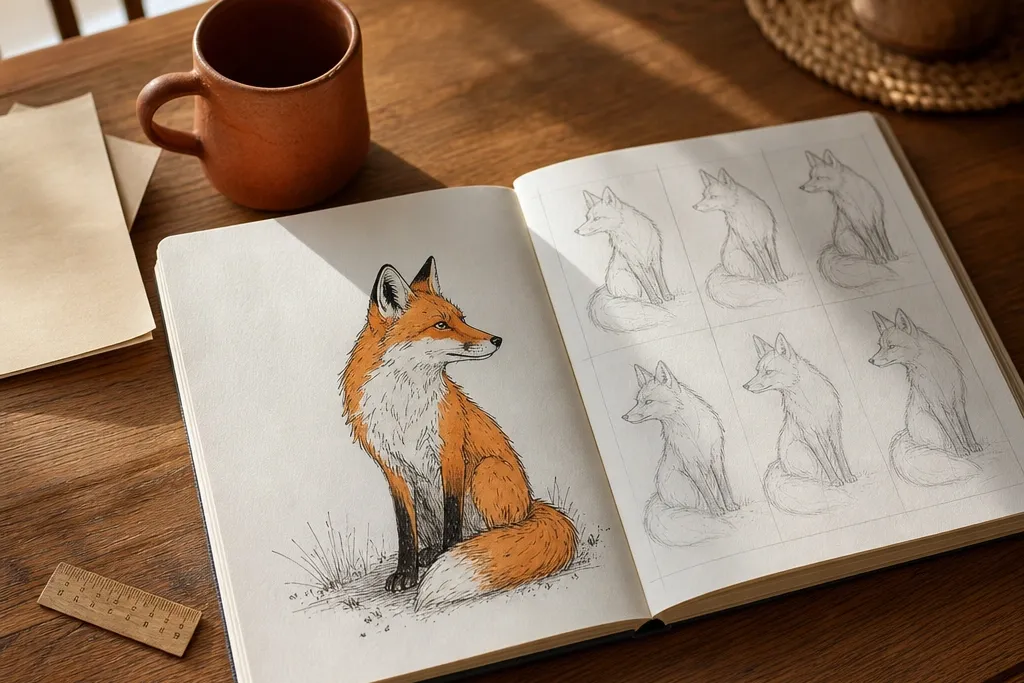
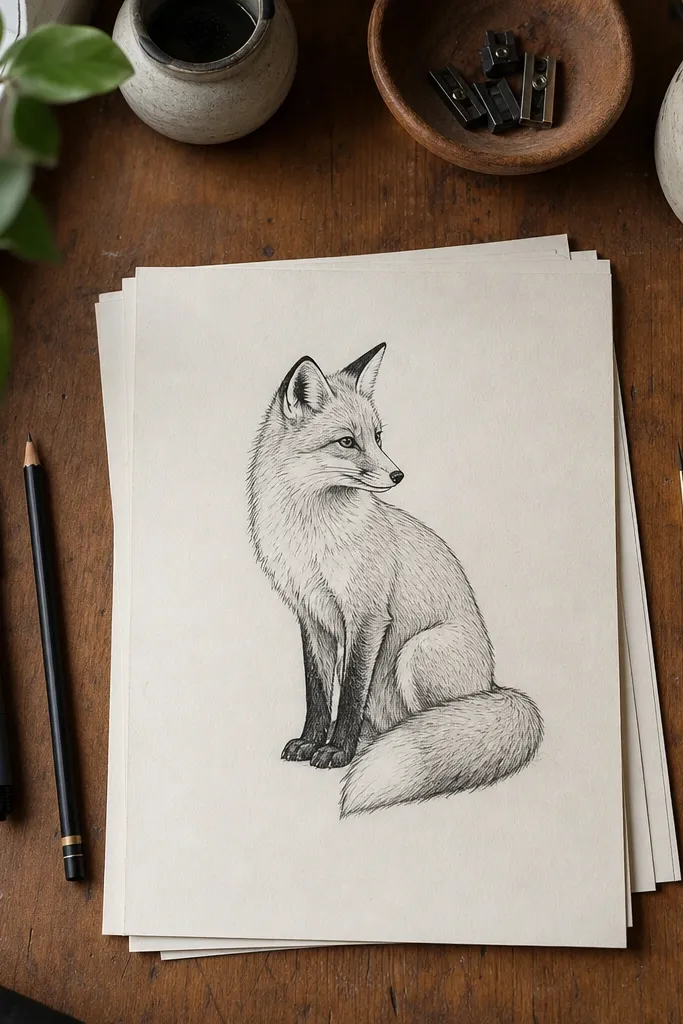
1. Pocket Fox Face in Three Shapes
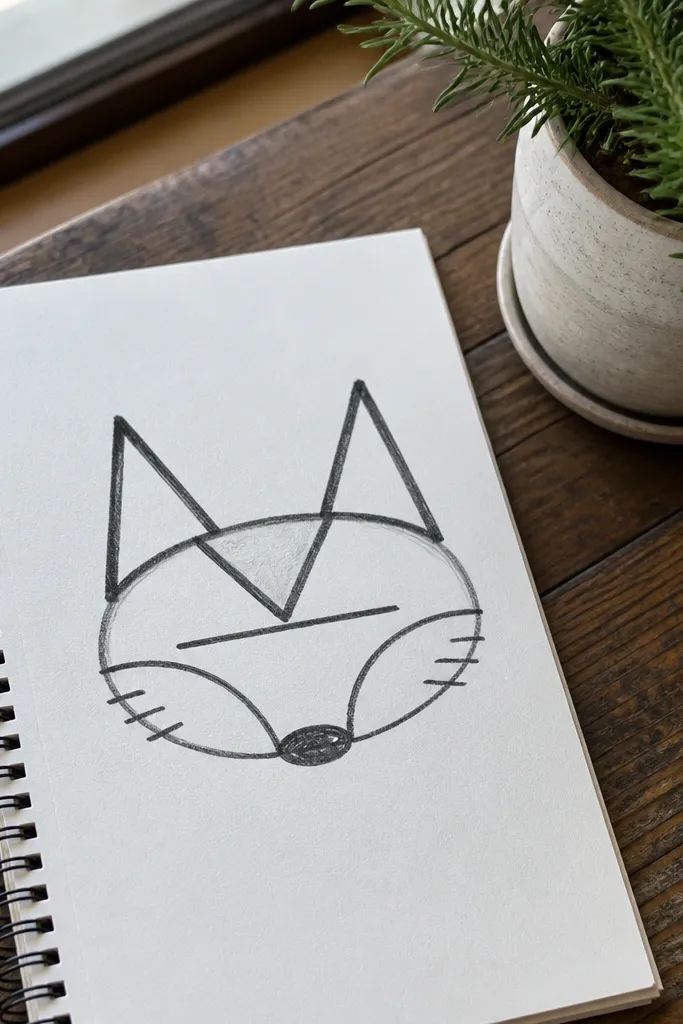
This is the quickest fox drawing that still looks “finished.” You only draw the head: two triangular ears, an oval muzzle, and a soft triangle for the forehead. The eyes sit on a single horizontal line, so the face never slips out of balance. Use a few short fur strokes at the cheeks and a thicker outline around the nose and eye sockets. It’s low-maintenance because you skip legs, tail, and complicated fur — the face does all the work.
Step 1: Lightly sketch a circle for the head, then add two triangles for the ears. Place the eyes slightly above the center line, then draw a small inverted triangle for the nose and a curved line for the mouth. Step 2: Ink the outer head contour with a 0.5 fineliner, then add a few short cheek strokes with a 2B pencil. Finally, shade under the muzzle and along the ear edges, leaving the rest of the paper clean.
Keep the fur marks short and stop them before they reach the cheek outline — that negative space makes it look crisp.
Don’t add whiskers before the eye and muzzle are locked in; whiskers will expose any face placement mistakes.
2. Side-Profile Fox with One Clean Tail Curve
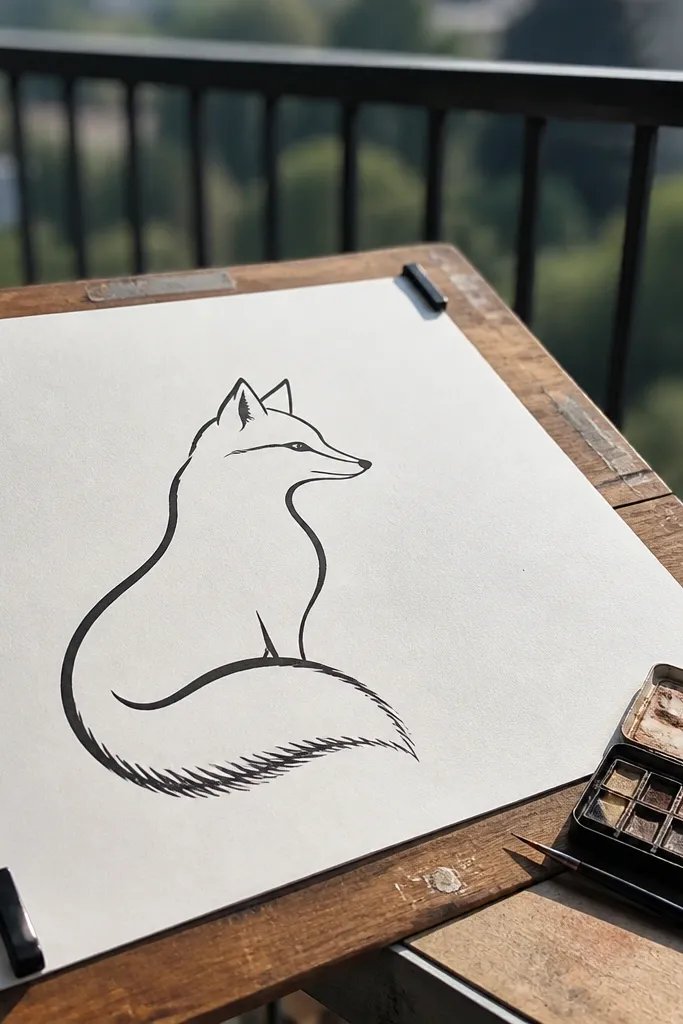
Side profiles look classy and graphic, and this one stays low-maintenance because the tail is the main design element. The head is a simple wedge shape, the body is a single curved bean, and the tail is one long S-curve. You add fur only at the tail underside and the brow line. This pose photographs well because the silhouette reads immediately, even with light shading. It also fits sketchbooks because it doesn’t require dense background work.
Step 1: Draw a slanted oval for the head and connect it to a larger bean-shaped body. Add a long S-curve tail that overlaps the body slightly. Step 2: Add the ear triangle and a small nose dot, then ink the outer contour with a 0.5 fineliner. Finally, shade under the jaw and along the tail underside using 2B pencil, keeping the top fur area mostly unshaded.
Pro tipUse a ruler or straight edge only for the first outline block, then freehand the final ink — it keeps the pose clean without looking stiff.
AvoidAvoid over-shading the top of the head; side profiles look muddy when the highlight area gets dark.
3. Fox Sitting with Bow-Tie Chest Mark
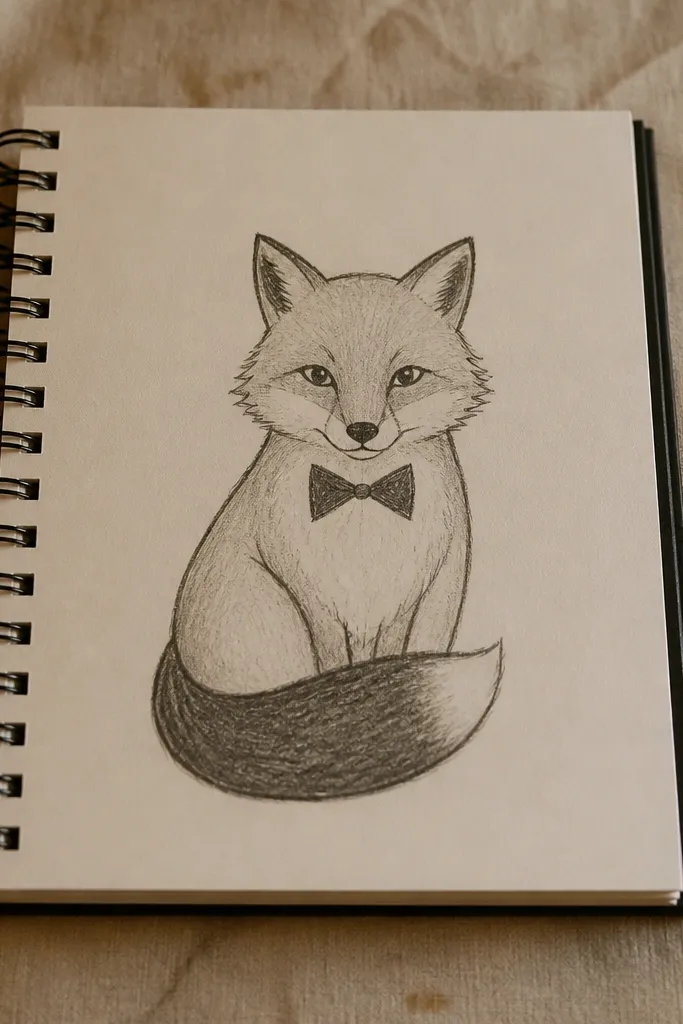
This pose is cute without being messy. The body is a rounded sitting shape, and the chest marking is a small “bow-tie” stripe that gives the fox personality in one stroke. You get a strong focal point for a low-detail drawing: eyes, chest stripe, and tail curl. The fur texture stays minimal — a few strokes around the cheeks and along the tail. It looks good on a plain background because the chest mark creates visual contrast.
Step 1: Sketch a circle for the head, then attach a larger rounded body block beneath it. Draw two small legs as short rectangles tucked under the body, and curl the tail to the side. Step 2: Add ear triangles, then place eyes and a small nose. Ink with 0.5 fineliner, then draw the bow-tie chest mark as two angled curves. Shade around the chest edges and under the tail with 2B pencil.
Make the chest mark slightly wider than you think; it’s the design anchor that makes the fox look “intentional.”
Don’t place the legs too far apart; it turns the sitting shape into a lopsided stance.
4. Fox Reading Book Silhouette
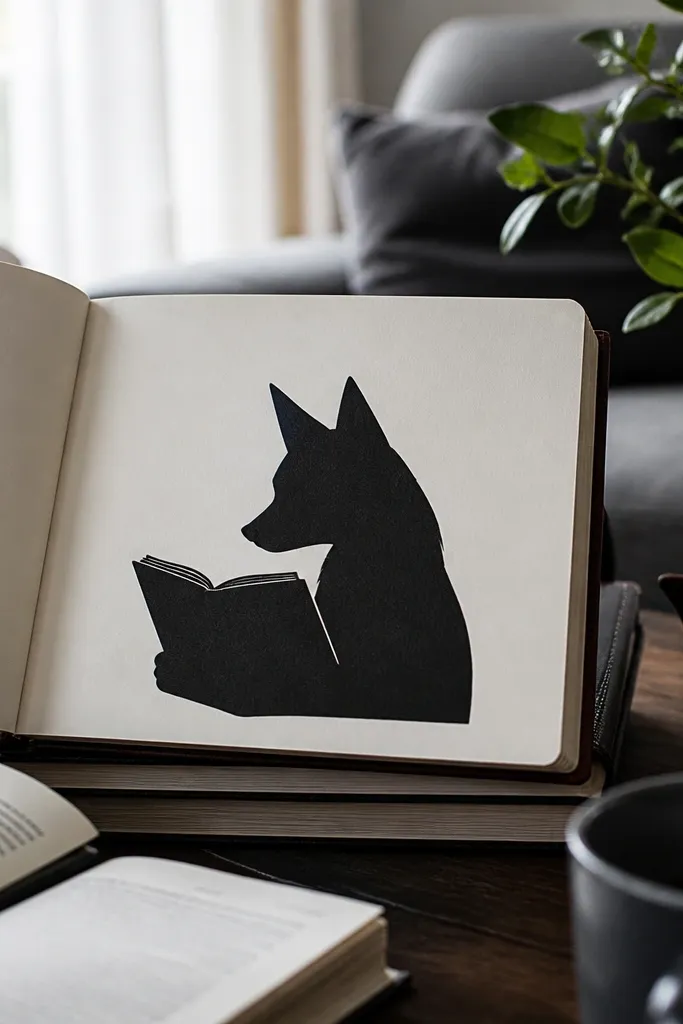
A silhouette drawing is basically cheating in the best way. You don’t need fur texture at all, because the fox shape is the art. The trick is giving the fox a recognizable face through two ear triangles and a muzzle bump. Add one simple open-book shape in front, and the whole scene looks designed even if you use only one color. This is perfect when you want a photogenic result with minimal drawing time.
Step 1: Draw the fox outline as one solid silhouette: ear triangles, a rounded head, and a sitting body with a curled tail. Keep the face details minimal — just a nose bump and a small mouth line. Step 2: Add an open book as two rectangles with a slight V at the spine. Fill the fox shape with black or dark brown marker, then leave the book unfilled or lightly shaded.
Use a brush-tip marker for the silhouette fill so edges stay smooth and dark.
Avoid adding lots of interior lines; silhouettes look best when the shape does the work.
5. Tiny Fox in a Circle Badge
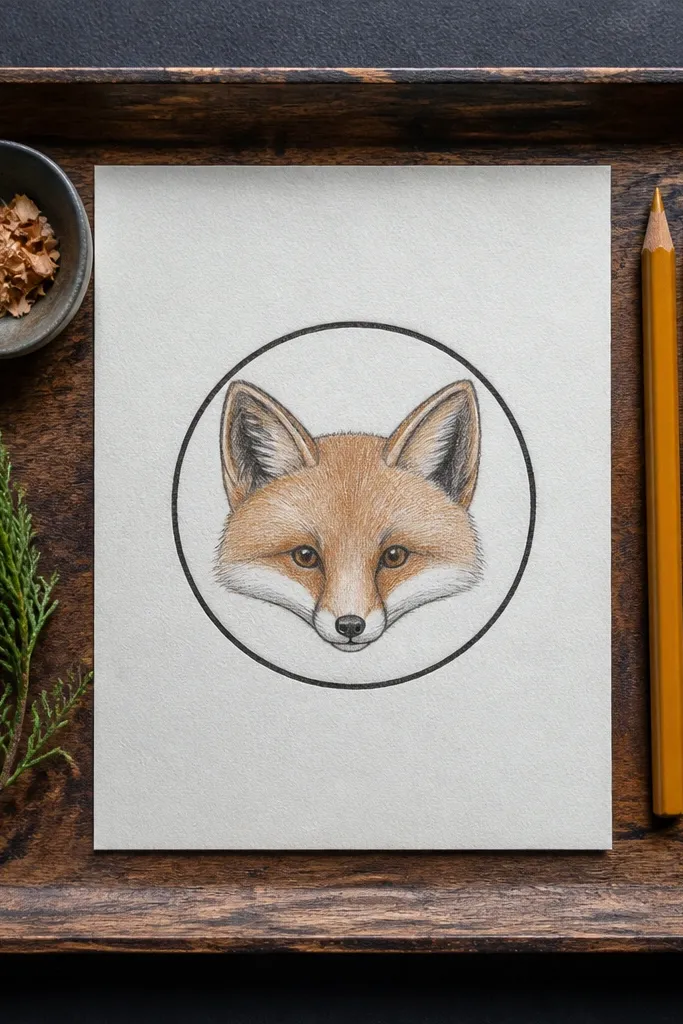
Badges look clean and aesthetic because they frame the subject. This low-maintenance fox drawing uses a thick outer circle, then a simplified fox face centered inside. You only need a few marks: ears, eyes, muzzle, and a curved forehead. The circle border makes the drawing look finished even with light shading. It’s a great choice for quick practice because you can redraw the same badge layout without changing your process.
Step 1: Draw a circle with a compass or traced cup, then lightly sketch the fox face inside. Place ears as two triangles that touch the top of the circle, and center the eyes. Step 2: Ink the fox outline and eyes with 0.5 fineliner, then thicken the outer circle with a darker pen or marker. Add a small muzzle oval and a short cheek stroke, then leave the rest blank.
Pro tipMake the outer circle heavier than the fox lines; that contrast reads well in photos.
AvoidDon’t let the ears reach outside the circle — it makes the badge look sloppy.
6. Fox Head with Negative-Space Fur Edges
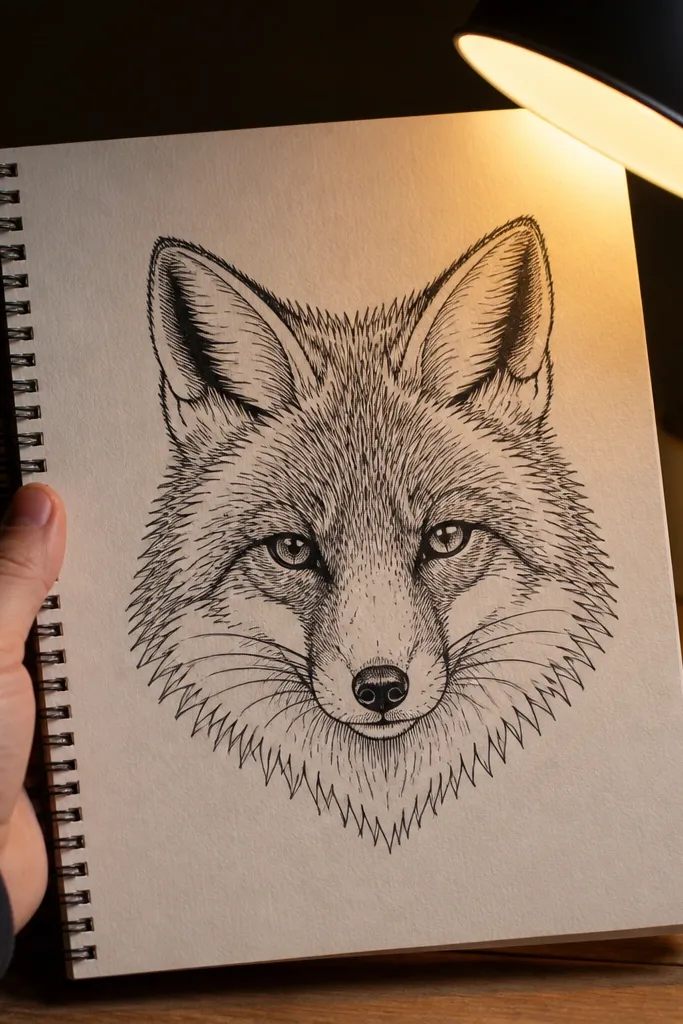
This style uses negative space to imply fur instead of drawing every hair. The outline stays smooth, but you carve tiny gaps along the fur edge, especially around the cheeks and forehead. Those blank triangles make the drawing look textured without adding complexity. It’s low-maintenance because the “fur” is only a handful of repeated marks. The result is striking because the viewer sees texture instantly from the silhouette edge.
Step 1: Sketch a clean fox head outline with a pencil, keeping the ears triangular and the muzzle rounded. Decide where the fur edge will be jagged, then mark 8-12 small gap triangles along that edge. Step 2: Ink the main outline with 0.5 fineliner, leaving the gap triangles uninked. Shade only under the brow and along the underside of the muzzle using a 2B pencil.
Use the same gap size all the way around; consistency makes it look intentional, not accidental.
Avoid random gap placement; uneven spacing makes the texture look chaotic.
7. Fox Sleeping with Blanket Fold Lines
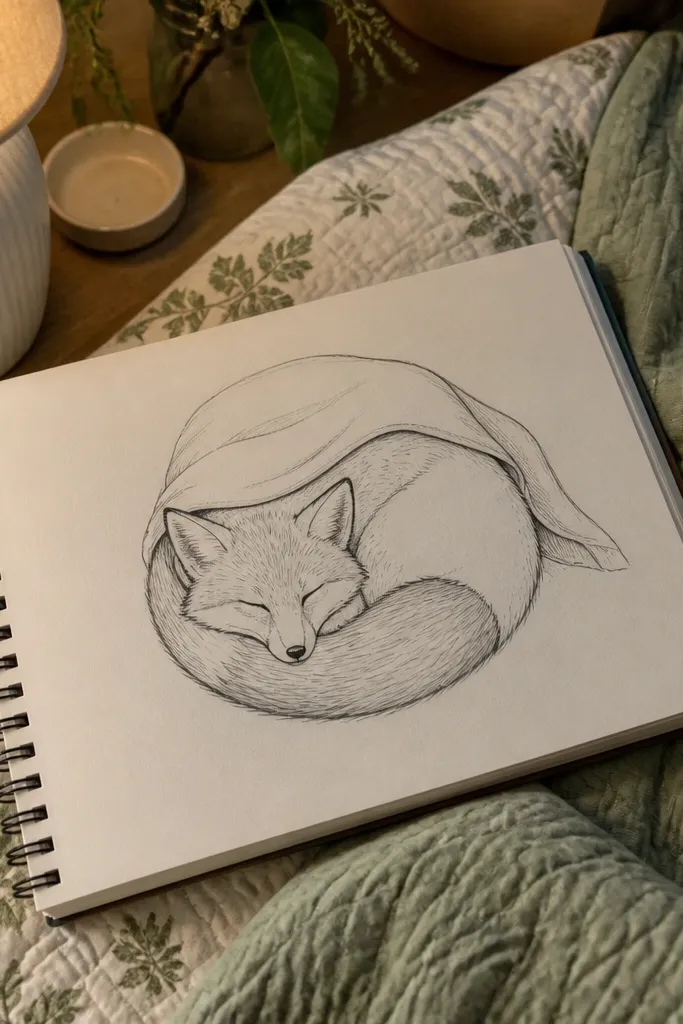
Sleep poses look cozy and aesthetic with minimal work because the body is mostly one shape. Draw the fox curled into a tight spiral, then add a blanket that covers it with only three fold lines. The face can be simplified to closed eyes and a small nose triangle. The blanket adds depth without requiring fur detail. It’s a great option for low-maintenance because you’re focusing on geometry — folds, curve, and contrast.
Step 1: Draw a large spiral shape for the curled body, then add a small head bump on top with triangular ears. Place eyes as short curved lines and draw a tiny nose. Step 2: Sketch a blanket edge wrapping around the spiral, then add three fold lines on the blanket surface. Ink the fox and blanket outlines, then shade the blanket folds with 2B pencil.
Pro tipKeep blanket folds thick and few — thin folds turn into clutter fast.
AvoidDon’t add paws; in a sleeping curl, paws fight the silhouette.
8. Fox Standing with Step-Line Ground
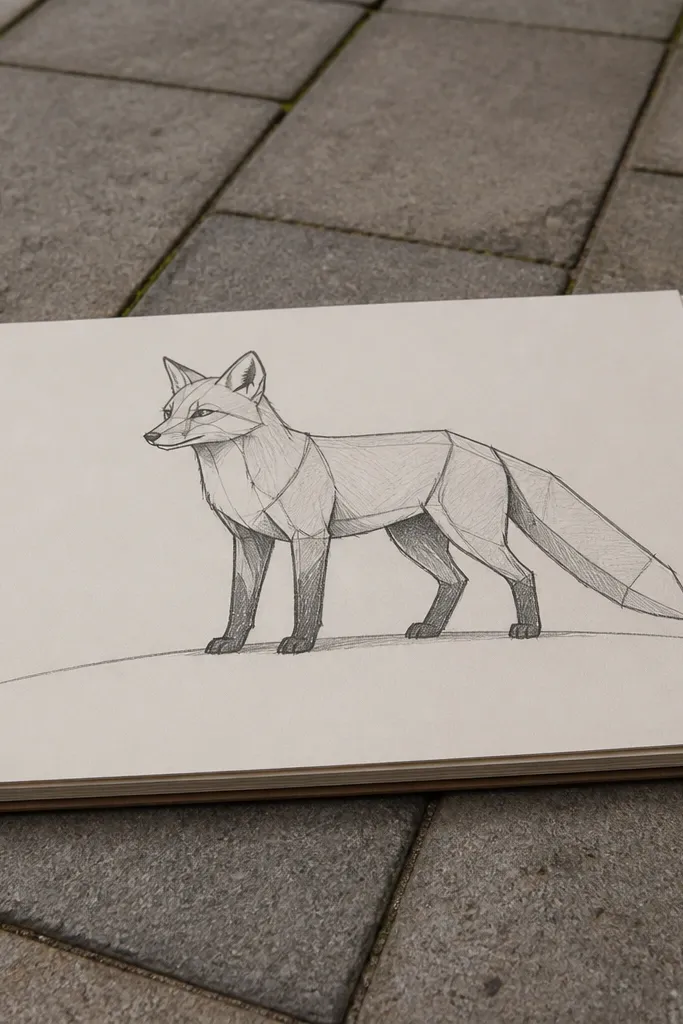
Ground lines make drawings feel grounded (pun intended) without a busy background. This standing fox is built from a head circle, a body oval, and two leg sticks, but the legs are shaded just enough to show weight. The step-line ground is a single thick curve with one shadow under the body. You get a clean, graphic look that still reads as a real pose. It’s low-maintenance because the background is one line and the fur is minimal.
Step 1: Sketch head circle and body oval connected with a short neck curve. Add two legs as slightly angled rectangles and a tail that curves behind. Step 2: Draw a ground line under the feet, then add a soft shadow oval under the belly. Ink with 0.5 fineliner, then shade the underside of the body and one leg edge with 2B pencil.
Pro tipMake the shadow slightly smaller than you think; oversized shadows look cartoon-flat.
AvoidAvoid drawing a detailed grass background; one line beats texture every time here.
9. Fox Face with Geometric Cheek Patch
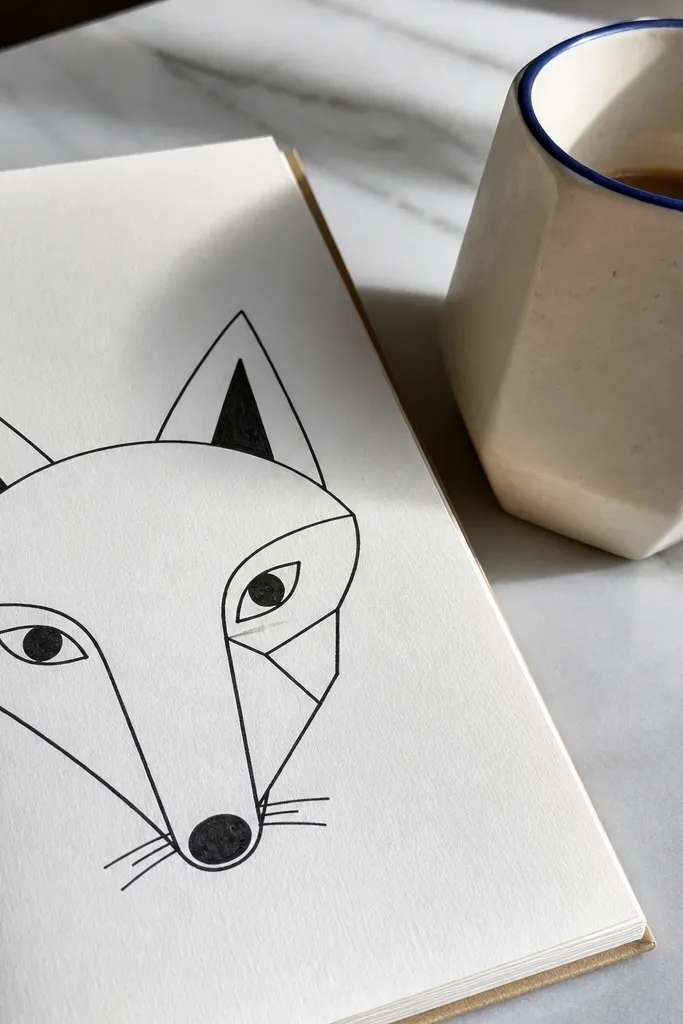
Geometric markings make fox drawings look modern and crisp. Instead of drawing fluffy cheek fur, you place a cheek patch made of two or three straight-edged shapes that sit under the eye. The rest of the face stays simple: ear triangles, muzzle oval, and a small nose. This reduces maintenance because straight lines are faster than fur texture, and the patch gives the fox a design identity. It also photographs well on light paper because edges stay sharp.
Step 1: Draw the head outline as a circle with pointed ears. Place the eyes, then sketch the muzzle oval and nose. Step 2: Create the cheek patch as an angular shape (like a sideways trapezoid) and ink it solid or lightly shaded. Ink the face outline with 0.5 fineliner, then shade under the muzzle and around the cheek patch edge.
If your cheek patch looks lopsided, resize it so its top edge lines up with the bottom of the eye.
Don’t add fur strokes around the cheek patch; let the geometry carry the texture.
10. Fox Tail Spotlight with Feathered Tip
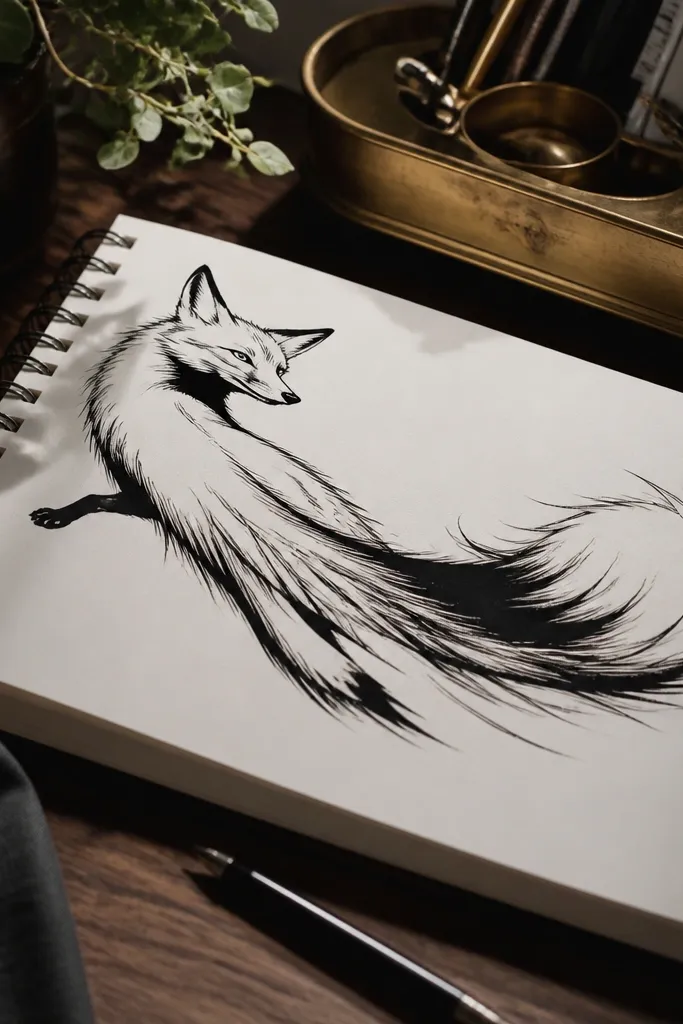
Make the tail the hero. This low-maintenance drawing treats the tail as a single sweeping shape with one feathered tip and a few underside strokes. You only need a tiny head or no head at all — just enough to connect the tail to the fox. It looks dramatic because the tail curve creates strong motion lines. Shading stays simple: one dark underside and a light highlight band. It’s a great choice when you want an aesthetic “poster” feel without drawing full anatomy.
Step 1: Draw a large curved tail arc that takes up most of the page, tapering at the tip. Add a small base connection to a head shape or a single shoulder curve. Step 2: Ink the tail outline with 0.5 fineliner, then add a feathered tip using 6-10 short V-shaped marks. Shade the underside with 2B pencil and leave a clean highlight strip along the top edge.
Pro tipUse one highlight strip width consistently; it makes the tail look smooth instead of scratchy.
AvoidAvoid drawing every strand along the whole tail; the feathered tip is the only texture you need.
11. Fox in Profile with Moon and Star Background
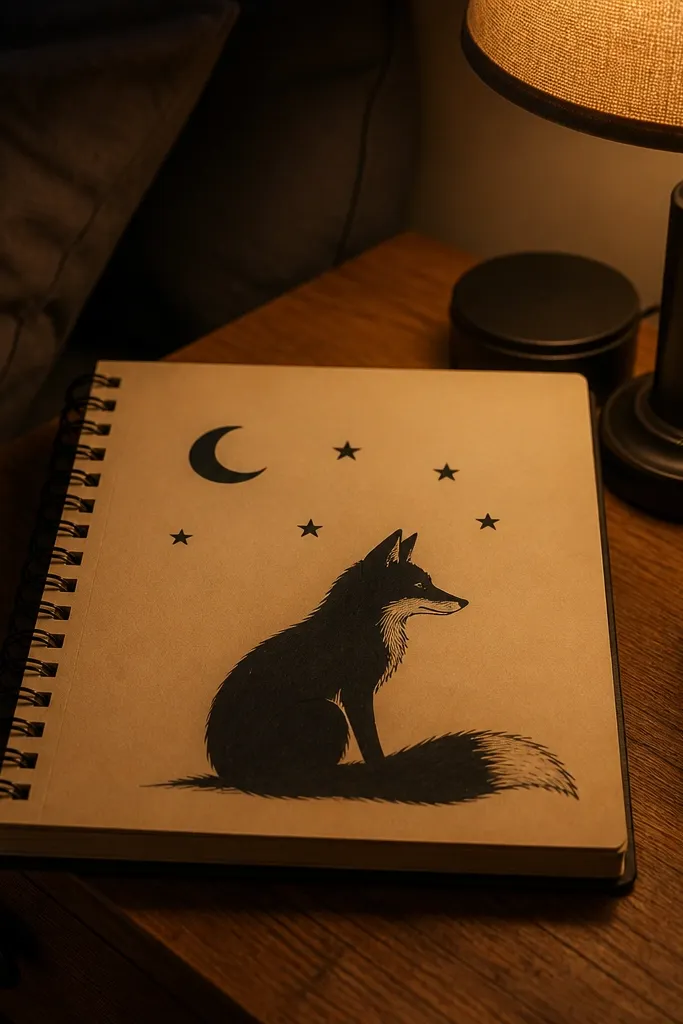
Backgrounds that are simple but graphic make your fox look intentional fast. This design has a side-profile fox silhouette and a moon plus 5-7 small stars. You can keep the fox detailed only at the face and tail edge, while the night sky stays minimal. The contrast between dark fox and light paper makes it pop in photos. Low-maintenance here means you’re drawing fewer elements, and each element is high-impact.
Step 1: Sketch the side-profile fox as a silhouette outline, then place it so the tail curves toward the moon. Draw a large moon circle in the upper corner and add a few tiny star dots. Step 2: Ink the fox with a 0.5 fineliner or marker, then ink the muzzle and eye area. Add light shading under the jaw and along the tail underside with 2B pencil, leaving stars and moon unshaded.
Pro tipKeep stars different sizes but fewer than 10; too many stars turns into noise.
AvoidDon’t add a gradient sky with messy pencil — stick to clean moon and dots.
12. Fox with Hanging Tags and Simple Pattern Fur
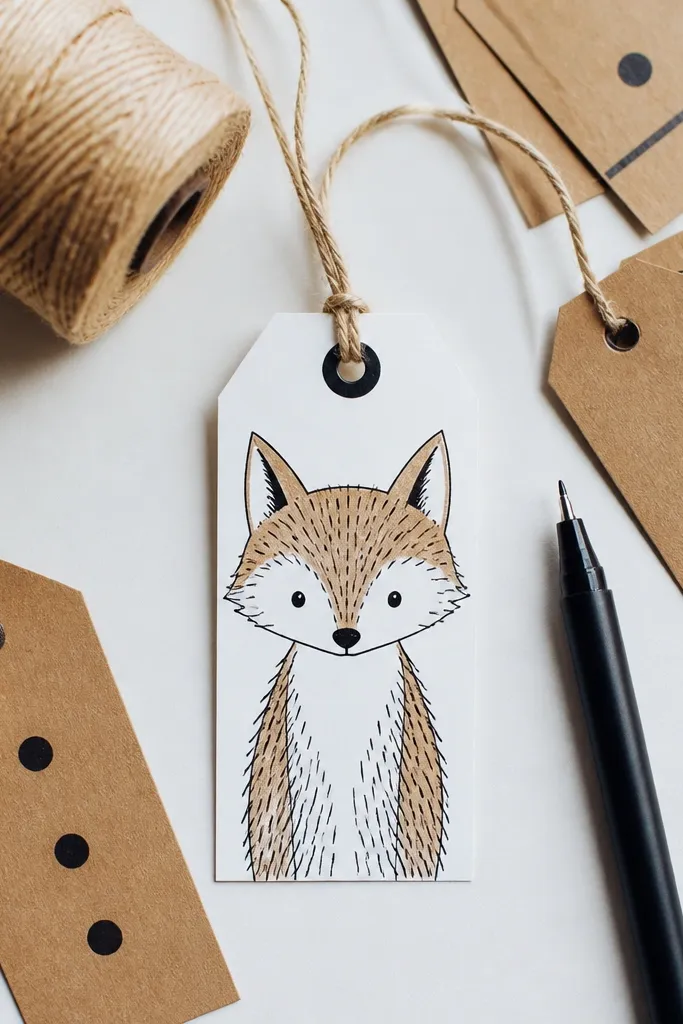
This one looks playful and styled because of the hanging tags and controlled fur pattern. The fox head is simplified, and the fur is suggested with repeating short strokes in just two zones: forehead and cheek edge. The tags give you a place to add a single stripe or dot pattern, so the drawing feels designed without heavy shading. It’s low-maintenance because your “detail” is pattern placement, not anatomy.
Step 1: Draw a fox head outline with triangular ears and a rounded muzzle. Add two small tag shapes under the chin connected by thin lines. Step 2: Add repeating fur strokes along the forehead edge and a few on the cheek outline, then ink everything with 0.5 fineliner. Pattern the tags with one stripe each using a fineliner, then shade only under the muzzle.
Pro tipChoose one pattern type for both tags (stripes or dots), not mixed patterns.
AvoidAvoid adding facial whiskers everywhere; keep whiskers to 3 short lines per side.
13. Fox Head with Bold Eye Ring and Minimal Nose
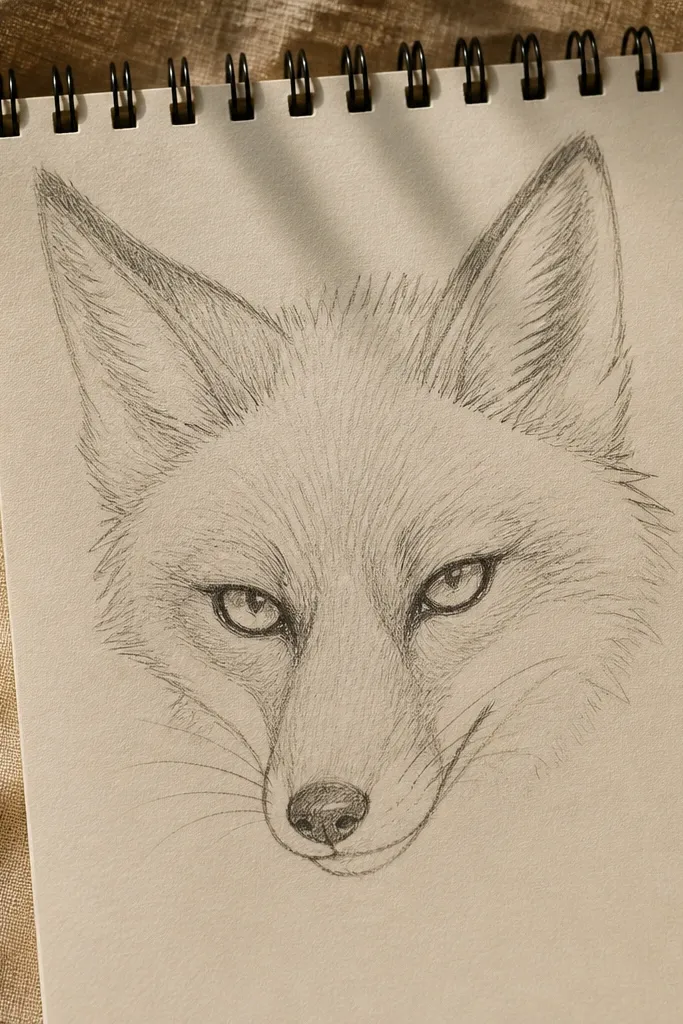
Big eye rings make fox drawings look expressive instantly. The face stays simple: small nose, curved mouth line, and two ears. You outline the eye area thicker than the rest of the face, then shade inside the ring just a bit. Fur marks are just a few lines along the forehead and cheek. This style is low-maintenance because the “work” is one bold feature instead of lots of fur texture.
Step 1: Sketch the head outline and ear triangles, then place eyes with a slight tilt toward the center. Draw a tiny nose dot and a curved mouth line. Step 2: Ink the eye rings thick with 0.5 fineliner, then shade inside with 2B pencil. Add 5-7 short forehead fur strokes and a couple cheek lines, keeping everything else light.
Let the eye rings touch the brow line — it tightens the expression.
Don’t outline the entire face too thick; it makes the drawing heavy and less cute.
14. Fox with Simple Leaf Frame
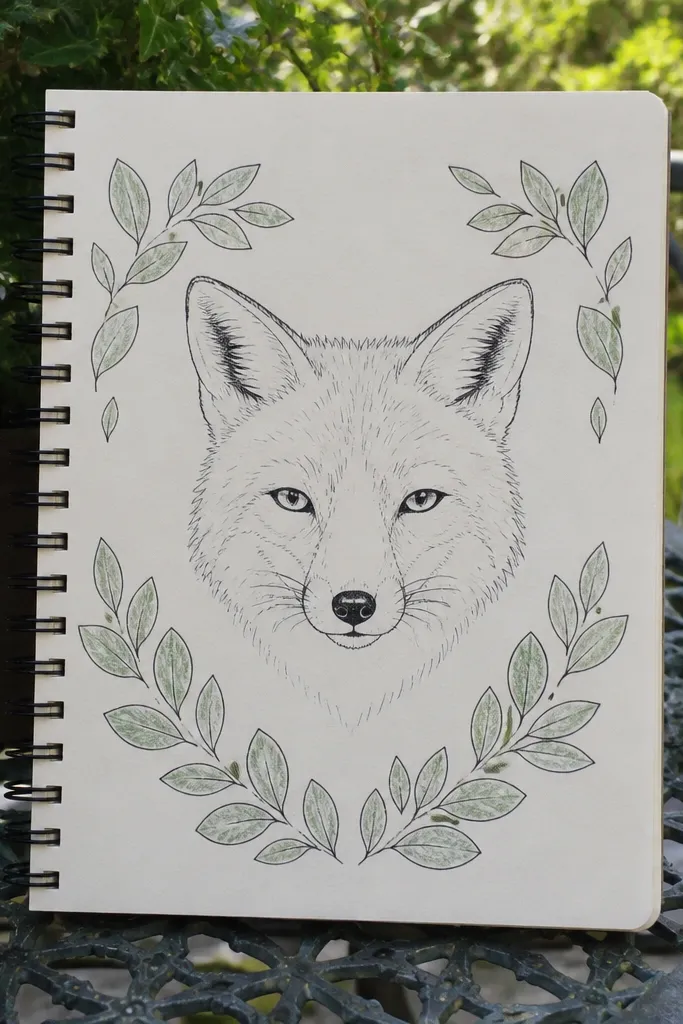
A leaf frame makes your fox look like it belongs in a card or print, without requiring a full background scene. You draw the fox face in the center with minimal fur marks, then add 6-10 leaf shapes around it like a wreath corner. The leaves can be one shape repeated and rotated, which keeps the project low-maintenance. The final look is clean, balanced, and easy to photograph.
Step 1: Draw the fox face centered on the page, using a simple head circle and ear triangles. Keep fur marks limited to cheek edges. Step 2: Add leaf shapes around the fox, leaving gaps so the paper shows through. Ink the fox and leaf outlines, then shade the underside of each leaf with a light 2B pencil pass.
Rotate leaf shapes in pairs; symmetry looks designed and reads well in photos.
Avoid dense leaves all the way to the edge; it crowds the fox.
15. Fox Standing with Crosshatch Shadow Patch
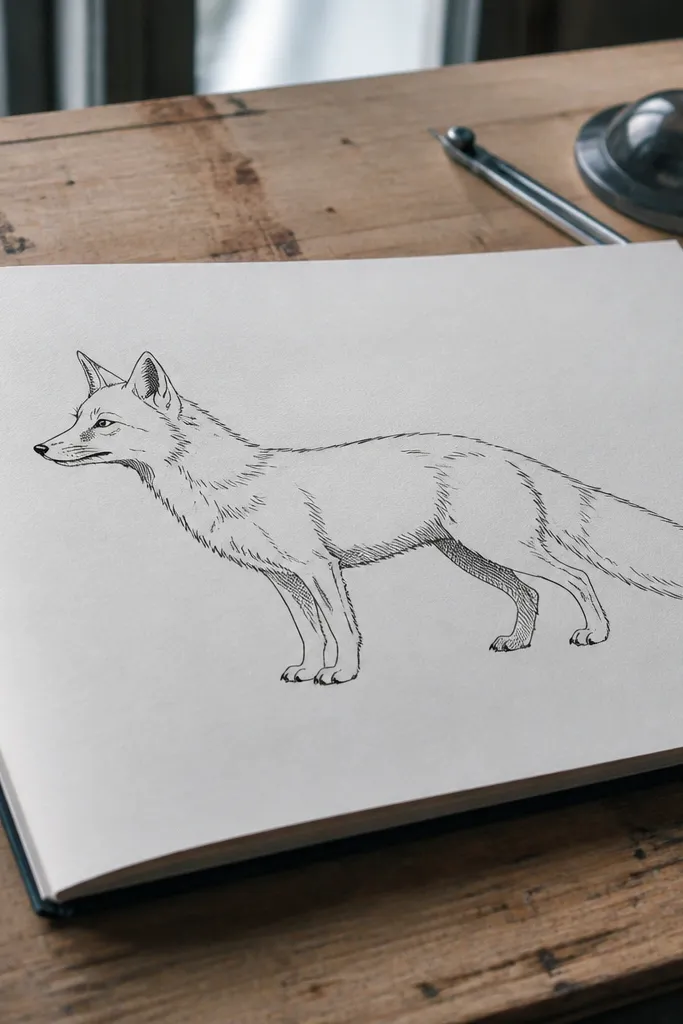
Crosshatching is a fast way to make a drawing look darker and more finished without building complex fur. The fox body is simple, but you add one shadow patch under the belly using tight crosshatch lines. That gives depth and makes the fox read as grounded. Keep the fox fur minimal and let the shadow do the heavy lifting. It’s also easy to redo because the fox pose is basic and the shadow patch is one controlled area.
Step 1: Sketch a standing fox with a head circle, body oval, and two legs. Place the feet and draw a small ground line. Step 2: Ink the outline, then shade under the belly with crosshatching using a 2B pencil. Add a few fur strokes at the cheeks and tail edge only, leaving the rest untextured.
Crosshatch in one direction first, then cross it with a second direction. Random scribbles look messy fast.
Avoid crosshatching the entire body; concentrate it under the belly only.
16. Fox Head with Patterned Fur Bands
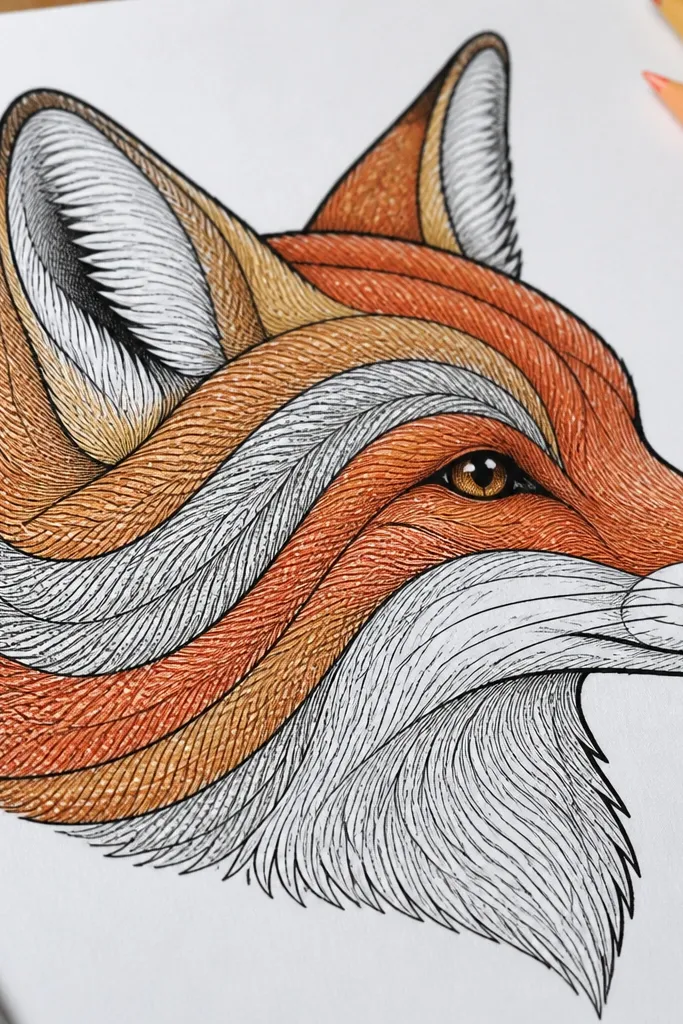
Patterned fur bands turn a fox drawing into something graphic and collectible. You draw the face normally, then add three repeating band shapes that follow the cheek and forehead curve. Each band is a strip with short lines inside, so it feels like fur without needing individual hairs. This is low-maintenance because you repeat one template for the band shape. The fox looks neat and intentional even with minimal shading.
Step 1: Sketch the head outline and place eyes and muzzle. Keep the ears clean and triangular. Step 2: Draw three band shapes across the cheek and forehead area, then fill each band with short parallel lines. Ink the outer face contour, then lightly shade around the bands to separate the layers.
Pro tipMake the bands slightly darker at the bottom edge; it creates a soft 3D effect.
AvoidDon’t extend bands into the eye area; it makes the eyes look buried.
17. Fox with Snow Dots and Tiny Paw Prints
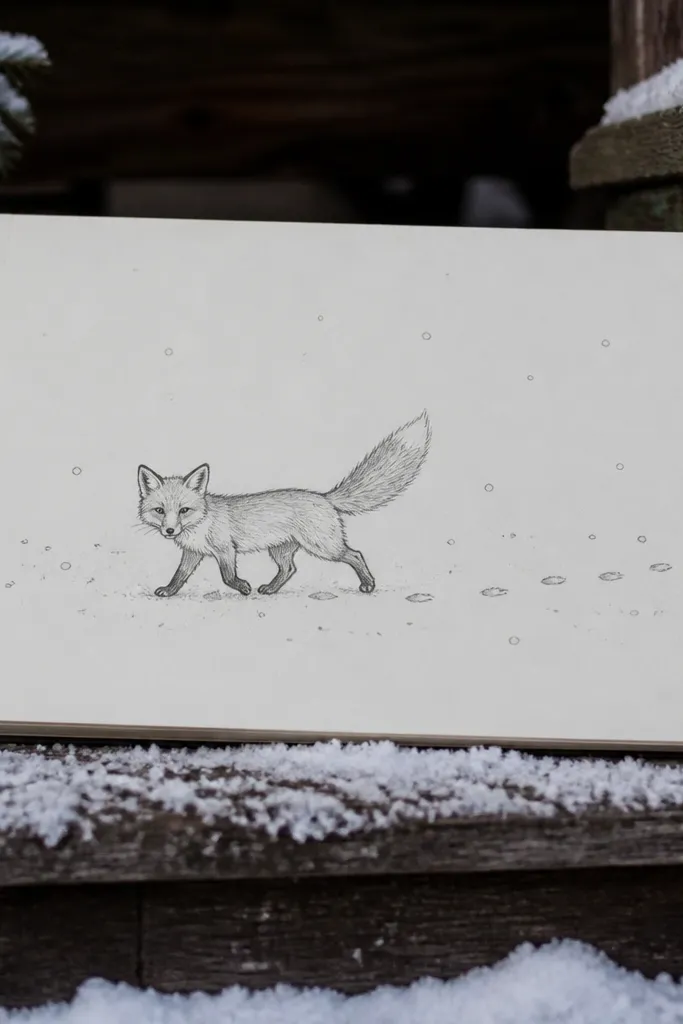
Snow dots and paw prints are a low-effort background that still makes the drawing feel complete. The fox can be simple: one forward step, tail lifted slightly, and a basic face. Add a line of tiny paw prints behind the fox, then sprinkle small dot clusters around the feet. This creates a clear scene without drawing snowdrifts or heavy textures. It’s photogenic because the dots frame the fox and add contrast.
Step 1: Draw a walking fox with a head circle, tilted body oval, one front leg lifted, and the tail curved upward. Place the face using a simple eye and muzzle. Step 2: Ink the fox outline, then add tiny paw prints as small ovals with 3 short toe marks. Finally, sprinkle snow dots around the feet and add a light shadow under the belly with 2B pencil.
Keep paw prints smaller than the eye width; it keeps the fox as the focal point.
Avoid drawing big snow piles; dots and paw prints are cleaner.
18. Fox in a Polaroid-Style Frame
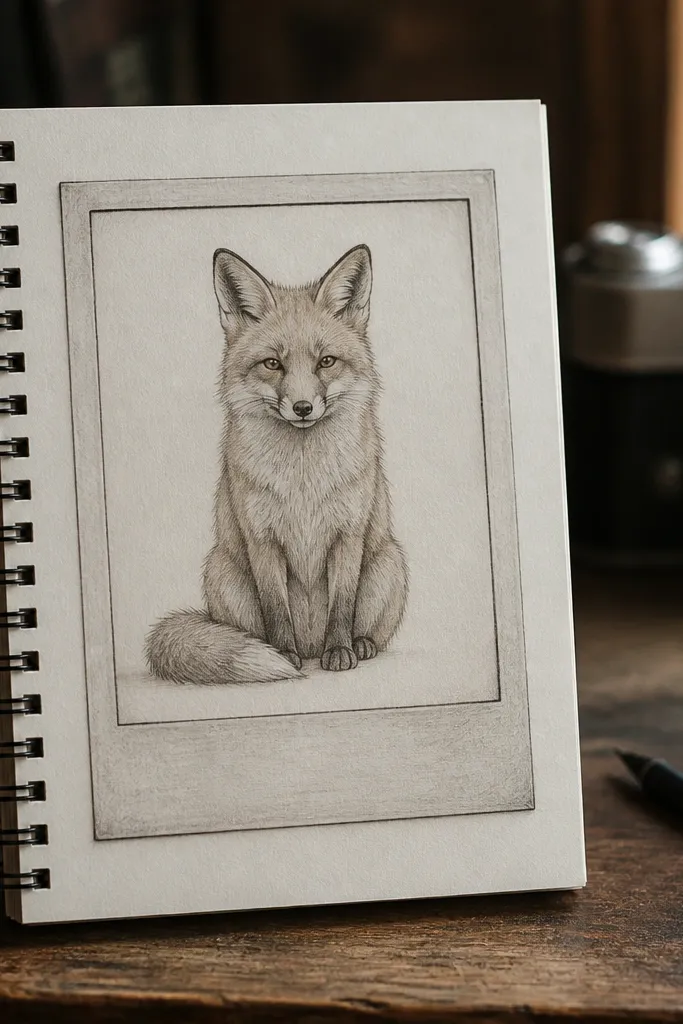
A frame makes any fox drawing look more like “art” and less like practice. This layout uses a polaroid-style border: a thick outer rectangle, a slightly darker inside edge, and a small caption strip at the bottom. The fox inside can be minimal, even a face-only design. The frame is your aesthetic work, so the fox can stay low-detail. It’s great for sketchbook pages you want to photograph and share.
Step 1: Draw a rectangle border with rounded corners and a slightly inset inner edge. Add the small caption strip at the bottom, leaving room inside for the fox face. Step 2: Sketch a simple fox face centered, ink with 0.5 fineliner, and shade under the muzzle. Add one or two fur strokes near the ears, then leave the rest clean.
Pro tipTilt the border by a few degrees for a natural look, but keep the fox centered within the frame.
AvoidAvoid putting too much text; a blank caption strip looks cleaner than messy handwriting.
19. Fox Sitting with Stacked Books Background
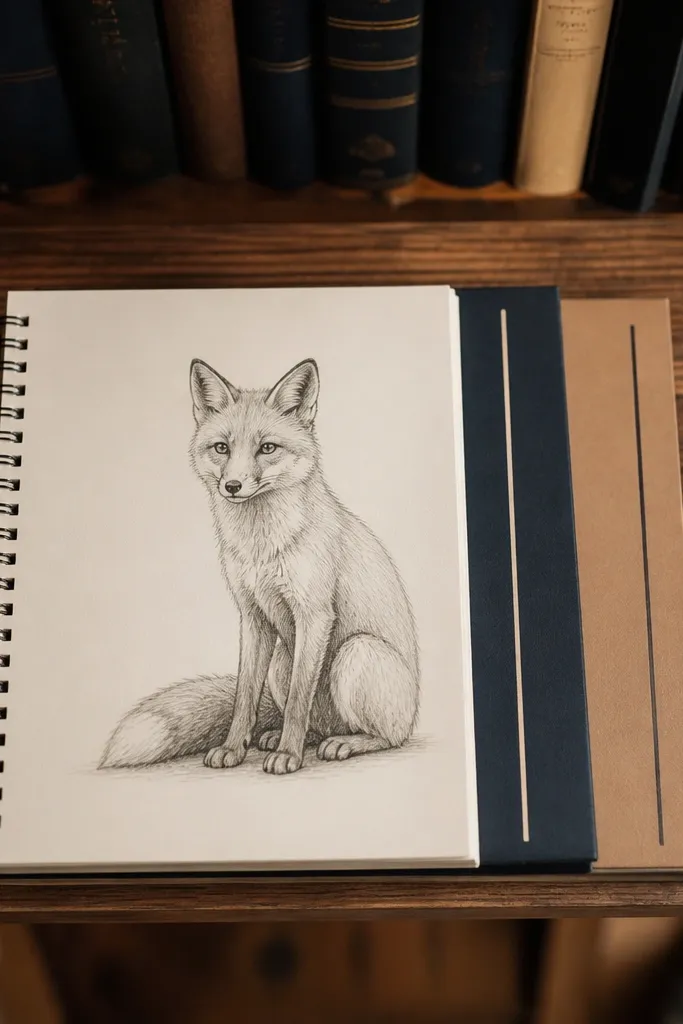
Books give you straight lines and big shapes, which makes the fox look neat even when the fur is minimal. Draw the sitting fox, then stack 3 book rectangles behind or to the side. Add one spine stripe on each book and keep the fox face as the focal point. This is low-maintenance because you’re using geometric background blocks instead of detailed scenery. It also gives you easy contrast areas for shading.
Step 1: Sketch the sitting fox first so the face placement is right, then draw three stacked book rectangles behind it. Step 2: Ink fox outline and book edges with 0.5 fineliner. Shade book covers lightly with a 2B pencil, then add a small shadow under the fox belly and tail curl.
Make the top book slightly narrower; it adds realism without more work.
Don’t add book titles; just one stripe per book keeps it clean.
20. Fox Head with Single-Line Contour Style
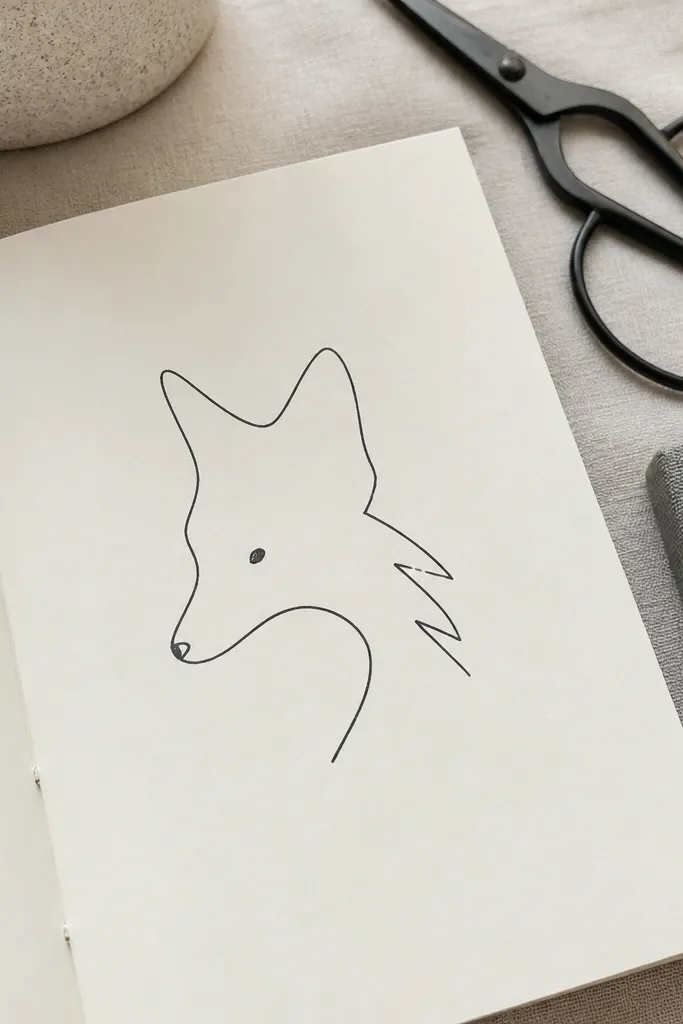
Single-line contour drawings look modern and calm. You draw the fox outline in one continuous pass, then add a dark eye dot and a tiny nose mark. Fur texture is optional, but you can add 3-4 short lines at the cheek edge only. The low-maintenance benefit is huge: no shading, no erasing, and the line itself is the design. It’s photogenic because the clean linework stands out on white paper.
Step 1: With a 0.5 fineliner, start at the ear and draw the outline continuously around the head and muzzle, keeping the line unbroken. Step 2: Add a single dark eye dot and a small nose triangle. Optionally add 3 short cheek lines and stop — don’t keep adding texture.
Pro tipIf you mess up, keep going. The imperfect continuity is part of the look.
AvoidAvoid thickening the whole line; the eye dot should be the darkest mark.
21. Fox with Geometric Hills and Minimal Sun
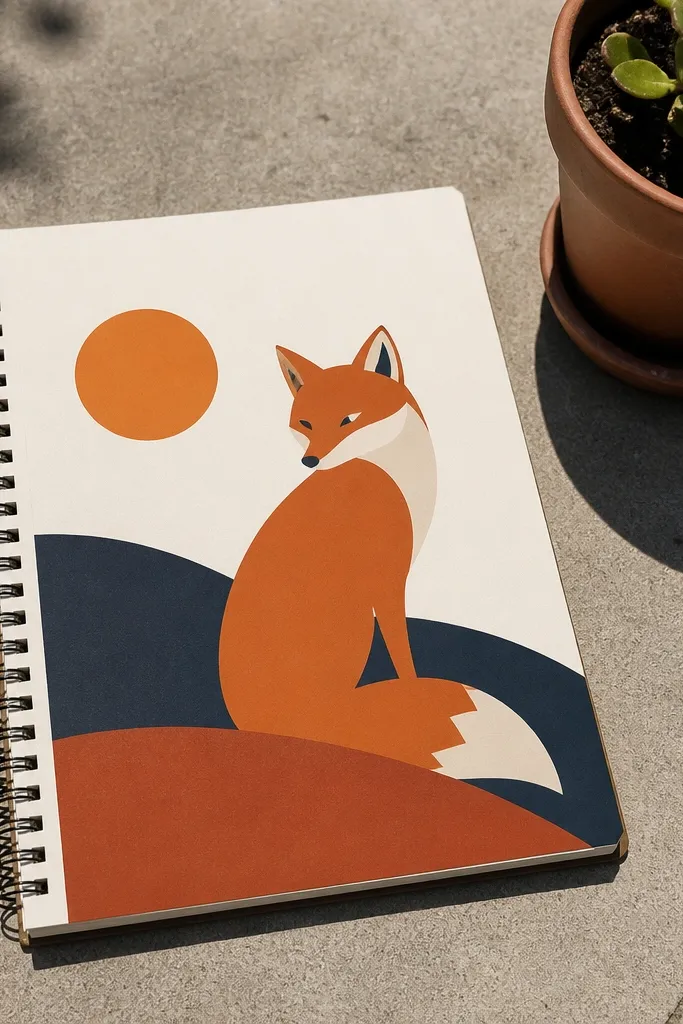
Geometric hills make fox drawings look like posters. The fox can be a simplified silhouette with just enough face detail. Add one small sun circle and two layered hill shapes, and you have a scene that reads instantly. This stays low-maintenance because the background uses clean shapes, not detailed texture. The result is crisp and easy to photograph because edges are high-contrast.
Step 1: Draw the two hill shapes as overlapping triangles or curved wedges. Place the fox silhouette in front, centered on the lower hill. Step 2: Add a small sun circle in the sky, then ink the fox outline and fill it with dark color. Keep the hills light or lightly shaded so the fox stays the focal point.
Pro tipUse one color for hills and one for the fox; two-tone scenes photograph better than multi-tone mess.
AvoidAvoid drawing extra clouds; the hills and sun already carry the composition.
22. Fox Profile with Watercolor Wash Background Only
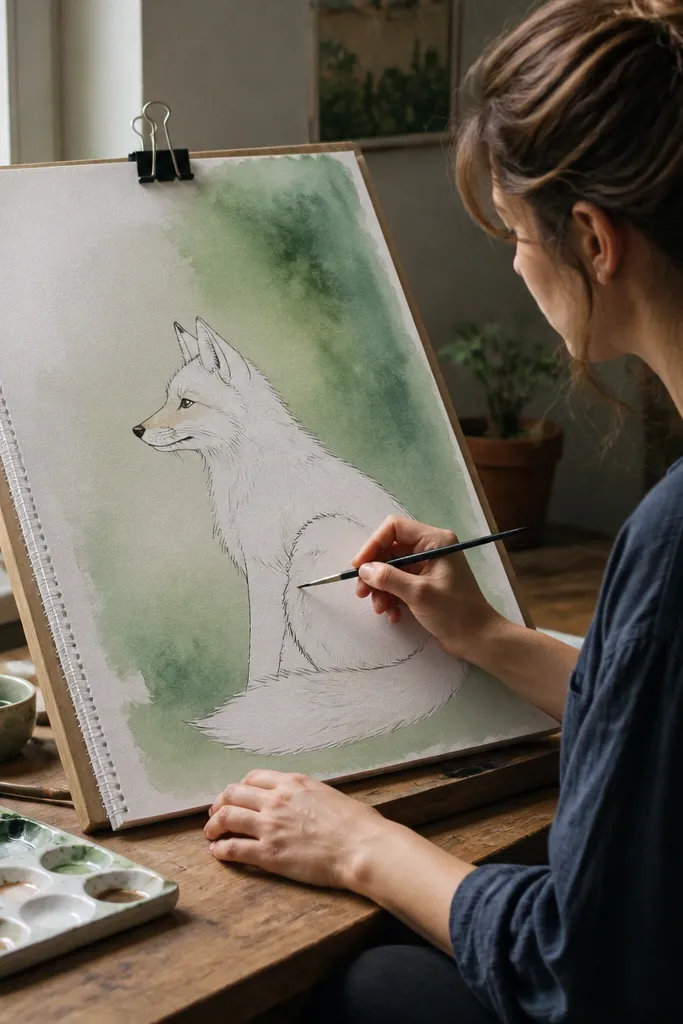
This is low-maintenance because you do the hard “color” in the background, then keep the fox line clean. Paint a loose watercolor wash — one color family, one light-to-dark direction — and let the fox stay mostly unpainted except for minimal shading on the muzzle and tail edge. The wash adds atmosphere without demanding detailed fur painting. It looks aesthetic because the fox line pops against the soft background gradients.
Step 1: Lightly sketch the fox profile with pencil, then ink the outline with waterproof fineliner. Step 2: Wet the paper behind the fox and paint a watercolor wash using 1-2 diluted tones. Let it dry, then add a small amount of colored pencil or diluted paint only on the muzzle and tail underside.
Mask the fox area with dry paper while painting the wash so edges stay sharp.
Avoid painting watercolor on top of fineliner lines without testing; it can bleed and blur the fox outline.
23. Fox Head with Two-Tone Colored Pencil Fur Blocks
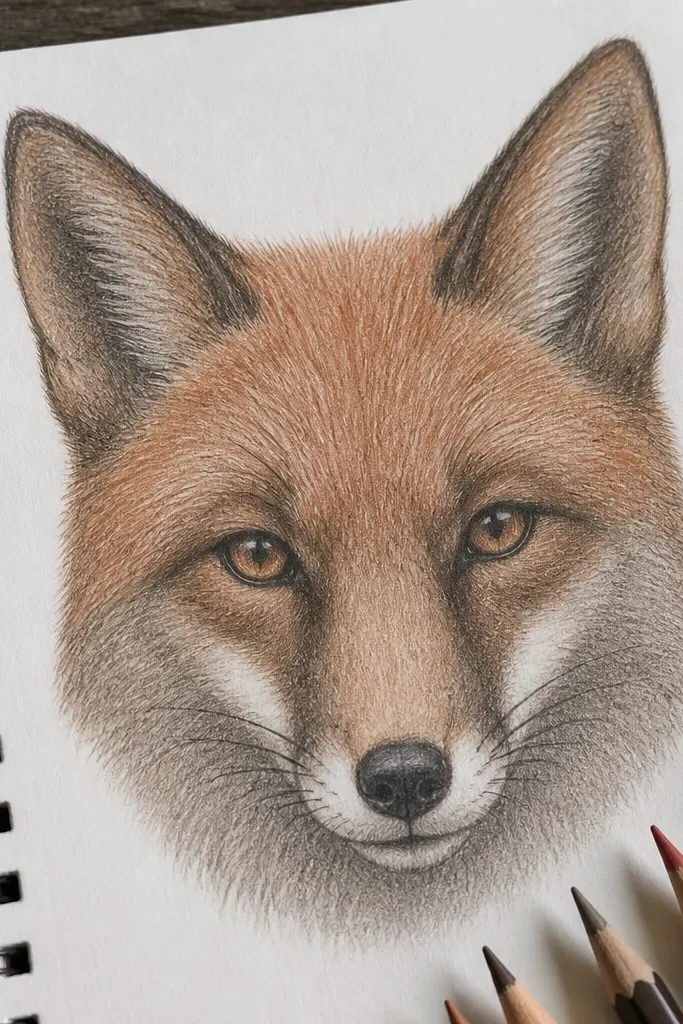
Two-tone fur blocks look richer than you’d expect, and they’re still low-maintenance. You color the forehead and ear bases one tone, then the cheek and muzzle another tone. Instead of painting individual hairs, you blend within each block using light pressure. Add a darker edge around the eyes and ears for depth. This style is fast because you’re coloring big areas, not drawing fur strands all over.
Step 1: Sketch and ink the fox head with 0.5 fineliner. Step 2: Choose two colored pencil tones — one orange-brown and one cream or light tan. Block in each area with light strokes, then blend gently with a tissue. Finally, add a dark ring around the eyes and shade under the muzzle with a darker pencil (2B or a dark brown).
Use circular motion for blending in the cheek area; it smooths colored pencil without streaks.
Avoid heavy burnishing; it kills the soft, furry look and makes the paper slick.
24. Fox with Minimal Ink Outline and One Shadow Layer
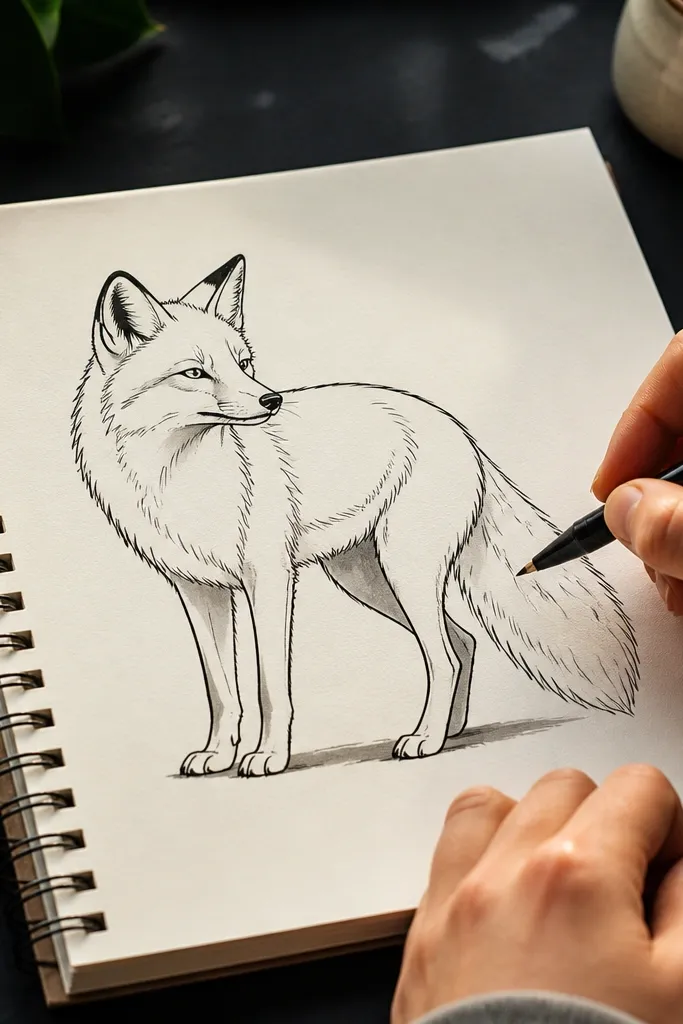
This is the cleanest path to “finished” without getting lost in texture. You ink the fox outline confidently, then add only one shadow layer under the belly and behind the legs. The fur stays implied with a few contour lines around the cheeks and tail. It looks modern and airy, and it’s low-maintenance because the rendering is basically outline plus one value. Perfect for sketchbook pages you want to look crisp.
Step 1: Sketch your fox pose with pencil, then ink the outline with 0.5 fineliner. Keep facial details minimal: eye dot, small nose, short mouth curve. Step 2: Use 2B pencil to draw one shadow shape under the belly and a thin shadow under the tail. Blend lightly so the shadow edge is smooth but not gray everywhere.
Pro tipMake the shadow edge softer on the far side of the body; it reads like light direction.
AvoidDon’t add extra interior shadows; one layer is the whole point.
25. Fox with Patterned Scarf Stripe
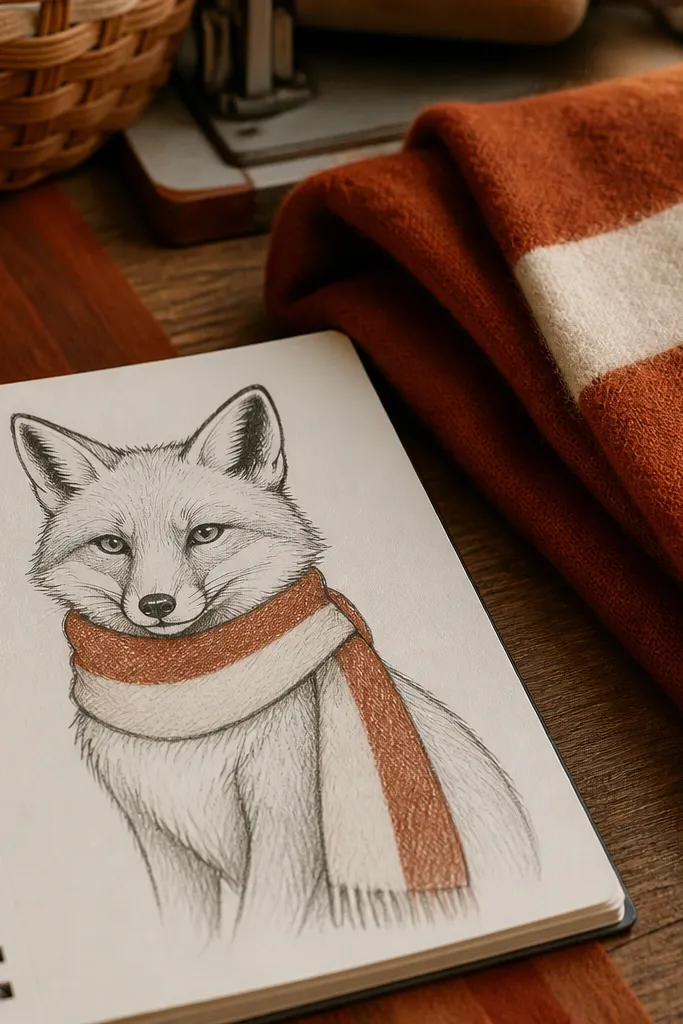
Scarves are the fastest way to add personality to a fox without drawing more fur. This design keeps the fox body simple, then adds a scarf draped across the neck with one bold stripe or two. You get strong color contrast and a clear focal point. The scarf also hides the complexity where the neck meets the chest, so the drawing stays low-maintenance. It looks great in photos because the stripe catches the eye.
Step 1: Draw the fox head and body outline, leaving the neck area open. Add a scarf shape wrapping around the neck with two hanging ends. Step 2: Ink the fox and scarf outlines with 0.5 fineliner. Add one thick stripe across the scarf using a darker color pencil or marker, then shade under the scarf edge with 2B pencil.
Pro tipKeep the scarf stripe slightly curved to match the neck — straight stripes look pasted on.
AvoidAvoid multiple patterns; one stripe beats a busy scarf every time.
26. Fox Face with Stippling Cheek Glow
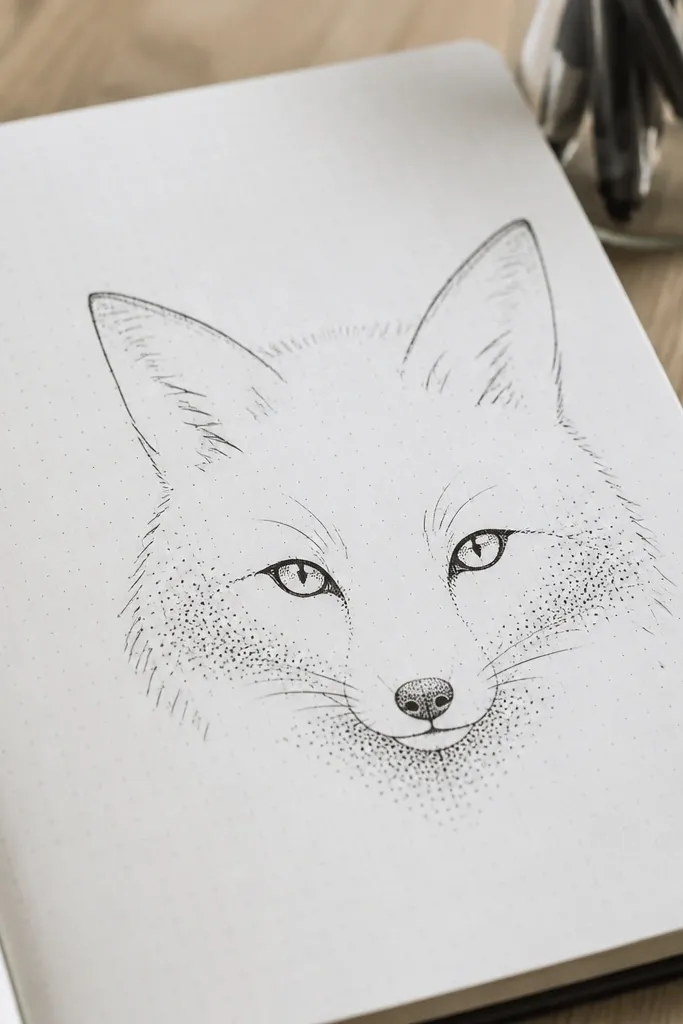
Stippling gives you texture without sketchy fur lines. This low-maintenance fox drawing uses dots only in two places: the cheek area and a small patch under the muzzle. The dots build contrast slowly, but the placement is simple and repeatable. Keep everything else clean with linework and a dark eye. The cheek glow looks aesthetic because it looks like soft fur lighting rather than heavy shading.
Step 1: Sketch and ink the fox face outline with 0.5 fineliner. Place eyes and nose, then lightly block the cheek area. Step 2: Use a 2B pencil to add stipples in the cheek and under the muzzle, increasing density near the contour line. Leave the center of the cheek lighter so it looks like a glow.
Use fewer dot sizes — mostly small dots — for a cleaner texture.
Don’t stipple the whole face; it turns into gray fog and kills the crisp look.
27. Fox in an Abstract Frame of Triangles
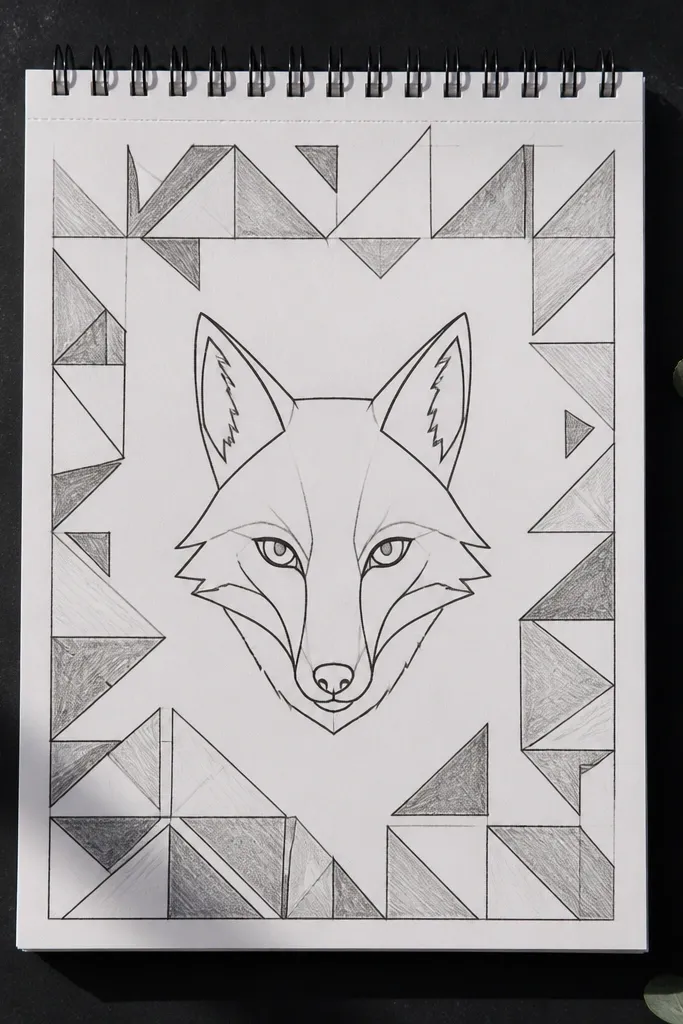
Abstract triangle frames make fox art feel graphic and modern. You draw the fox head clean and centered, then build a triangle border around it using repeated small shapes. The triangles can be left white or lightly shaded. This is low-maintenance because you’re repeating one pattern, and it gives you instant composition. In photos, the border makes the fox look like a finished print rather than a loose sketch.
Step 1: Draw the fox head centered and ink with 0.5 fineliner. Leave a margin around it. Step 2: Create a border of triangles around the fox, using a ruler lightly for consistent angles. Ink the triangle edges and lightly shade alternate triangles with 2B pencil. Keep the fox face darker than the frame.
Pro tipAlternate shaded triangles every other one; it makes the frame feel intentional.
AvoidAvoid drawing triangles touching the fox outline — keep a small gap for clarity.
28. Fox Profile with Calligraphy-Style Fur Lines
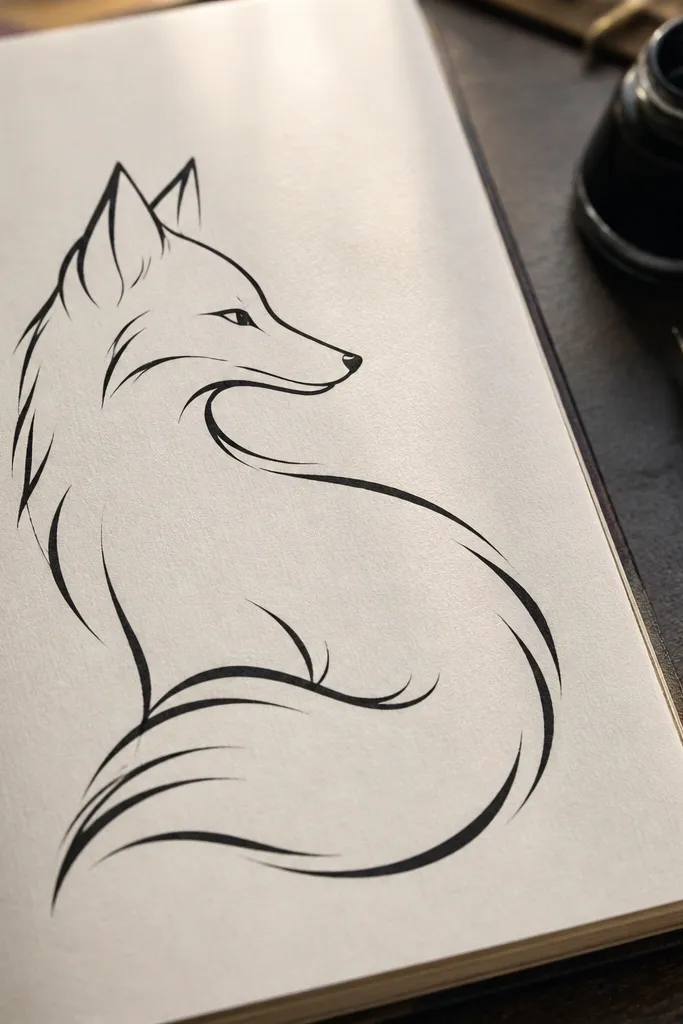
These foxes look elegant because the fur marks are controlled like calligraphy. Instead of many small scratches, you use 5-8 flowing lines that follow the tail curve and cheek edge. The profile silhouette stays simple, so you’re not fighting anatomy. This style is low-maintenance because the number of fur marks is capped, and each mark has a clear direction. The result is visually striking without being time-consuming.
Step 1: Draw a side-profile fox silhouette with a clear head wedge and body curve. Ink the outer contour with 0.5 fineliner. Step 2: Add 3-4 flowing fur lines along the cheek edge and 4-5 along the tail underside. Keep the lines tapering at the ends, then lightly shade under the jaw with 2B pencil.
Pro tipPractice one taper stroke on scrap paper first; it makes the fur lines look confident.
AvoidDon’t add extra short fur flecks between the main lines; it breaks the clean calligraphy look.
29. Fox with Stamped Pattern Background
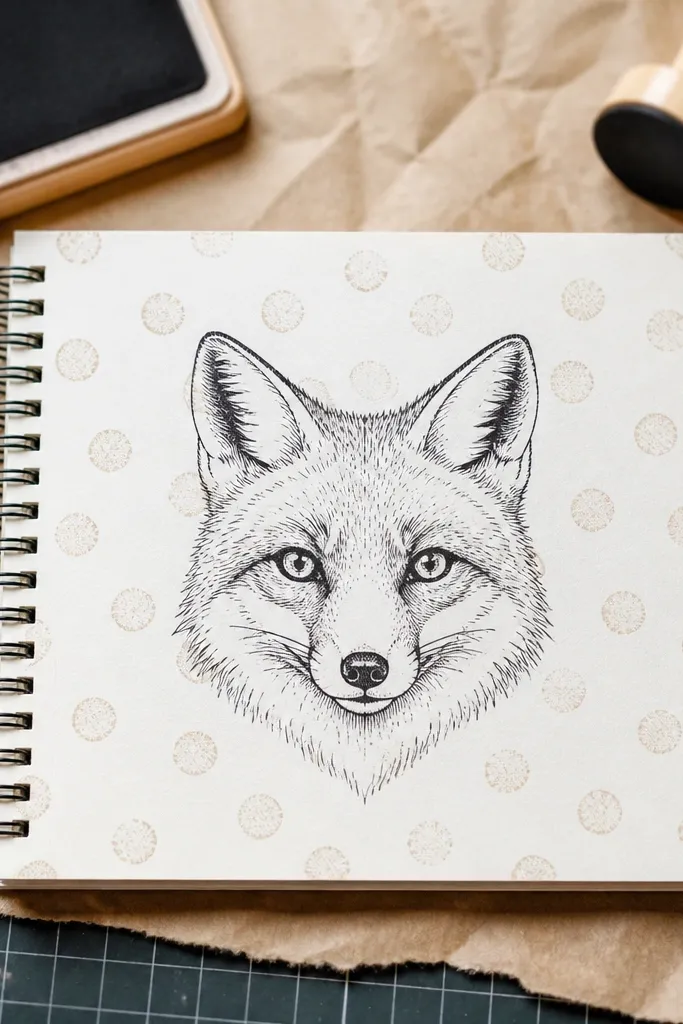
A stamped pattern background makes the fox look styled with very little drawing. You sketch and ink the fox face, then add a repeating pattern behind using simple circle stamps or a pen dot pattern. Keep the pattern lighter than the fox lines so it doesn’t compete. This is low-maintenance because you’re repeating one shape, and the fox stays the clear center. It’s also great for using up scrap paper or mismatched colors because the pattern hides imperfections.
Step 1: Draw and ink the fox face centered on the page using 0.5 fineliner. Decide the background area around it and leave a small border of clean paper. Step 2: Add repeated circles or dot clusters behind the fox, using a consistent size. Shade the fox muzzle and add a few cheek strokes with 2B pencil, keeping the pattern mostly unshaded.
Pro tipStagger the circles slightly so it doesn’t look like a grid; random spacing looks more organic.
AvoidAvoid dark pattern dots behind the eyes; it steals attention from the face.
30. Fox with Hanging Crescent Moon Tail Arc
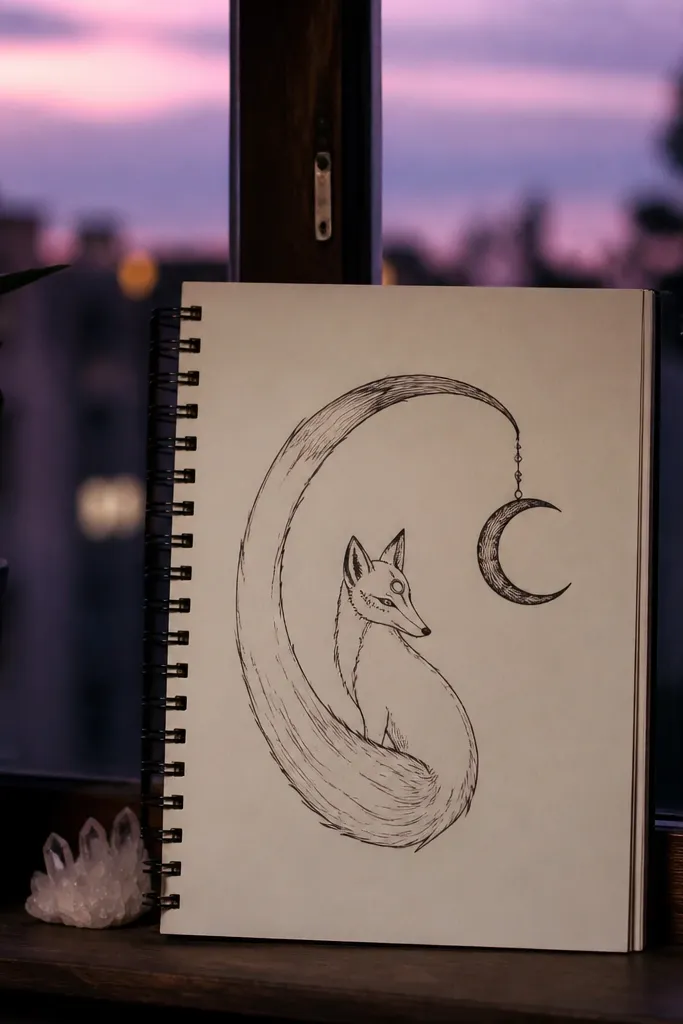
This design is clever because the tail arc becomes a visual shape, like a crescent moon. You draw a curled tail that forms a clean curve, then place a simple face at the head end. It’s low-maintenance because you’re using geometry to create both silhouette and drama. The crescent tail shape also frames the fox face so you don’t need a complex background. It looks good even with minimal shading.
Step 1: Sketch the head and a simple body curve, then draw a tail that curves into a crescent shape behind the fox. Keep the crescent smooth and thick. Step 2: Ink the outline with 0.5 fineliner, then add the eyes and a small nose triangle. Shade only the underside of the tail and under the muzzle with 2B pencil, leaving the top edge lighter.
Pro tipMake the crescent tail slightly thicker on the outside edge; it reads as a single bold shape.
AvoidAvoid adding fur texture along the whole crescent; just shade the underside.



