
1. Oval Shell Tile Turtle
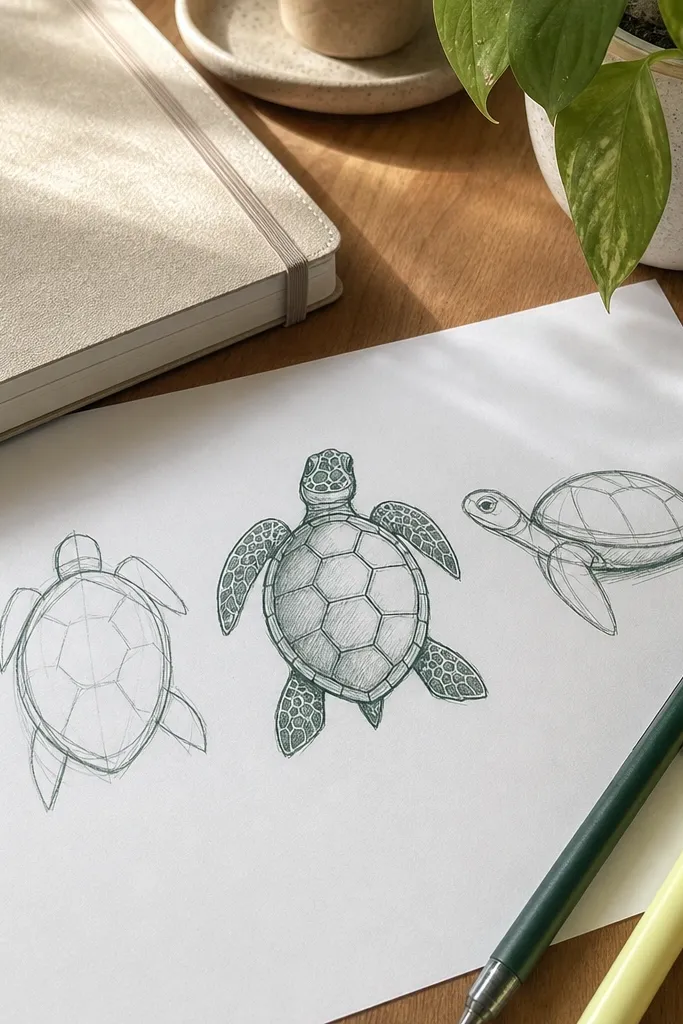
Step 1: Draw an oval for the shell and add 2 center guidelines that curve slightly with the oval. Step 2: Add 5-7 square tiles by drawing short straight segments between the guidelines, keeping them the same size. Step 3: Outline the head and legs with simple rounded shapes, then ink over the shell tile borders and erase pencil lines.
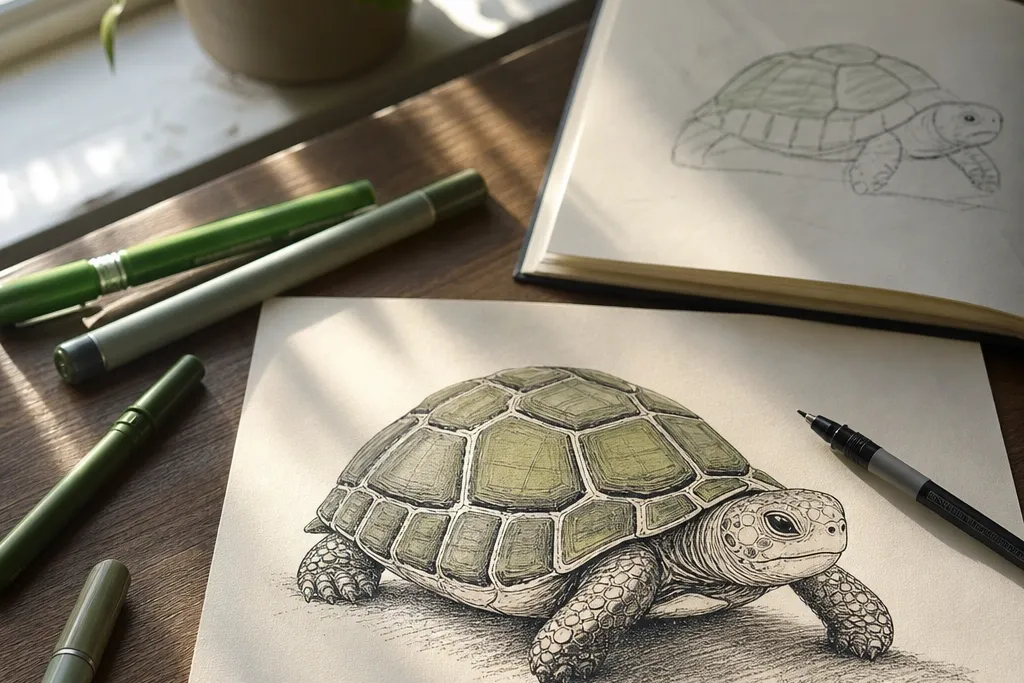
This idea looks polished because the shell pattern does most of the work. Start with a smooth oval shell, then divide it into small square tiles with straight-ish lines that follow the curve. The result reads clean even if you skip shading, because the pattern creates contrast and structure. Use a darker pen for the tile borders and keep the head and legs minimal. It’s a strong choice for a “low-maintenance Turtle Drawing” because you can repeat the tile grid across many turtles without redrawing complex shapes.
AvoidDon’t make the tiles perfectly flat — the shell curve should bend the grid or it will look sticker-like.
Pro tipPress the pen lightly on the first pass, then go back for darker borders once everything sits right.
2. Dot-Shadow Shell Turtle
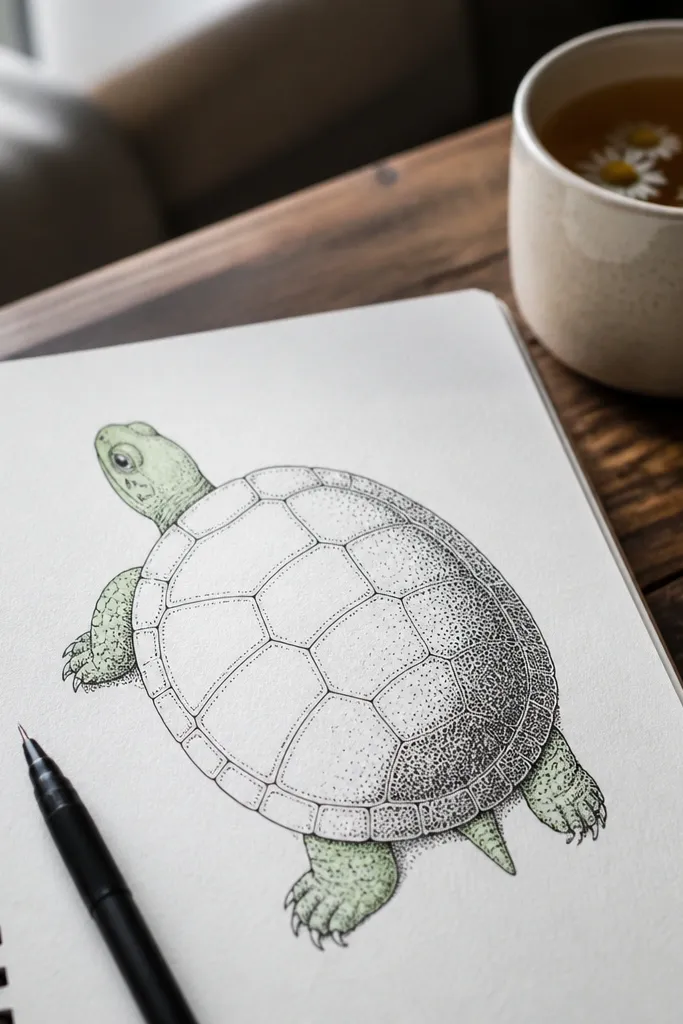
Step 1: Sketch the shell as an oval and add a single curved guideline showing where the “shadow” will sit. Step 2: Place dots in a tight row along that curve, then add a second looser row farther from the edge. Step 3: Ink your outline, then add a simple eye dot and a tiny highlight mark on the eye.
Dot shading is fast and looks intentional, which is why it belongs in a low-effort turtle series. You’re not rendering gradients; you’re placing a dotted shadow band along one side of the shell. The dots make the texture visible in photos without making the drawing messy. Keep the rest of the shell mostly white or lightly colored. This style is great if you want a turtle that looks finished even when you only spend 10-15 minutes.
AvoidDon’t scatter dots all over the shell — keep them in one band so the turtle stays readable.
Pro tipUse a 0.1 or 0.2 fineliner for dot rows so you don’t get thick blobs.
3. Geometric Leaf Frame Turtle
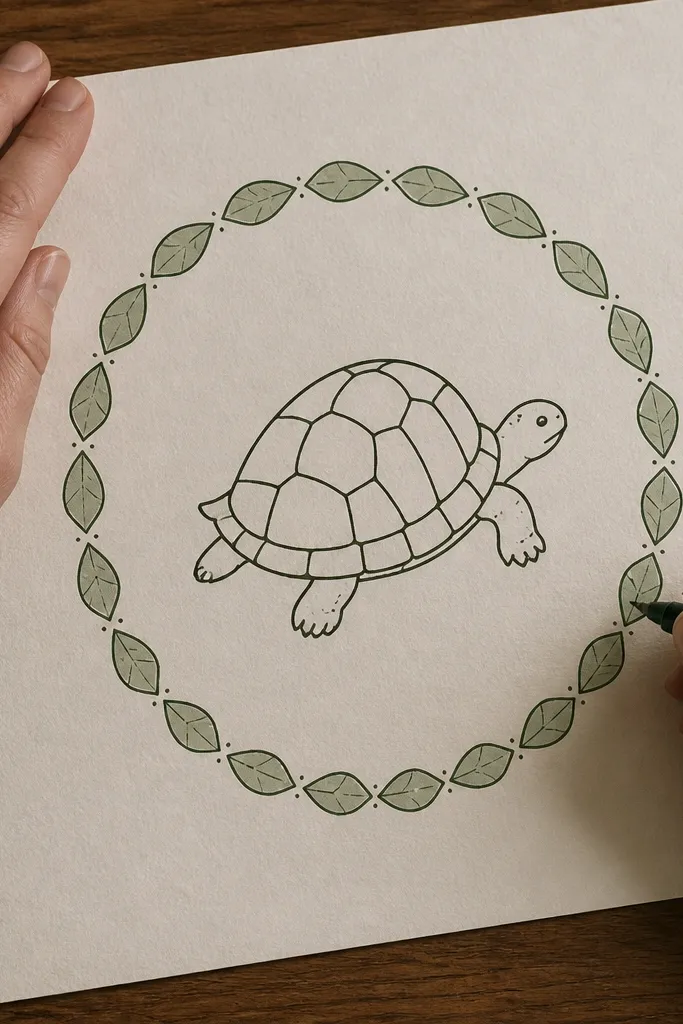
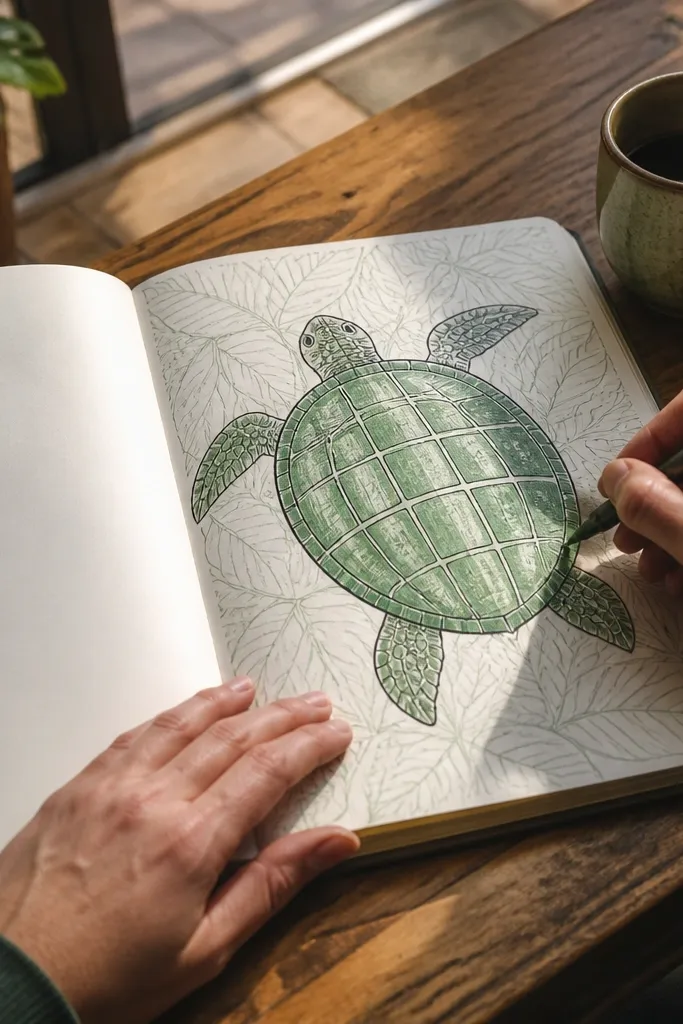
Step 1: Draw a medium oval shell and simple head/leg shapes, then add one curved shadow band. Step 2: Around the turtle, draw 10-14 leaf shapes in a circle, each leaf slightly rotated. Step 3: Outline with your main pen, then lightly erase pencil and darken the turtle’s outer contour.
This one looks aesthetic because it uses a frame, not complicated shading. Draw a turtle in the center, then surround it with a ring of repeating leaf shapes that echo the shell’s curve. The leaves create a natural border for your photo and hide small drawing unevenness. Keep the turtle itself simple: clean outline, one shadow band on the shell, and one highlight on the eye. It’s a low-maintenance Turtle Drawing because the frame repeats and you can finish it quickly while still looking like you planned it.
AvoidDon’t overlap the leaves too much; gaps keep the frame crisp instead of muddy.
Pro tipMake the leaf tips point outward — that gives the frame energy in photos.
4. Bold Outline Minimal Turtle
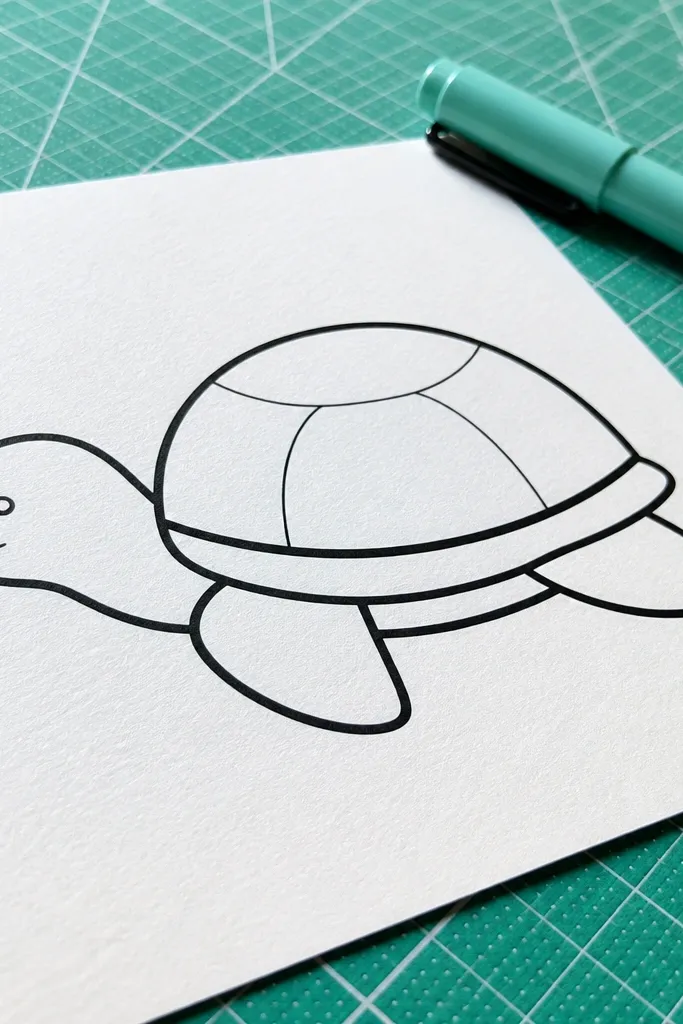
Step 1: Sketch a shell oval, head circle, and four leg arcs lightly in pencil. Step 2: Ink the outer contour with a thick pen, then add 3 shell section lines with a thinner pen. Step 3: Add an eye dot and a tiny smile line, then erase pencil lines once ink is dry.
Thick outlines make even a simple turtle look intentional. This style is all about contrast: use a 0.8 or 1.0 pen for the outer contour and a 0.3 pen only for small details like the eye and shell seams. The shell can have just 3-4 curved sections, no shading. It’s perfect when you want a quick, photogenic drawing that looks graphic on a phone and stands out on a page.
AvoidDon’t add lots of interior details — thick outline drawings look best when the interior stays clean.
Pro tipOutline in one continuous motion where possible to keep line weight consistent.
5. Sunlit Shell Gradient Blocks
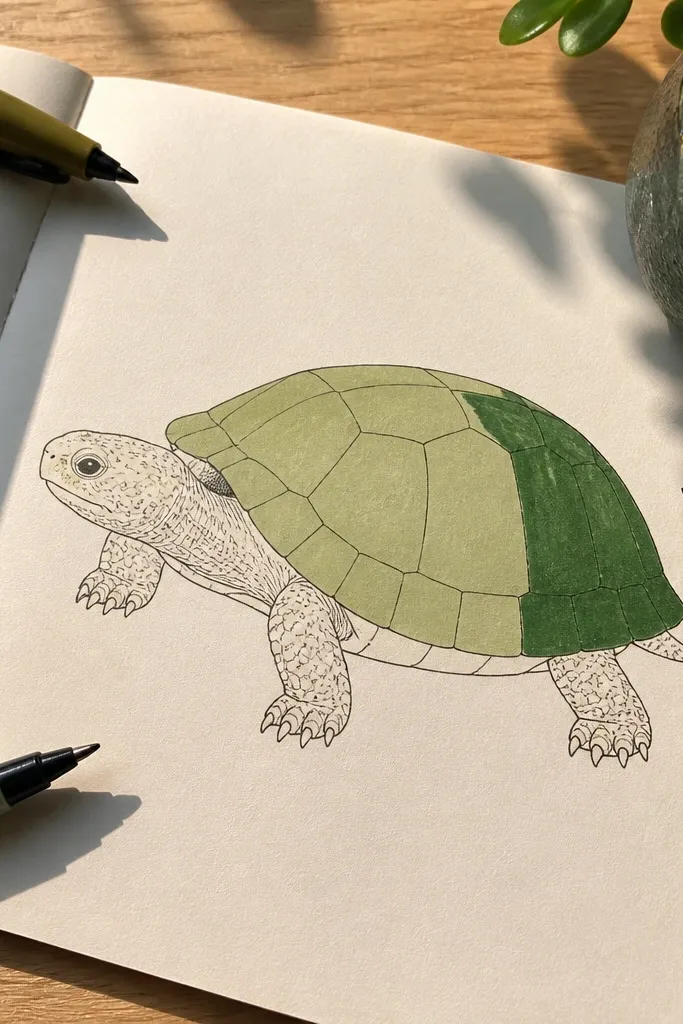
Color blocks look good because they create smooth-looking depth without real blending. Use 2-3 tones for the shell: a base green, a lighter front area, and a darker side band. Keep the head and legs mostly uncolored or lightly tinted. This style is low-maintenance because you can fill shapes with markers or colored pencils without trying to render realistic texture. The result photographs bright and clean.
Step 1: Sketch the shell oval and divide it into 2-3 regions with light pencil lines. Step 2: Fill the front region with the light tone, the center with base tone, and the far side with the dark band. Step 3: Outline with a fineliner and add a small highlight on the eye.
Use a lighter tone first, then layer the darker band so you don’t stain the highlight area.
Don’t color over the shell outline — leave the outline crisp so the turtle reads instantly.
6. Chalk Pastel Turtle on Gray Paper
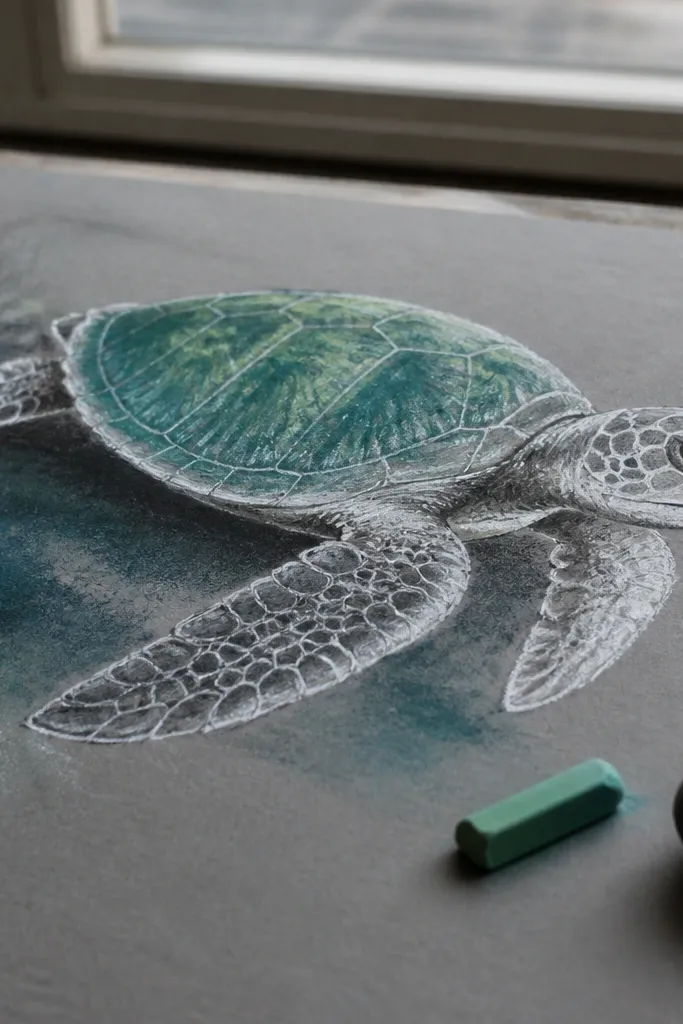
Step 1: Lightly sketch the shell oval and head/legs with a mid-tone pastel. Step 2: Add shell section lines and shade one side with gentle strokes, then blend with a fingertip or tissue. Step 3: Use white pastel or a gel pen for a highlight line on the shell edge and a bright eye dot.
Gray paper makes your turtle pop without heavy shading. Use a white pastel or gel pen for highlights and a mid-tone green or blue for the shell shape. Draw simple shell sections, then add a few soft smudges along one side. The texture of pastel looks artsy and forgiving if your lines aren’t perfect. This is one of the most low-maintenance Turtle Drawing options because the paper does the contrast work for you.
AvoidDon’t over-smudge the whole shell; keep shading to one side for a cleaner look.
Pro tipFix pastel with a light spray from a distance if you plan to handle the page.
7. Tiny Turtle on Big Leaf
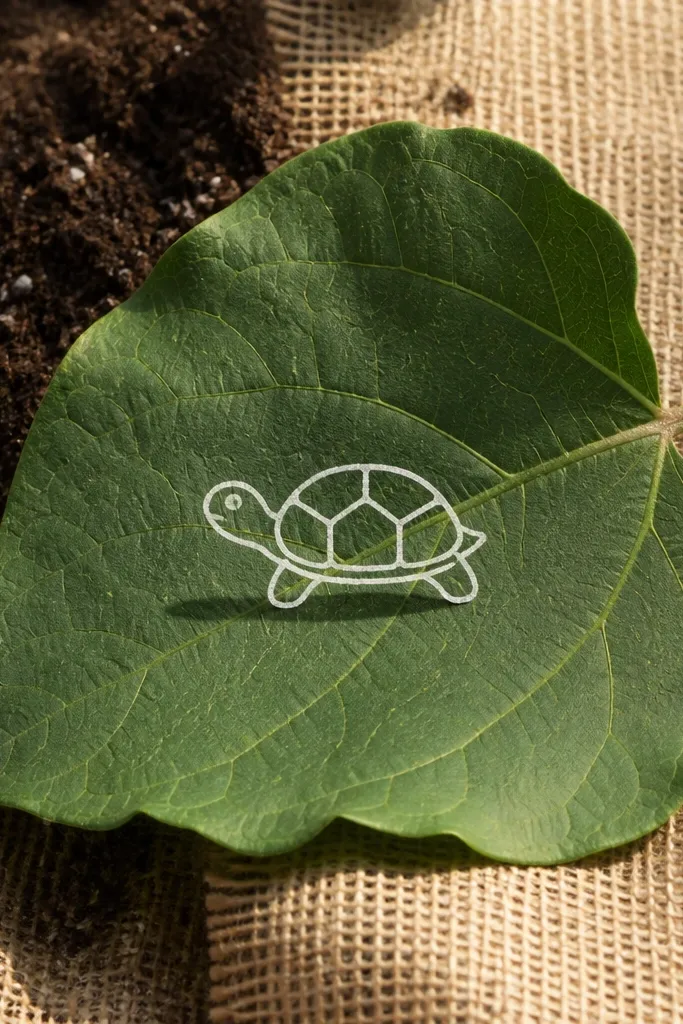
Step 1: Draw a large leaf outline that fills the page, with a center vein and two side veins. Step 2: Sketch a small turtle perched near the leaf stem, keeping the shell oval compact. Step 3: Add a soft shadow under the shell with a gray pencil or light marker, then ink the turtle outline.
This layout is photogenic because it uses scale. Put a tiny turtle on a single big leaf and keep the background empty. The leaf becomes your composition anchor, while the turtle can stay simple: outline, 3 shell sections, and one shadow under the shell. The negative space makes the drawing look intentional and modern. It’s low-maintenance Turtle Drawing because you do one big shape well and don’t need a full scene.
AvoidDon’t overcrowd the leaf with tiny textures; one or two veins is enough.
Pro tipMake the leaf vein thicker than the turtle outlines so the composition hierarchy feels clear.
8. Manga-Style Turtle Face Close Composition
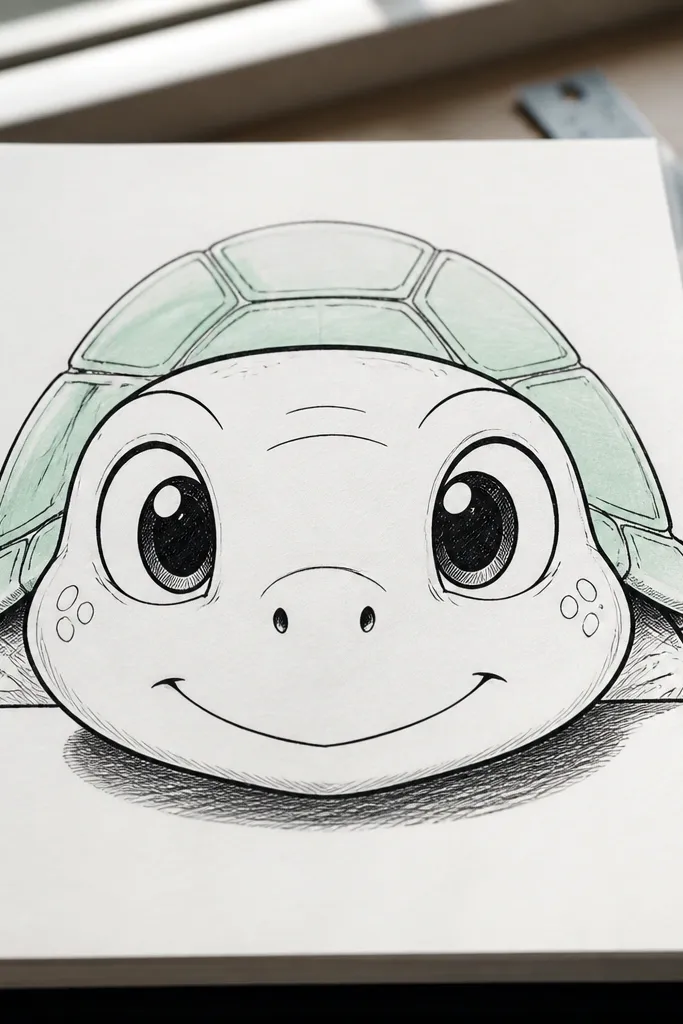
Big eyes make turtles look cute instantly, and this style uses that without adding complexity. Focus on a front-facing head with a wide eye and small shell visible behind it. Keep the shell to 4 simple arcs and add one bold shadow under the head. Manga-style lines look clean in photos, and you can finish this quickly because you’re not drawing a full detailed body.
Step 1: Draw a large head circle with a slight tilt, then add a small mouth curve. Step 2: Place one big eye with a dark pupil and a white highlight dot. Step 3: Sketch a partial shell oval behind the head with 4 curved section lines, then ink everything and erase pencil.
Use a ruler for the eye highlight edges only if your pen wobbles; otherwise freehand looks better.
Don’t add lots of wrinkles on the head; one cheek line is enough.
9. Shell Chevron Pattern Turtle
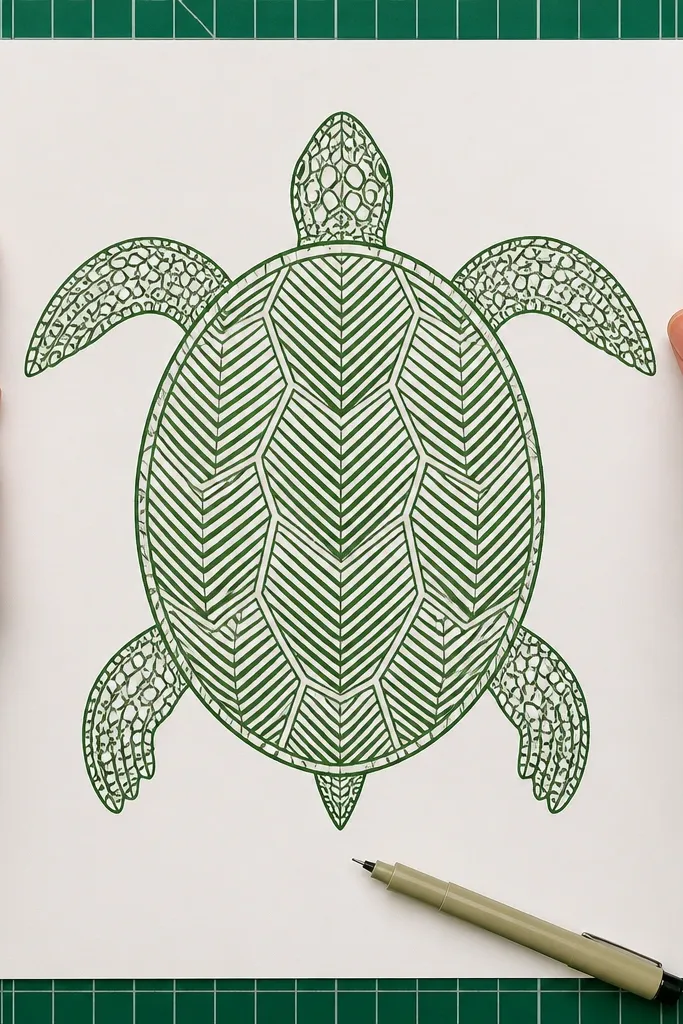
Chevron stripes look crisp and structured, which helps your turtle read even at small sizes. You’re drawing repeated V shapes inside the shell sections, so it’s consistent and fast. Keep the chevrons slightly curved to match the shell oval. This is visually striking because the pattern creates movement and contrast without realistic shading.
Step 1: Sketch the shell oval and divide it into 3 main sections with a light line. Step 2: In each section, draw chevrons by repeating V shapes that get slightly smaller toward the edge. Step 3: Ink the shell pattern, then add a simple head and legs outline with minimal interior lines.
Start each chevron row from the same edge of the shell so the pattern aligns.
Don’t make the chevrons all the same angle across the whole shell; curvature makes it look natural.
10. Watercolor Wash Turtle with Ink Outline
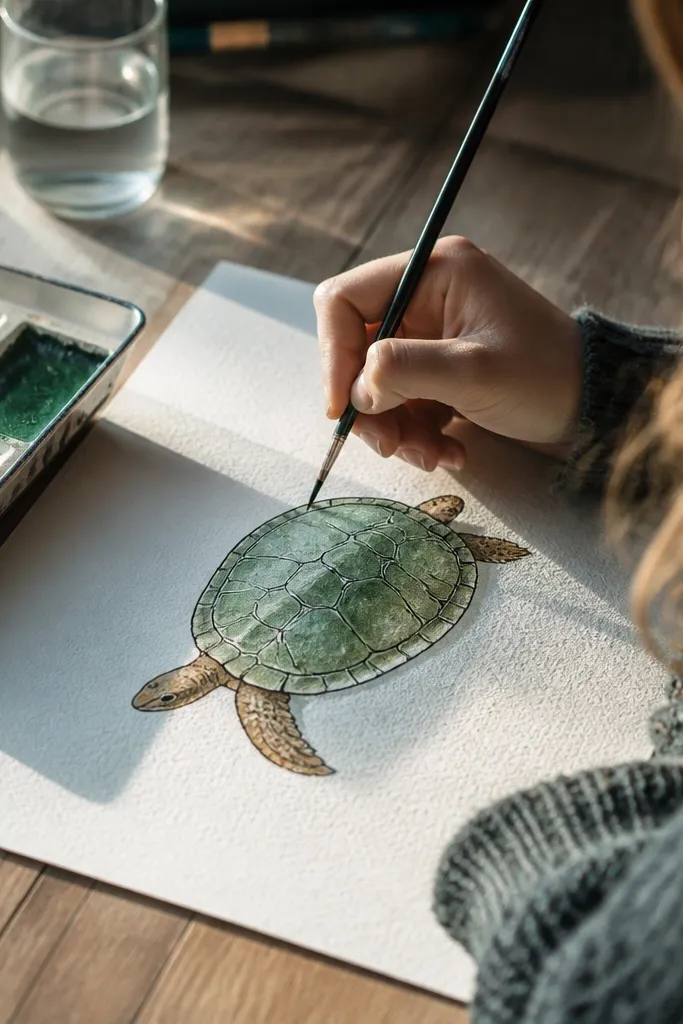
Watercolor wash makes your turtle look artsy with almost zero rendering. Paint the shell as a single loose oval wash, then let edges dry naturally for texture. Add a darker ink outline after the wash dries so the turtle looks sharp. You only need 2 colors for the shell and one for the head. This is low-maintenance because you’re embracing imperfect edges while keeping the shape clean.
Step 1: Lightly sketch the turtle in pencil and outline lightly with a fineliner. Step 2: Wet the shell area and apply one base watercolor wash, then drop in a darker tone on one side. Step 3: Once dry, add shell section lines with a thin pen and a highlight dot on the eye.
Use thicker paper so the wash doesn’t buckle and smear your outline.
Don’t ink before the watercolor — you’ll get bleeding lines.
11. Patterned Shell with 5 Circles
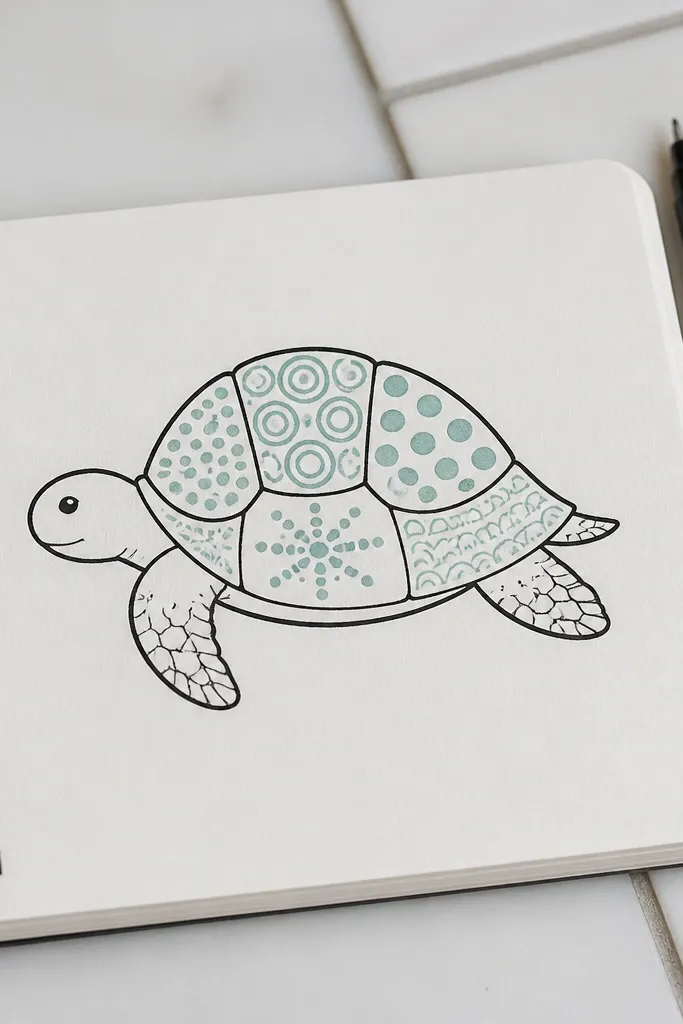
Step 1: Sketch the shell oval and divide it into 5 sections with light lines. Step 2: In each section, draw a circle motif — use a compass or trace a bottle cap edge for consistent sizes. Step 3: Ink patterns, then add legs and head with minimal linework and a single shadow under the shell.
This works because it’s graphic and easy to repeat. Each shell section gets one circle motif: a solid dot, ring, small filled circle, star-like dot cluster, or tiny scallops. You get visual interest without shading. Keep the turtle outline simple so the patterns stay the focus. It’s low-maintenance Turtle Drawing because the pattern set is small, and you can mix them across 30 turtles without getting lost.
AvoidDon’t add tiny extra symbols in every section; one motif per section keeps it clean.
Pro tipPick one circle size and reuse it across sections to keep the look cohesive.
12. Minimal Line Turtle with One Shadow Triangle
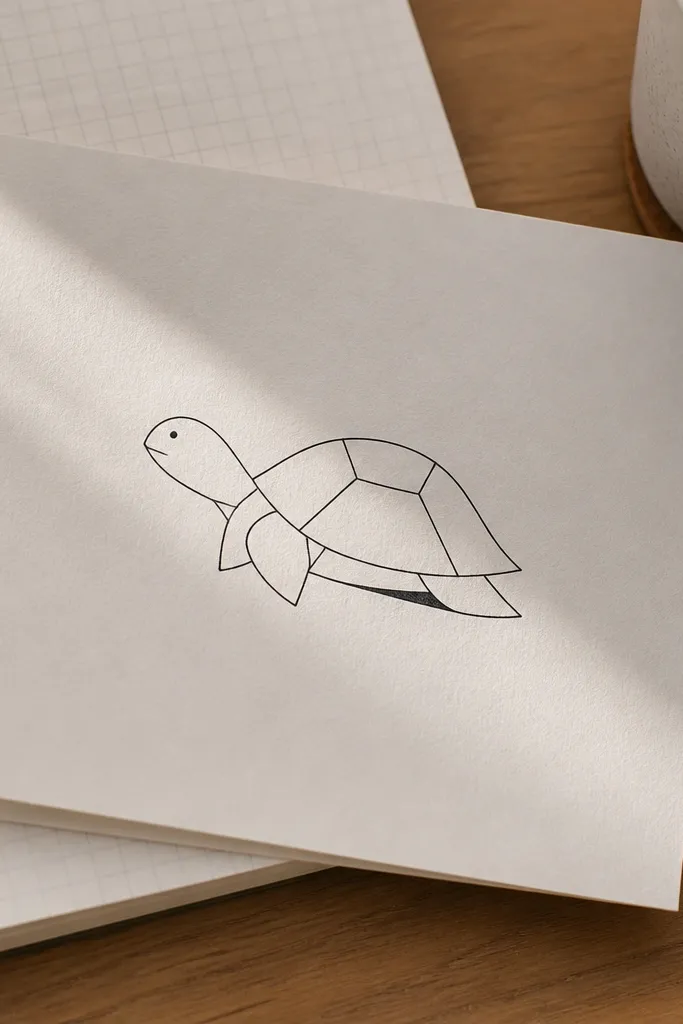
This is a clean, modern look built for speed. You draw the turtle with thin lines, then add one single shadow shape under the shell — a triangle or wedge. That one dark block gives depth instantly and makes the turtle feel grounded. It’s low-maintenance because you’re not shading multiple areas, and the design still photographs well on white paper.
Step 1: Sketch shell oval and head/legs with thin pencil lines, then ink with a 0.3 fineliner. Step 2: Add a single shadow triangle beneath the shell edge using a 0.5 pen or a soft pencil. Step 3: Add a small highlight dot on the eye and erase pencil once ink is set.
Keep the shadow shape consistent width across drawings so your series looks intentional.
Don’t add extra shading around the legs; the single shadow is the whole point.
13. Pastel Stripe Shell Turtle
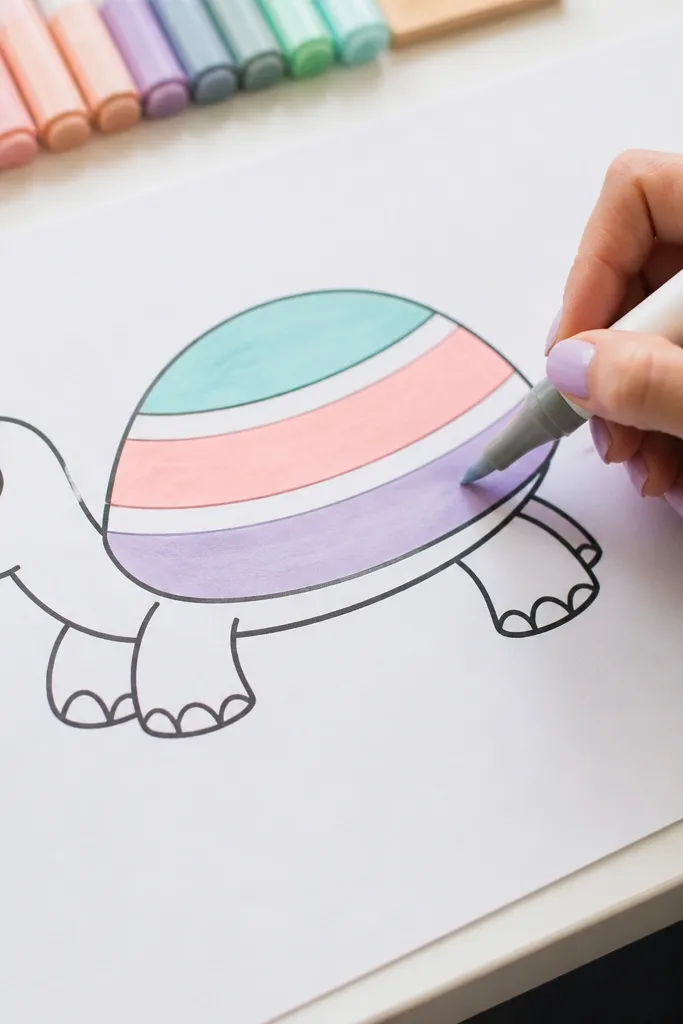
Step 1: Draw the shell oval and lightly mark 3 stripe bands with pencil. Step 2: Color each band with one pastel tone, then leave the gaps uncolored for contrast. Step 3: Outline turtle and add a tiny eye highlight with a white gel pen.
Stripes look cute because they read clearly even when the turtle is small in a photo. Use 3 horizontal or diagonal pastel stripes across the shell, leaving thin white gaps. Add a light shadow on the striped side only. This style is low-maintenance Turtle Drawing because it uses broad color fills, not detailed texture.
AvoidDon’t blend the stripes into each other; the white gaps are what make it look crisp.
Pro tipColor between pencil guide lines first, then erase guides after the ink outline is done.
14. Turtle Carrying a Little Mushroom
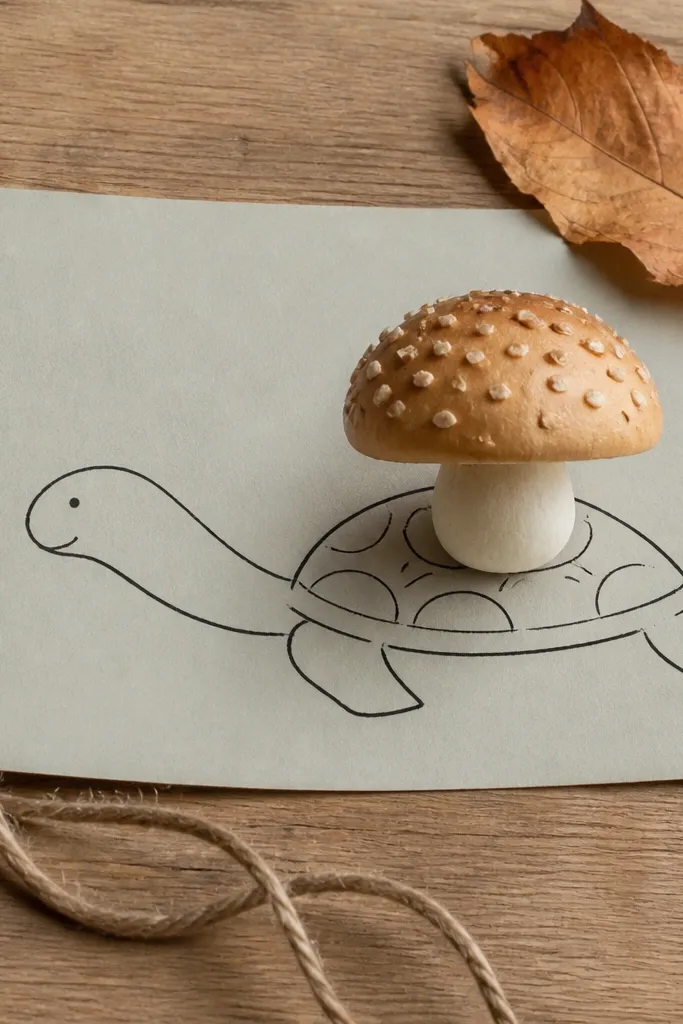
Add one prop and your turtle becomes a story without turning into a complex scene. Place a small mushroom on top of the shell with a simple cap and dots, then keep the turtle body minimal. The mushroom gives a clear focal point for photos and makes the drawing feel playful. It’s low-maintenance Turtle Drawing because you’re drawing two simple shapes well: the turtle and one mushroom.
Step 1: Sketch the shell oval and draw a small mushroom cap shape on the shell top center. Step 2: Add mushroom details — a stem and 4-6 cap dots — then ink the outlines. Step 3: Finish the turtle with 3 shell section lines, simple legs, and one shadow beneath the shell.
Put the mushroom slightly tilted so it looks more dynamic than perfectly upright.
Don’t add a full forest background — the mushroom is the only extra element you need.
15. Kawaii Shell with Heart Tiles
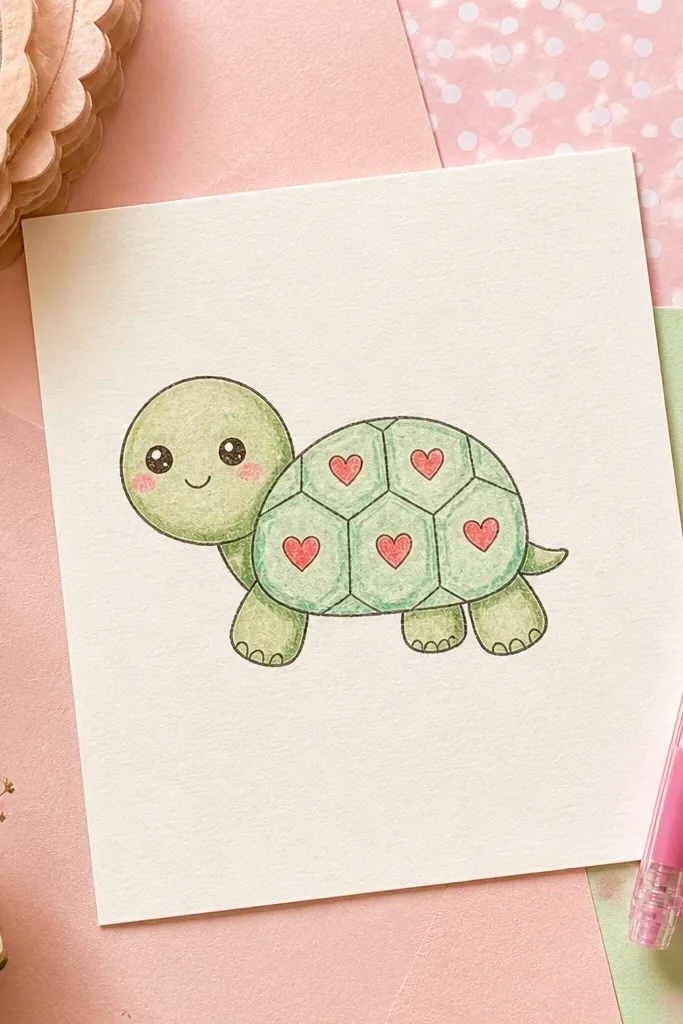
Step 1: Sketch a shell oval and divide it into 6-7 sections using light pencil arcs. Step 2: In each section, draw a small heart with a consistent size and line thickness. Step 3: Ink the outer turtle contour, then add the heart details and finish with a dot eye and tiny blush cheek dots.
Heart tiles are cute and photogenic, and they’re easier than realistic shading. Divide the shell into 6-7 rounded sections, then draw a tiny heart in each section. Keep the turtle’s head and legs chubby with round shapes. The hearts create consistent visual rhythm, so the drawing looks complete even if the legs are simple. This is low-maintenance Turtle Drawing because you’re repeating one tiny motif over and over.
AvoidDon’t make the hearts uneven in size; one size range keeps the turtle clean.
Pro tipUse the same heart curve for every section; consistency is what makes it look “designed.”
16. Shell Study with 3 Values Only
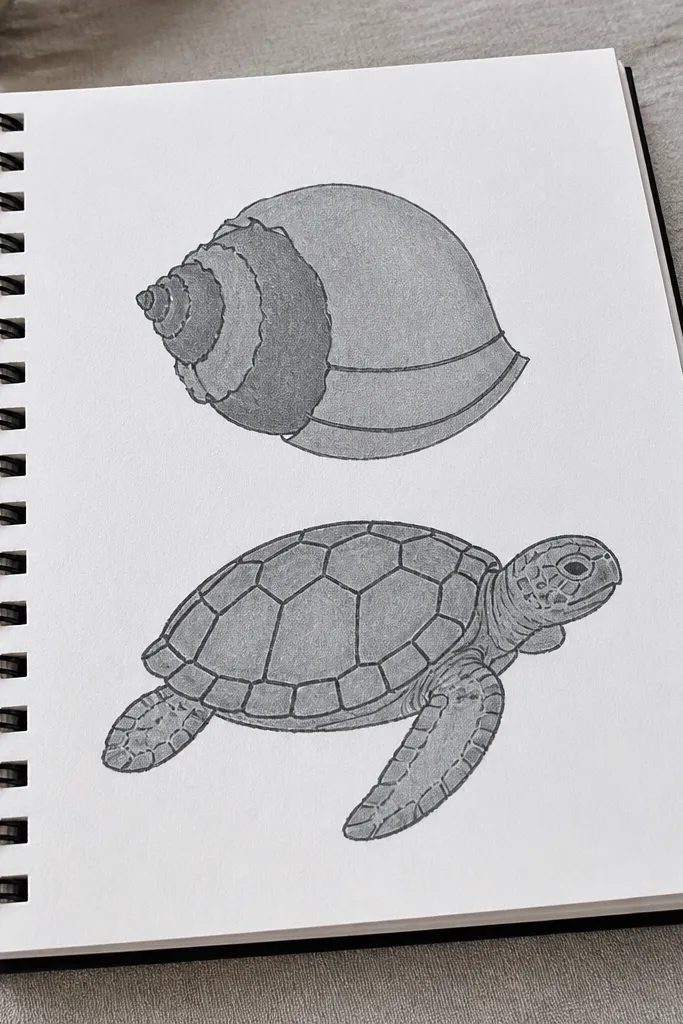
Step 1: Sketch the turtle and outline shell sections lightly. Step 2: Shade the entire shell with mid tone using a soft pencil or light marker, leaving the highlight edge lighter. Step 3: Add a dark band on one side and darken the shell section lines, then erase pencil lines on the head.
This idea trains your eye and gives you a clean look fast. You pick three values: light, mid, and dark. The shell gets mid tone overall, then you add a dark band and a few dark lines for section borders. The result looks like a real drawing, not a doodle, without hours of blending. It’s low-maintenance Turtle Drawing because the value plan is fixed.
AvoidDon’t add random dark spots; stick to one dark band and section lines.
Pro tipChoose one tool for values — either pencil or marker — so the texture stays consistent.
17. Sticker-Style Turtle Outline + Accent Color
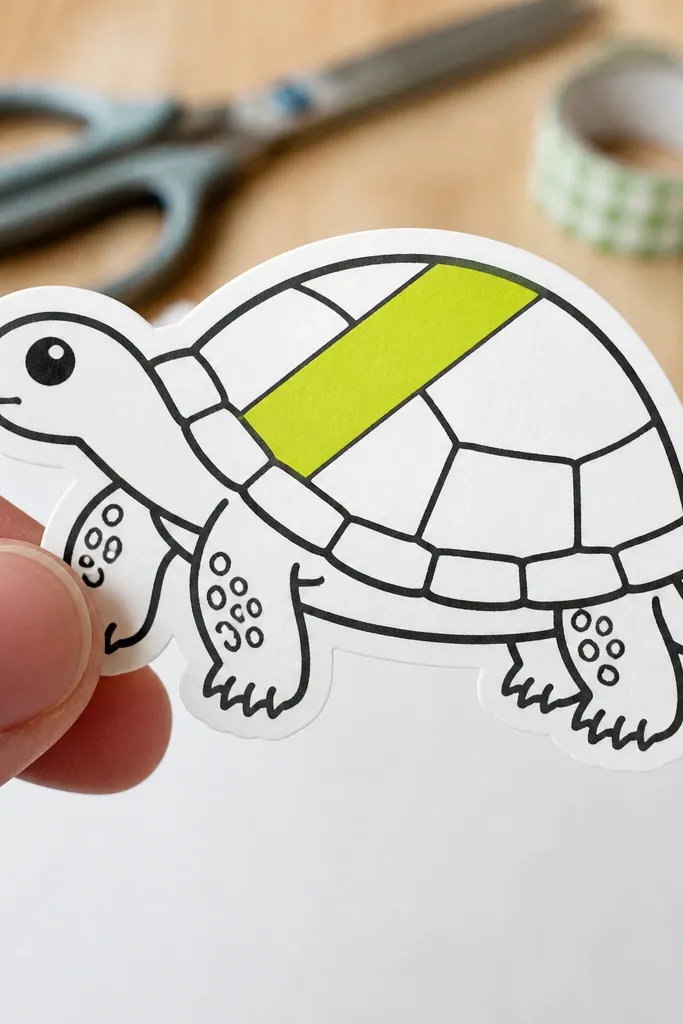
Sticker style is a cheat code for looking good quickly. You draw a crisp black outline, then color only one accent area on the shell — like a diagonal stripe or a front half. Everything else stays white. That contrast makes the turtle pop in photos and keeps the work low. This is low-maintenance Turtle Drawing because you’re not filling the entire body, just one intentional color hit.
Step 1: Sketch the turtle in pencil and ink with a 0.5 or 0.8 pen for the outer contour. Step 2: Color one shell accent shape with a marker or colored pencil, keeping edges inside the outline. Step 3: Add a small eye highlight and a thin shadow line under the shell to ground it.
Let the accent shape touch a shell section border — it looks more designed than floating color.
Don’t color random patches all over; one accent area reads best.
18. Turtle with Geode Shell Dots
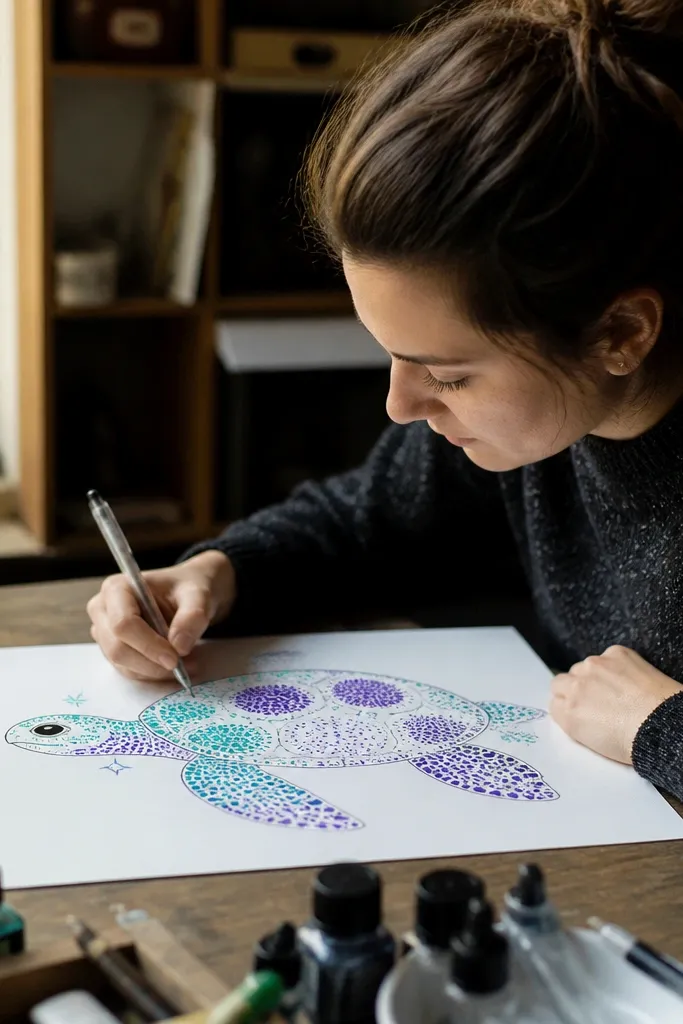
Geode dots look fancy without any real “gem” rendering. You draw a shell oval, then cluster small dots in a few “crystal” zones, leaving blank space between clusters. Add a few tiny line marks for sparkle. Use one bright gel pen highlight for the eye and a couple of dot clusters. It’s low-maintenance Turtle Drawing because you’re repeating dot clusters instead of doing texture painting.
Step 1: Sketch the shell oval and add 3-4 irregular section boundaries with pencil. Step 2: In two or three sections, draw clustered dots of varying density, then add 4-6 tiny sparkle lines with a 0.1 pen. Step 3: Ink the outline, then add a bright highlight dot with a white gel pen.
Keep the densest dot clusters near the center of the shell for the most “depth” look.
Don’t fill the whole shell with dots; clusters plus blank space are what keep it photogenic.
19. Zen Shell with One Continuous Spiral
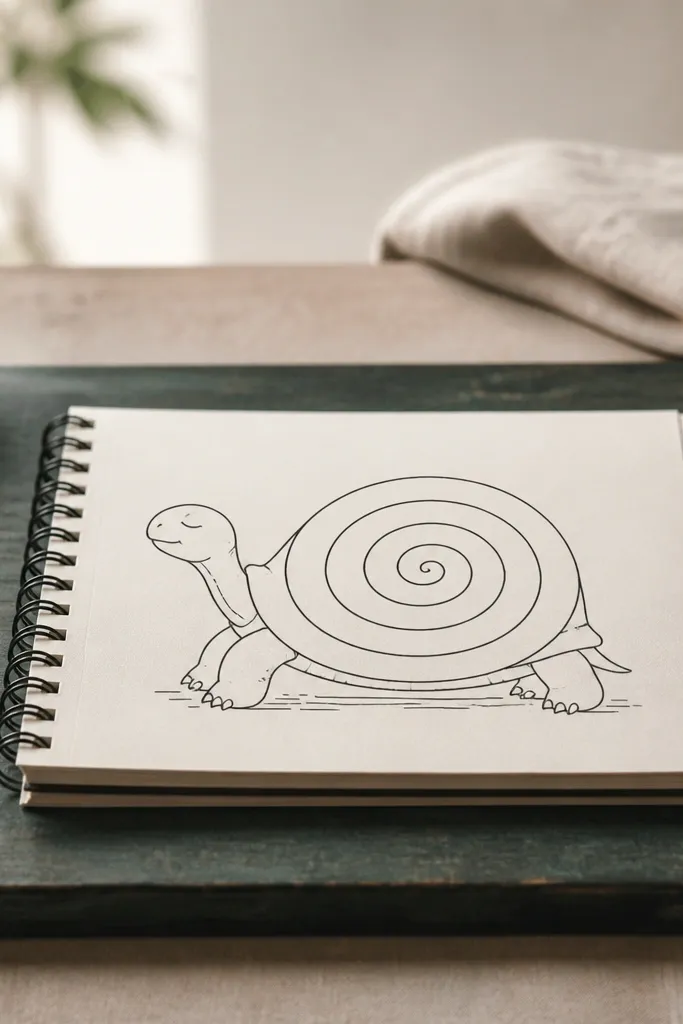
Step 1: Sketch the shell oval and lightly mark a spiral start point near the top. Step 2: Draw one continuous spiral line that follows the oval curve, keeping spacing consistent. Step 3: Ink the spiral and outer outline, then add a simple head and legs with minimal lines.
A single spiral gives your turtle a calm, artistic vibe and makes the shell instantly recognizable. You draw the spiral starting near the shell edge and curling toward the center, with section lines kept minimal. The spiral adds motion, so you don’t need heavy shading. This is low-maintenance Turtle Drawing because you’re doing one repeating curve instead of dozens of small details.
AvoidDon’t add extra shell patterns alongside the spiral; it will feel crowded.
Pro tipUse a smooth pen or pencil and go slow on the spiral; shaky spacing ruins the look.
20. Turtle in a Circle Badge
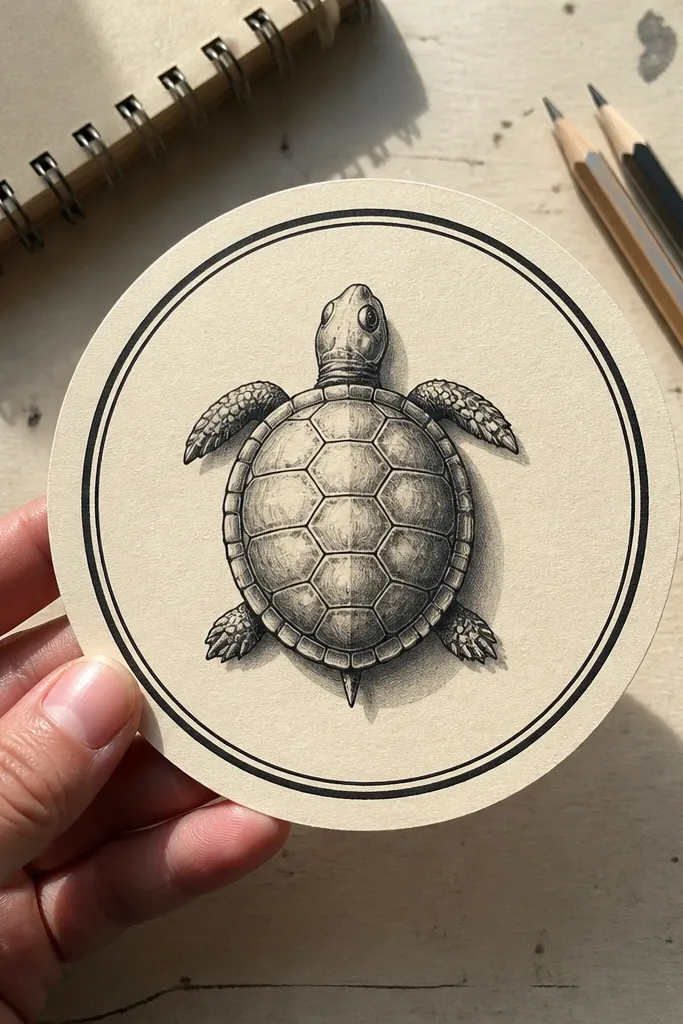
Step 1: Draw a circle with a light guideline, then sketch the turtle in the center. Step 2: Add a thick outer ring and a thin inner ring, then ink the turtle and ring. Step 3: Erase pencil and add small accent dots around the turtle inside the badge for balance.
Badges look great because they frame the subject and make it feel like a finished sticker or label. Draw a turtle centered in a circle, then add a thick outer ring and a thin inner ring. Keep the turtle details simple: shell sections, one small shadow under the head, and a bright eye highlight. The circle border hides minor line inconsistencies and gives you a strong photo shape. It’s low-maintenance Turtle Drawing because you only need to make the turtle readable inside the frame.
AvoidDon’t put tiny details all around the badge border; focus them near the turtle.
Pro tipKeep the turtle slightly lower than center so the badge feels stable in a photo.
21. Shell with Water Ripples
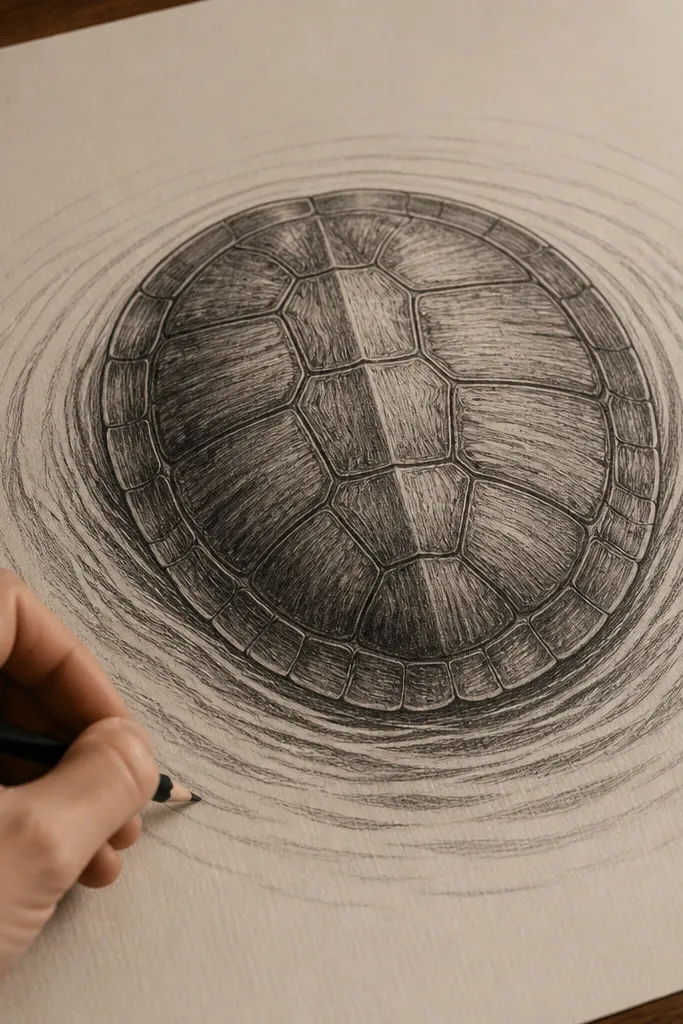
Step 1: Sketch the shell oval and lightly mark 6-7 curved ripple lines. Step 2: Draw each ripple line so it follows the oval curve and slightly changes thickness near the edge. Step 3: Ink the shell ripples, then outline the head and legs with simple arcs and add one eye highlight.
Ripple lines create a sense of movement, and that gives your turtle energy even without shading. Draw the shell as an oval, then add curved ripple lines that wrap around the shell edge. Keep the ripples evenly spaced and stop them before they hit the shell outline, leaving a clean border. This is low-maintenance Turtle Drawing because the pattern is repetitive, and the turtle looks more “designed” than a plain shell.
AvoidDon’t cross ripples randomly; crossing lines make the pattern look messy fast.
Pro tipUse a single direction for ripples (clockwise or counterclockwise) across the whole shell.
22. One-Tone Green Marker Turtle
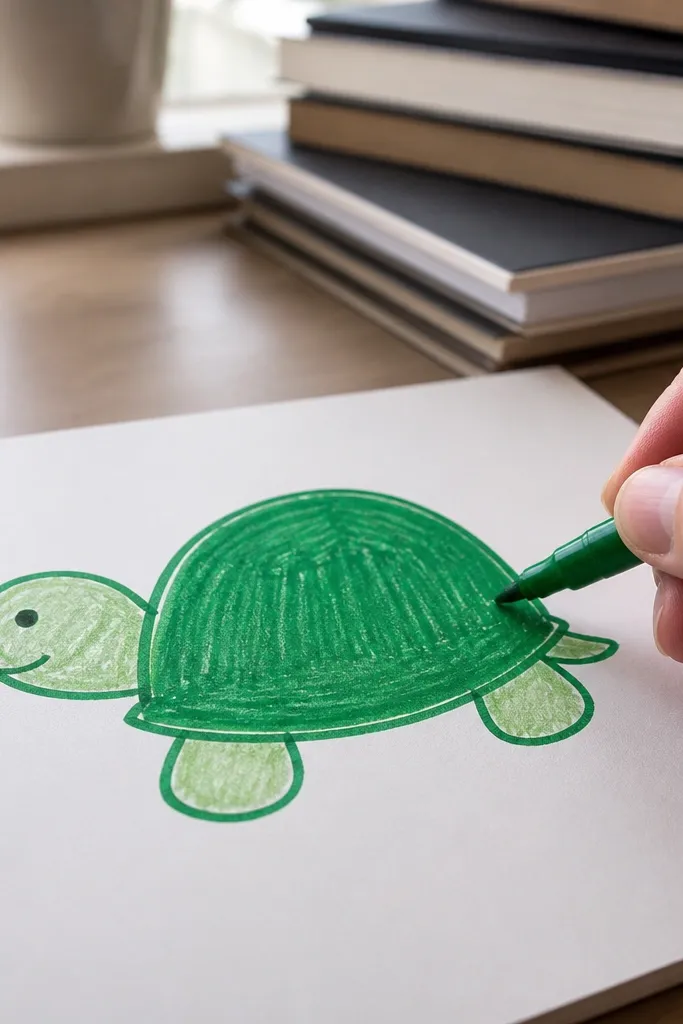
Step 1: Sketch the turtle in pencil and ink the outline with a 0.5 pen. Step 2: Fill the shell with one green marker, leaving small uncolored highlights along the top edge. Step 3: Add a lighter shade or pencil shadow on the underside and finish with a crisp eye dot.
One-tone coloring looks clean when your outline is sharp and your internal lines are minimal. Use one green marker for the shell and one lighter green or pencil for the head shadow. The contrast comes from line weight, not complex shading. This style is low-maintenance Turtle Drawing because it keeps your palette small and your filling simple.
AvoidDon’t press hard with the marker; thick ink pools ruin the clean look.
Pro tipColor the shell in two passes — light fill first, then a second pass on the shadow side.
23. Monochrome Ink Turtle with Crosshatch Only
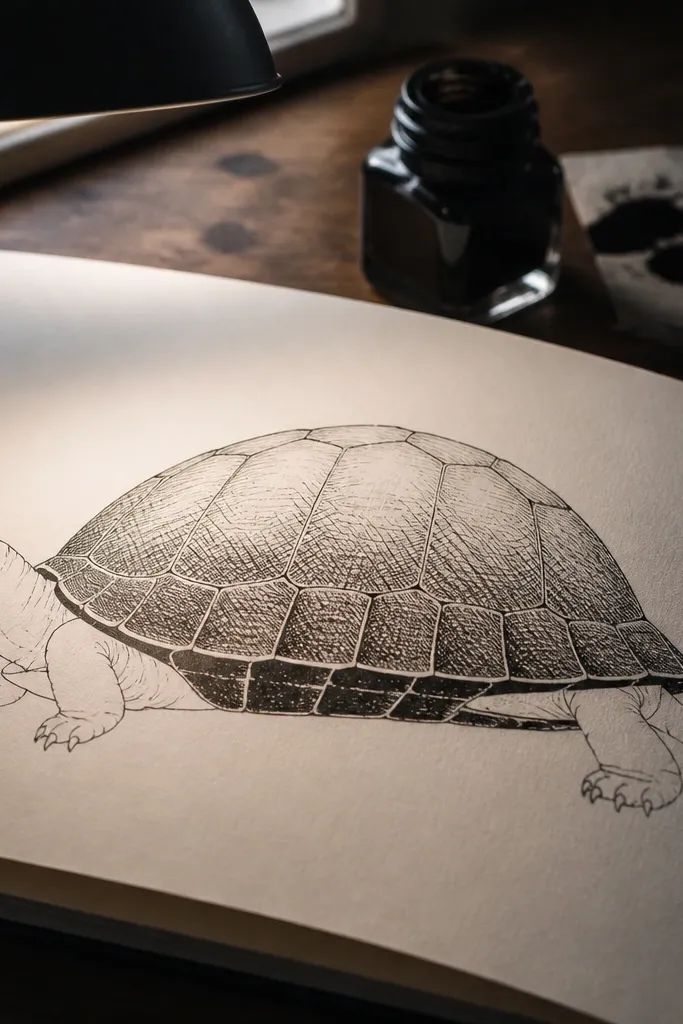
Crosshatch gives you real depth without needing grayscale blending. The trick is to confine crosshatching to the same shell side so it looks controlled. Keep the head and legs mostly outline-only. Use a dense hatch near the bottom edge and lighter hatch near the top. This is low-maintenance Turtle Drawing because you’re repeating one shading pattern in a limited area.
Step 1: Sketch the turtle and ink the outline with a 0.5 pen. Step 2: Choose one shadow side and add diagonal crosshatch lines, then add a second direction only in the darkest strip. Step 3: Add shell section lines lightly, then erase pencil once ink is dry.
Use shorter hatch strokes near the edge of the shell to match its curve.
Don’t crosshatch the entire shell evenly; it looks flat and overworked.
24. Turtle Holding a Heart Balloon
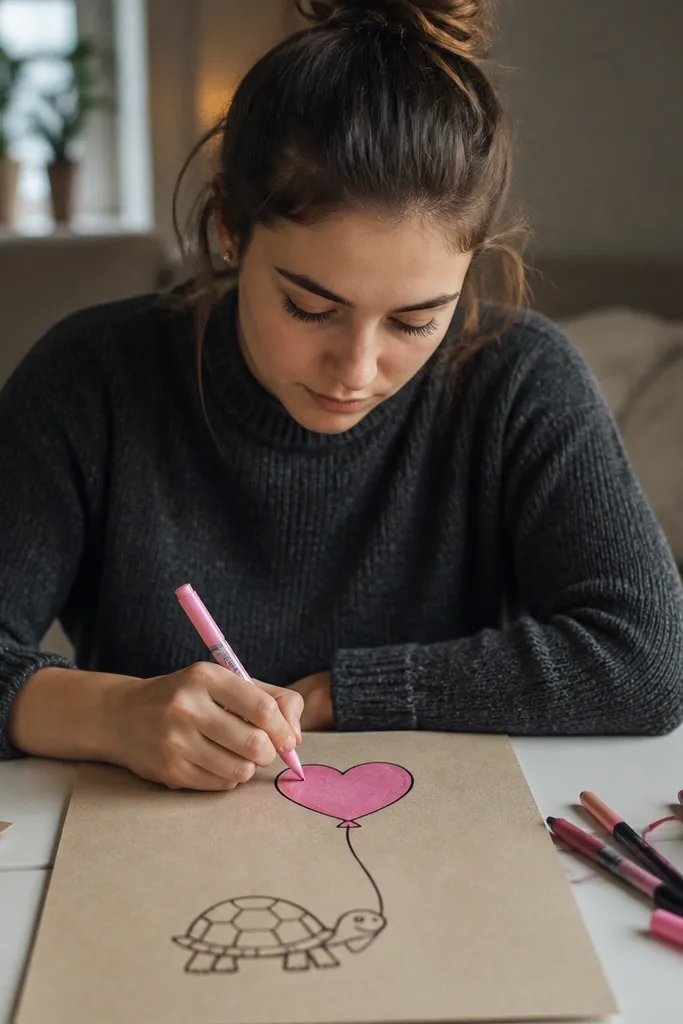
This idea is cute and photogenic because the balloon creates a clear vertical focal point. The turtle stays simple, and the balloon does the visual work with a heart shape. Add a string line from the balloon to the turtle’s front, plus a tiny tail curl on the balloon. It’s low-maintenance Turtle Drawing because it’s basically a turtle outline plus one big shape you can draw quickly.
Step 1: Draw the turtle shell and head in pencil, then add a heart balloon shape above the shell. Step 2: Add the balloon string as two parallel lines curving slightly toward the turtle’s front. Step 3: Ink everything and fill the balloon with a single color, then add a highlight dot on the eye.
Make the heart balloon slightly off-center — perfect symmetry can look stiff.
Don’t add multiple balloons or extra background shapes; the single balloon keeps it clean.
25. Shell with Concentric Curve Rings
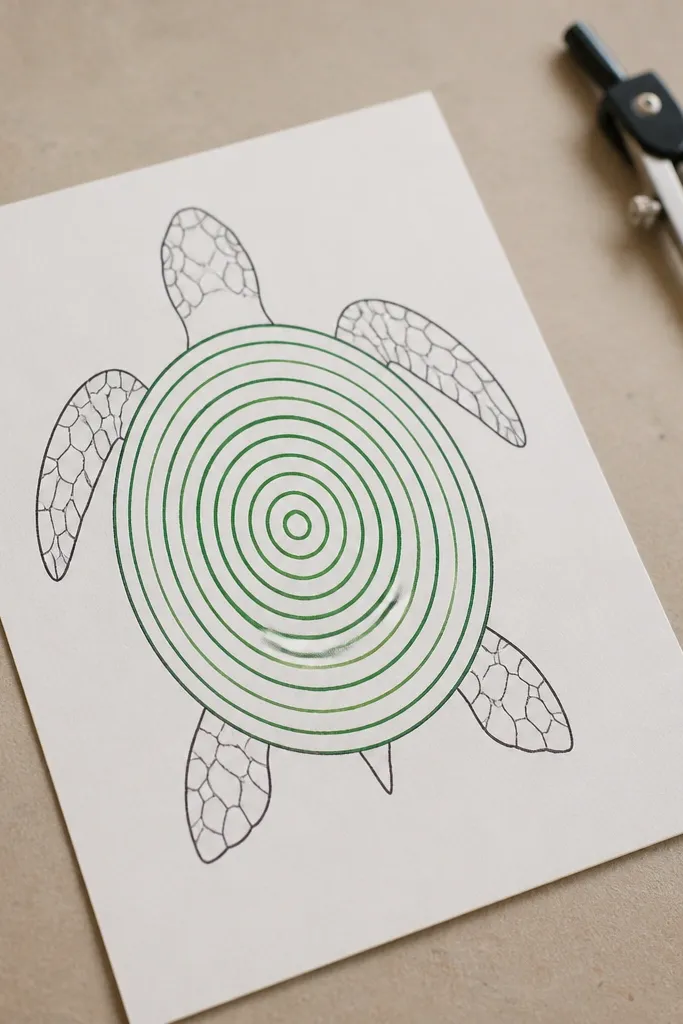
Step 1: Sketch the shell oval and lightly mark the center point. Step 2: Draw 5-7 concentric curved rings that wrap around the center point while staying inside the shell border. Step 3: Ink the rings and outline, then add simple legs with rounded ends and a single eye highlight.
Concentric curve rings look clean and classy because they give the shell a target-like structure. Draw rings that follow the shell oval and keep them spaced evenly. You don’t need shading; the ring pattern gives depth. This style is low-maintenance Turtle Drawing because once the shell is divided and the first ring is right, you can repeat the curves quickly.
AvoidDon’t let the rings drift in spacing; even small inconsistencies show up fast in photos.
Pro tipUse a light pencil compass or trace a flexible curve guide for consistent ring spacing.
26. Turtle with Striped Legs and Plain Shell
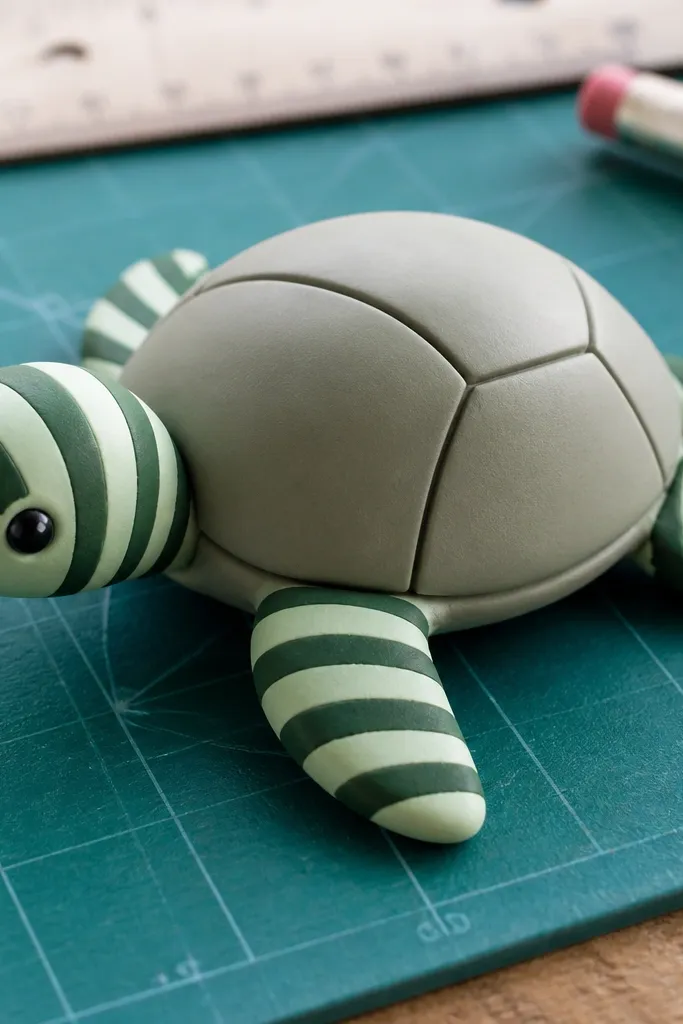
Step 1: Sketch the shell oval with 3 shell section lines and ink the outline. Step 2: Draw four legs as rounded cylinders and add 3-4 stripes on each leg with a lighter pencil guide first. Step 3: Ink the stripes and add a crisp eye highlight, then erase pencil guides.
When you keep the shell plain and put the pattern on the legs, the drawing stays simple and still looks stylish. The shell can have just 3 section lines. Then add alternating stripes on each leg — 3-4 stripes each side. That contrast makes the turtle look designed without heavy shading. It’s low-maintenance Turtle Drawing because you’re drawing stripes in a small area, not filling the whole shell.
AvoidDon’t stripe the head; keep the pattern limited to legs for a clean hierarchy.
Pro tipMake the stripes wrap with the leg curve so they don’t look flat.
27. Turtle with Bold Shell Outline Only
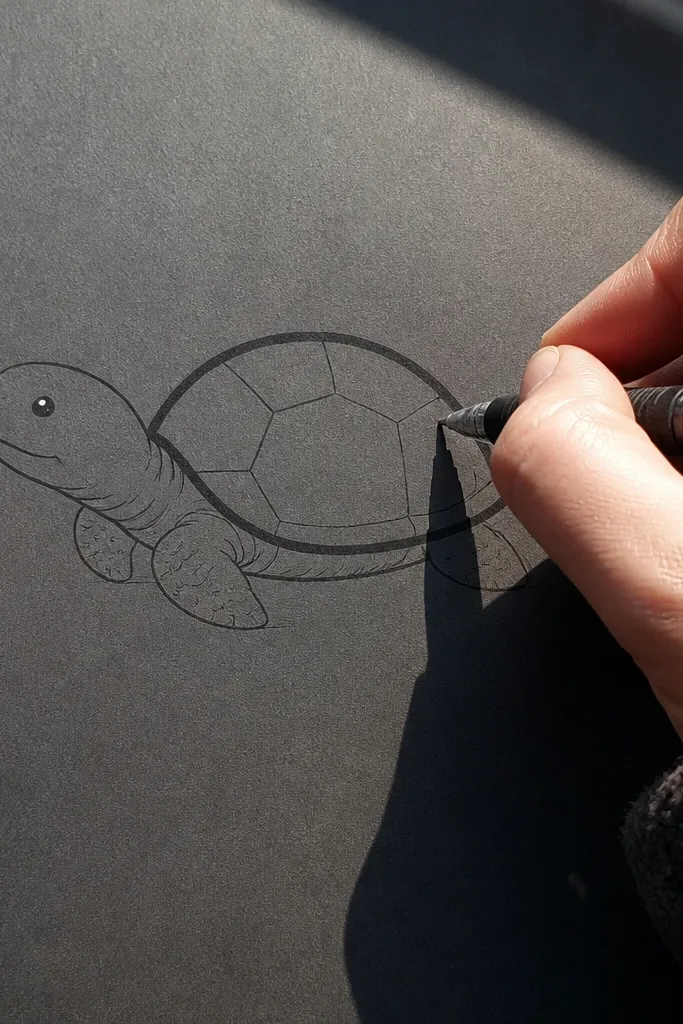
Step 1: Sketch the turtle in pencil, then ink the shell border with a thick pen. Step 2: Ink the head and legs with a thinner pen, and add 2-3 shell seam lines inside the thick border. Step 3: Add one shadow line and a white highlight dot on the eye, then erase pencil.
This is a graphic trick: make the shell outline thick and everything else thin. You get a high-contrast turtle that looks like a design element, not a sketch. The shell can include only a few internal lines. Add one small highlight on the eye and a tiny shadow line under the shell. It’s low-maintenance Turtle Drawing because your detail work is minimal and your style is controlled by line weight.
AvoidDon’t outline the whole turtle thick; the contrast only works when the shell is the star.
Pro tipLet the thick shell outline overlap slightly onto the legs so the turtle feels assembled.
28. Underwater Bubble Turtle
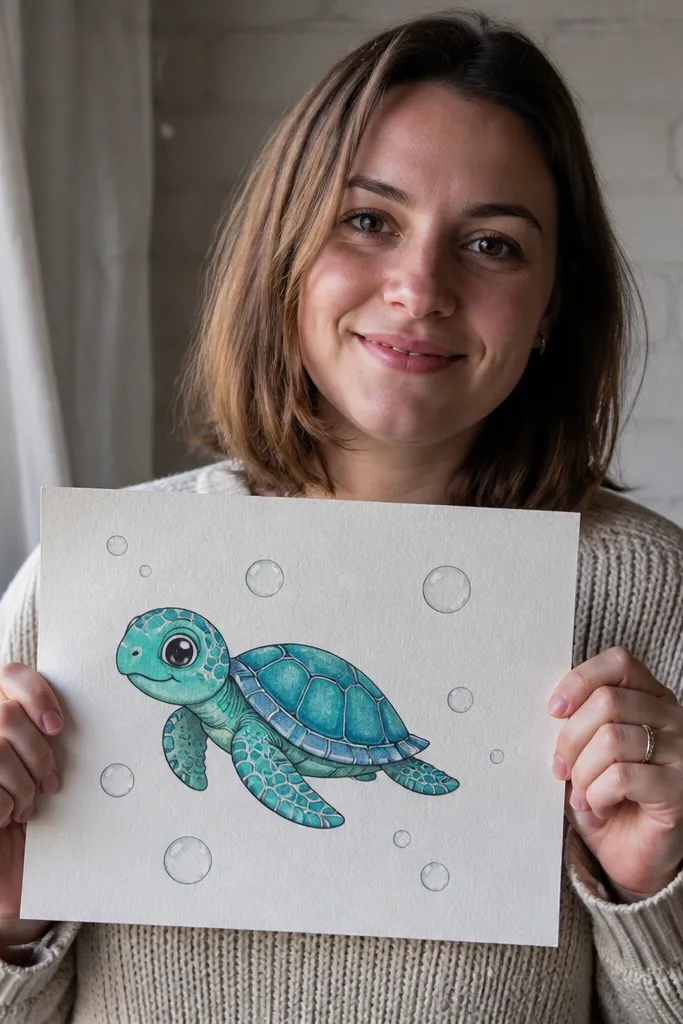
Step 1: Sketch the turtle and outline it with a fineliner. Step 2: Around the turtle, draw bubble rings with varying sizes, adding a couple of small bubbles close to the shell edge. Step 3: Add a highlight dot on the eye and a subtle shadow under the shell to separate it from the bubbles.
Bubbles make any turtle look like a scene without drawing a full background. Keep the turtle simple, then add 6-10 bubbles of different sizes around it. Use one light gray line or a soft pencil for bubble rings, and keep them thin so the turtle remains readable. This is low-maintenance Turtle Drawing because the “environment” is just bubble circles and the turtle stays quick.
AvoidDon’t draw bubbles touching the turtle outline all the time; leave small gaps.
Pro tipCluster two or three bubbles on one side to create a sense of direction.
29. Turtle Shell with Checker Dots
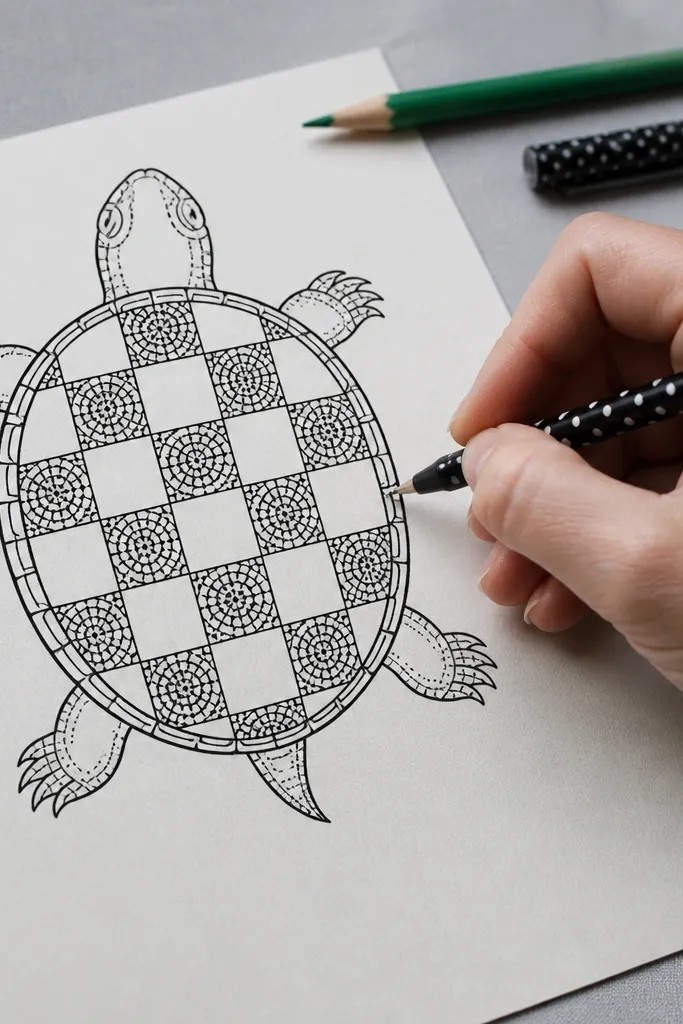
Step 1: Sketch the shell oval and lightly mark 4-5 rows and 4-6 columns using curved grid lines. Step 2: Fill alternating grid squares with a small cluster of dots, leaving the other squares blank. Step 3: Ink the outer outline and add simple legs and head, then erase pencil guides.
A checker-dot shell reads like pattern design, not doodling. Divide the shell into a grid of small squares, then fill alternating squares with dots. The empty squares keep the shell from becoming heavy, and the dot pattern looks crisp in photos. Keep the turtle outline and legs simple so the pattern stays the focus. This is low-maintenance Turtle Drawing because the grid keeps you from overthinking shapes.
AvoidDon’t make the grid too large; a tight grid looks cleaner and finishes faster.
Pro tipUse a single dot size for all filled squares so the checker effect stays sharp.
30. Turtle with Shell Scale Texture Lines
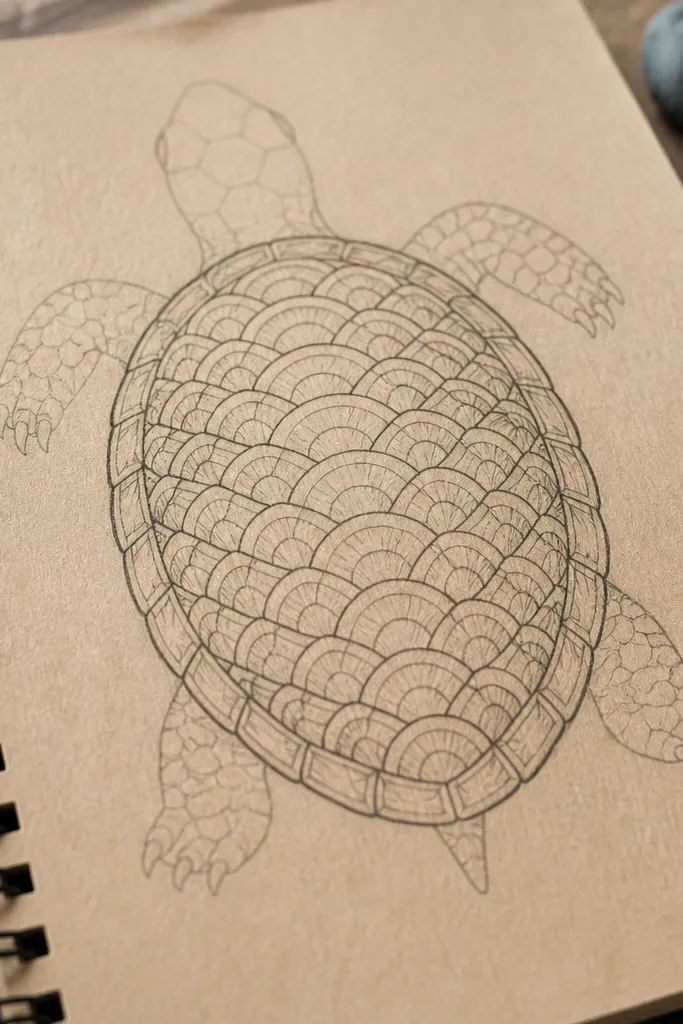
Step 1: Sketch the shell oval and lightly divide it into 3-4 sections with pencil. Step 2: In each section, draw rows of curved arcs like overlapping scales, each row slightly offset. Step 3: Ink the shell arcs, then outline the head and legs with simple lines and add a tiny eye highlight.
Scale texture lines make a turtle look more detailed without full rendering. You draw small curved “scale” shapes as arcs that overlap slightly, then keep the pattern only in the shell. Use a light pencil guide for the first row and repeat the arcs down the shell. The look is photogenic because scales catch light as line contrast, not as color gradients. It’s low-maintenance Turtle Drawing because the pattern is repeatable and stays within one area.
AvoidDon’t draw scales all the way to the shell edge; leave a clean border strip.
Pro tipMake each scale arc longer on the outer edge and shorter toward the center for a natural shell curve.



