
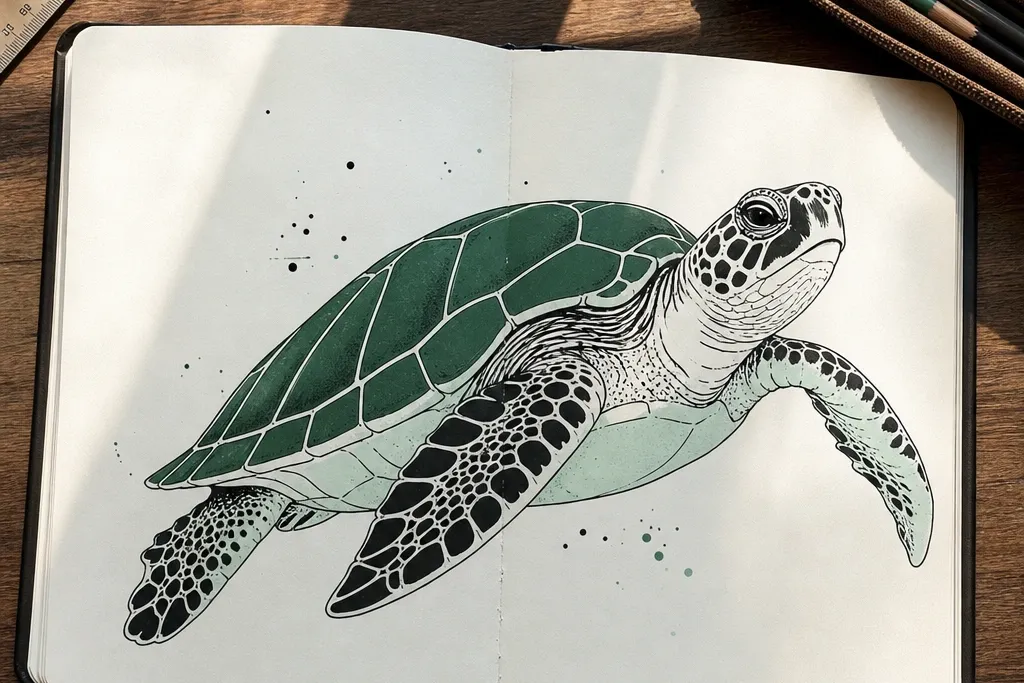
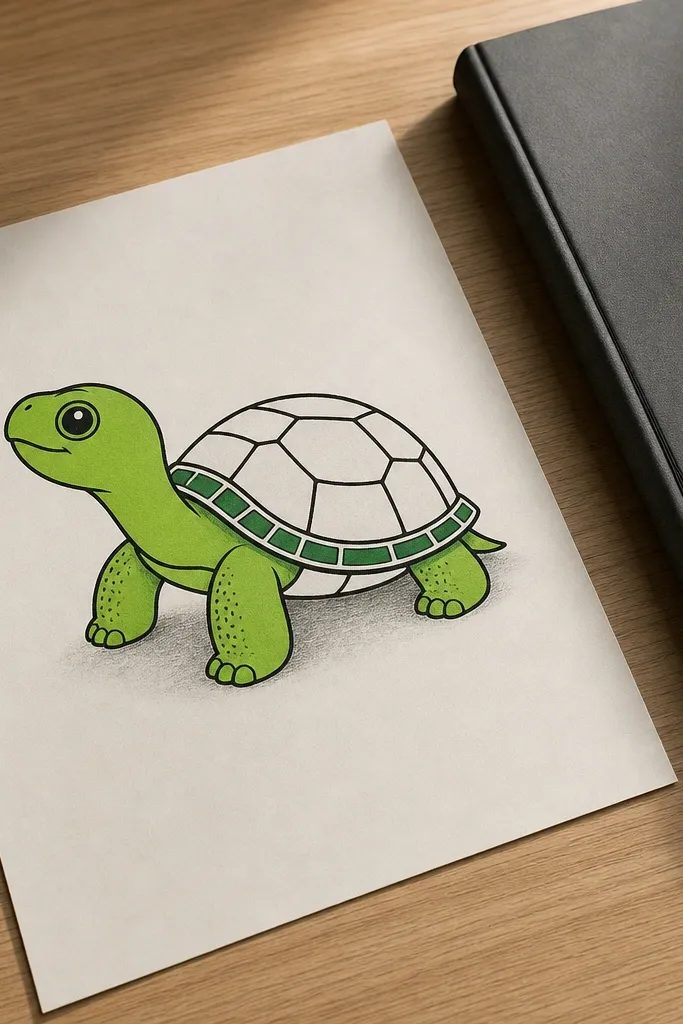
1. Neon Alley Turtle with Hard Shadow Block
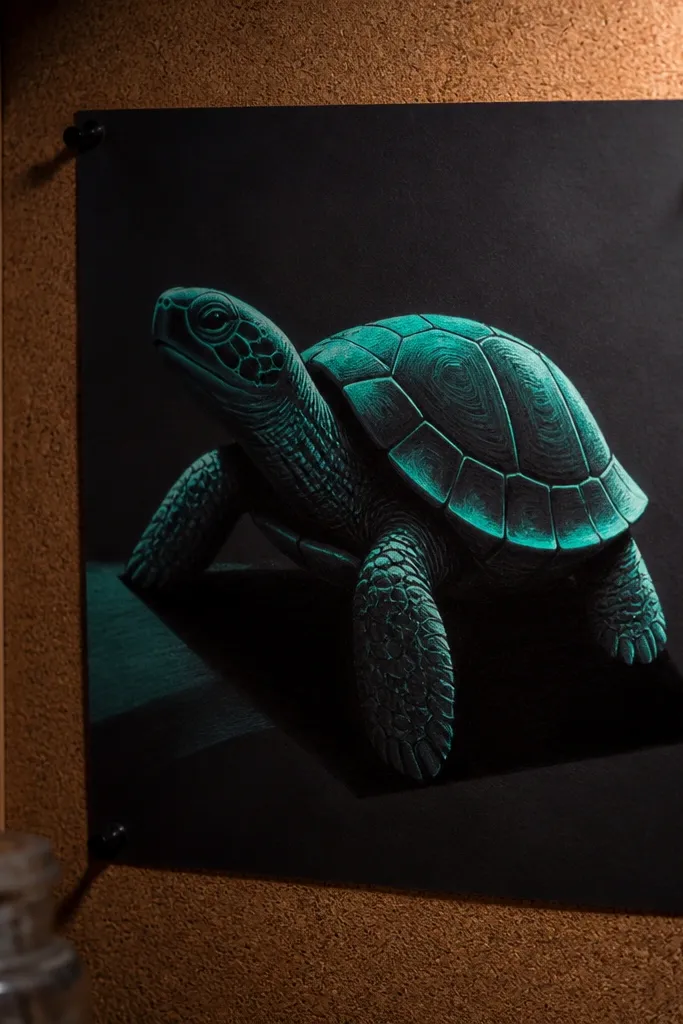
Step 1: Sketch a front-leaning turtle pose using a big head circle, an oval torso, and a rounded shell. Add a single light source from upper left, then draw one solid shadow mass under the belly and feet. Step 2: Line with fineliner for details, then trace the outside silhouette and shell outer edge with a brush pen. Step 3: Color the shell with green base, add yellow-green highlights on the shell rim and knuckles, then place teal neon only on the highlight edges and strap lines.
This one is all about contrast. You draw the turtle in simple shapes first, then you add neon teal only where the light hits, like cheek ridges, shell rim, and the top of the arms. The background stays deep charcoal so the turtle’s green feels brighter. The secret to the modern Turtle Drawing look is the shadow block: one big, crisp shadow shape under the body, not scattered pencil smudges. It reads clean in photos and looks like street-art without the mess.
AvoidAvoid blending the teal into the green; neon looks modern only when the edges stay crisp.
Pro tipUse tape to mask the background while you color the turtle, so the neon teal stays sharp.
2. Minimal Linework Turtle with One Accent Color
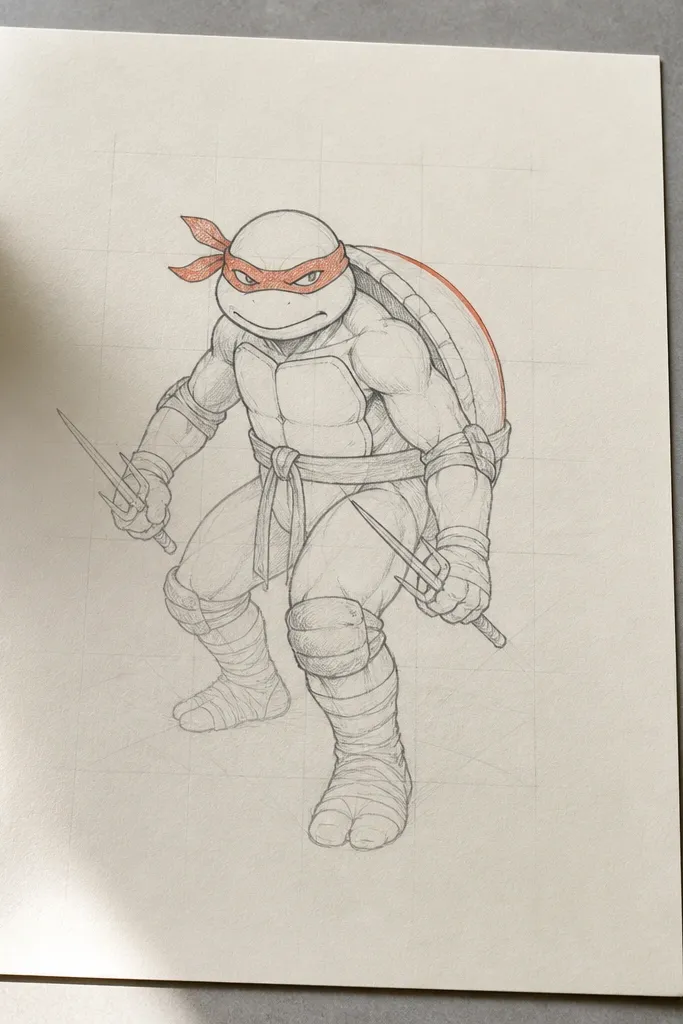
If your drawings look crowded, this style fixes it. You use thin lines for most contours and you only add one accent color — like a single red-orange stripe on the mask and one highlight stripe on the shell. Everything else stays off-white paper with light gray shading. The turtle still looks modern because the composition uses negative space and the line hierarchy does the heavy lifting. It’s also the fastest way to get a “finished” look without spending hours on coloring.
Step 1: Draw the turtle with light pencil for construction, then go over with 0.5 fineliner. Keep the shell pattern minimal: a few bold segments and one center line, not dozens of tiny scales. Step 2: Add a light gray tone with a pencil or marker only under the chin, under the arms, and along the shell underside. Step 3: Apply one accent color to the mask and a single shell highlight stripe, leaving the rest blank.
Pick an accent that contrasts your green base — red-orange looks especially modern against green.
Don’t add multiple colors; two or three accents start to look decorative instead of modern.
3. Shell Blueprint Turtle with Ruler Lines
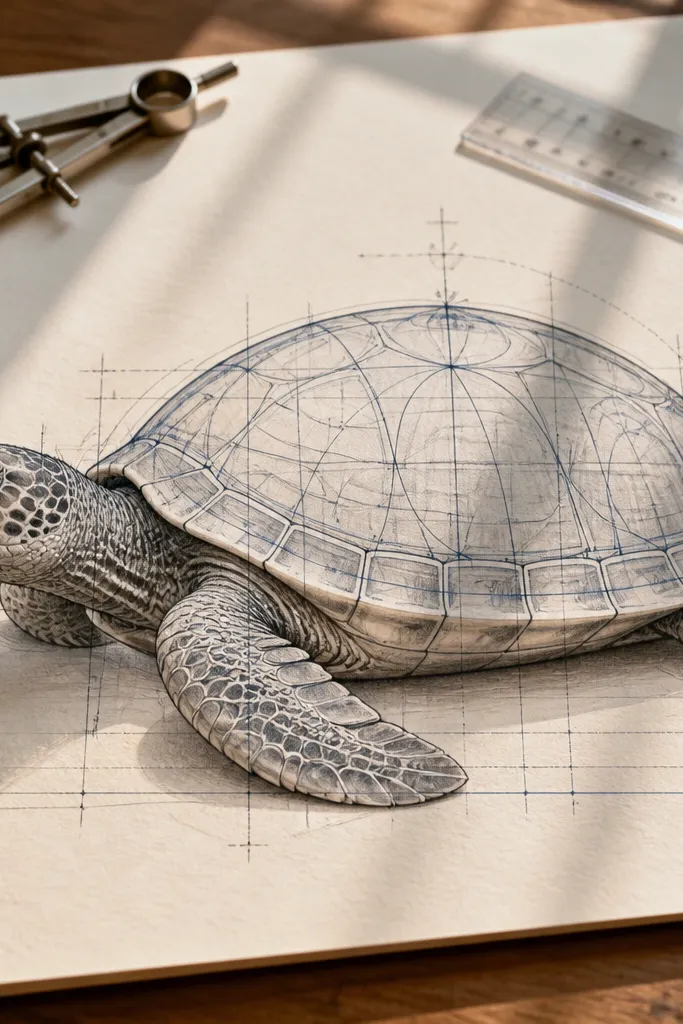
Step 1: Sketch the turtle face and shell shape, then add a rectangular grid inside the shell area using a ruler. Step 2: Draw blueprint lines: a vertical center line, two diagonals, and evenly spaced tick marks along the edges. Step 3: Color the shell with a flat green base, then draw blueprint lines in light blue-gray and leave the tick marks uncolored for clarity.
This is the design nerd version of a Ninja Turtle drawing. The shell gets a “blueprint” treatment with ruler-straight lines, measurement ticks, and a center crosshair. You still draw the turtle face naturally, but the shell reads like a technical diagram, which makes it look modern and graphic. Use cool grays for the blueprint lines so the green shell can stay clean. The result is photogenic because it has strong geometry and crisp edges.
AvoidSkip freehand grid lines; crooked geometry makes the whole piece feel messy.
Pro tipUse a gel pen for the blueprint ticks; it stays opaque and doesn’t smear.
4. Wet Ink Turtle with Splatter Edges
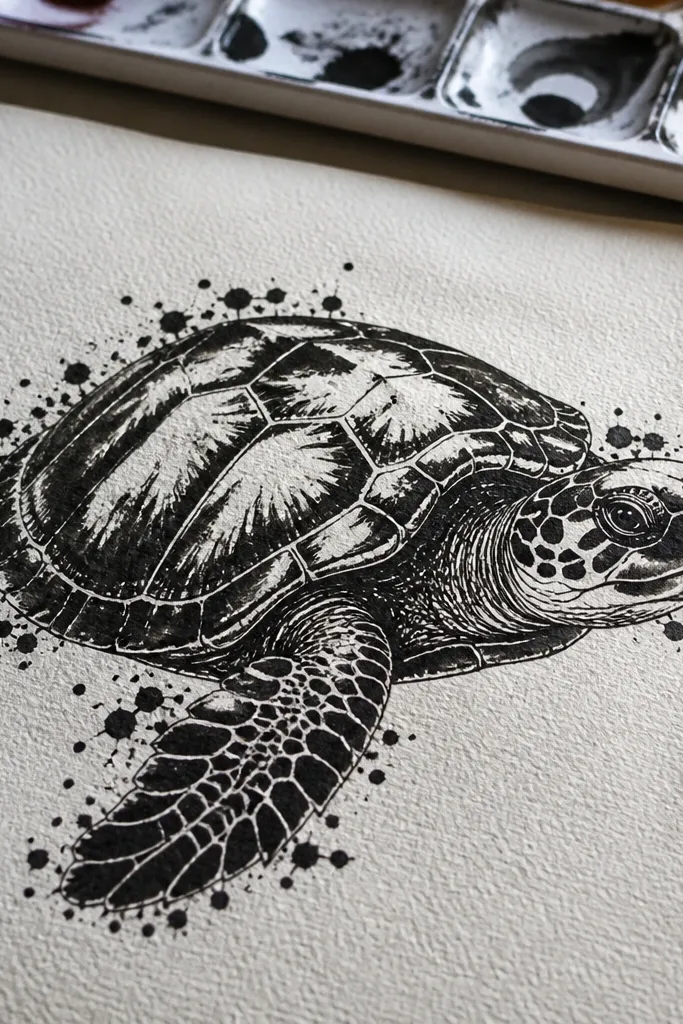
Step 1: Sketch and line the turtle with a brush pen, focusing on thick outer contours and dark creases under the arms. Step 2: For splatter, load a small brush with diluted ink, then flick lightly near the outer border so drops land outside the silhouette. Step 3: Color minimally: green base, one darker green shadow under the shell rim, and a thin highlight line on the mask.
This look adds movement without turning into chaos. You start with solid ink lines for the turtle silhouette, then you create splatter only along the outside edges where it frames the drawing. The modern part is that you keep the splatter controlled in one zone, not everywhere. Use dark ink shadows on the shell and a single light highlight, like a glossy streak on the mask. It photographs bold because the black ink reads fast and the splatter gives texture.
AvoidDon’t splash ink inside the shell; it kills readability of the shell pattern.
Pro tipPractice one flick on scrap paper first so you know the drop size you’ll get.
5. Comic Panel Turtle with Motion Lettering Blocks
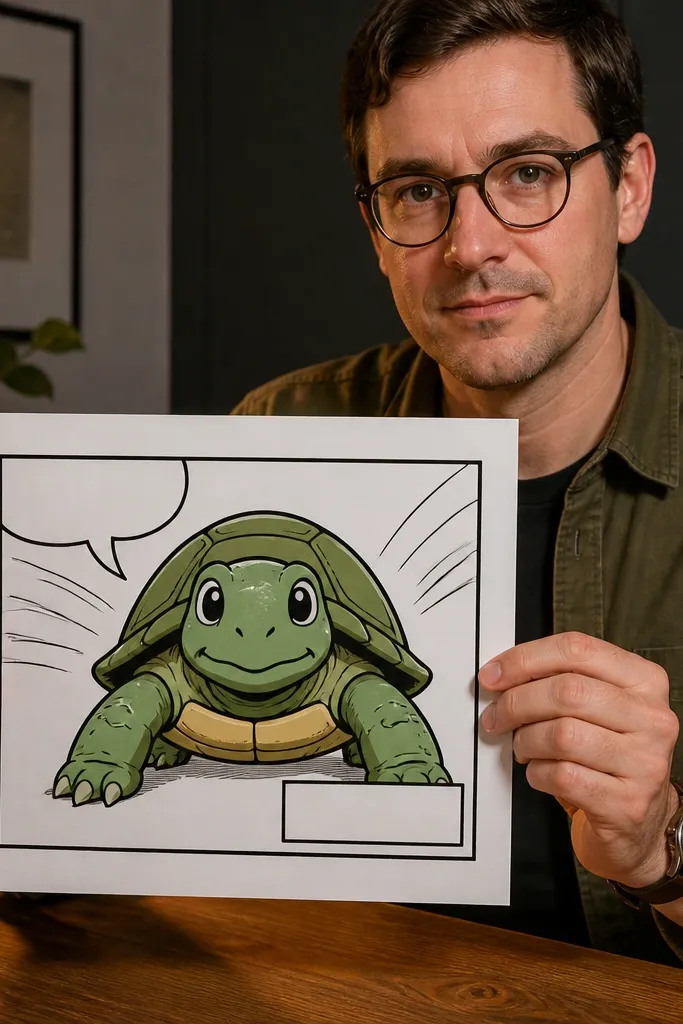
Step 1: Draw a thick rectangular panel border, leaving a margin of at least 1 cm around it. Step 2: Place the turtle in the center, then add motion lines that radiate from the shell toward one corner. Step 3: Color the turtle with a limited palette and keep the panel interior background mostly white or light gray, then fill motion lines with a dark gray.
This one looks like a modern comic cover because the composition is staged. You draw the turtle inside a panel frame, then add motion lines behind the body and a simple speech bubble or caption block that doesn’t steal attention. Keep the lettering shapes chunky even if you don’t write words. The turtle face stays clean and expressive, while the background motion makes the whole image feel energetic. It’s photogenic because the edges are graphic and the panel frame gives it a finished poster vibe.
AvoidAvoid thin motion lines; skinny rays look like doodles in photos.
Pro tipUse a ruler to keep the panel border straight; it makes the whole drawing look more “designed.”
6. Watercolor Wash Turtle with Salt Crystal Texture
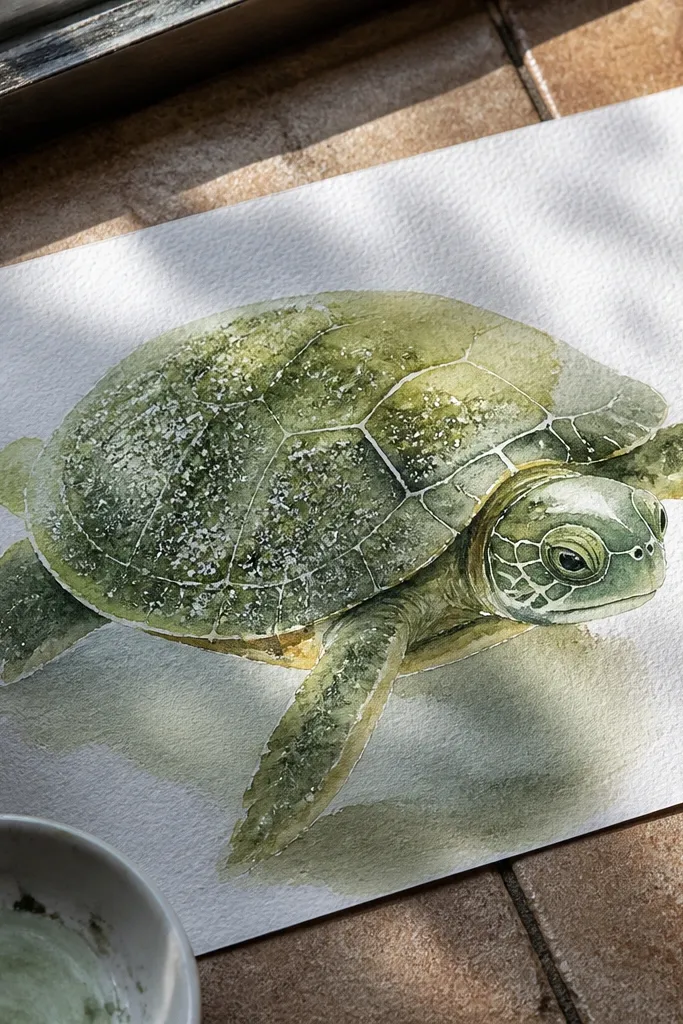
Watercolor can look modern when you control edges and use texture strategically. This design uses soft washes for the body and deliberately adds salt crystals in the shadow zones so the shell has natural speckling. The turtle looks more detailed without you drawing tons of scales. Keep the face sharper than the shell so viewers read the eyes first. Photos look great because the salt texture creates an organic pattern that still feels intentional.
Step 1: Lightly sketch turtle outlines, then wet the shell and arms with clean water. Step 2: Drop in green watercolor washes, then add salt crystals to the darker shadow areas while the paint is still damp. Step 3: After it dries, brush off salt gently, then add a darker green contour line under the chin and along the shell rim.
Use hot press or smoother paper if you want cleaner crystal shapes.
Don’t salt the whole page; limit it to shadows so it doesn’t flatten the face.
7. Geometric Helmet Turtle with Facet Shading
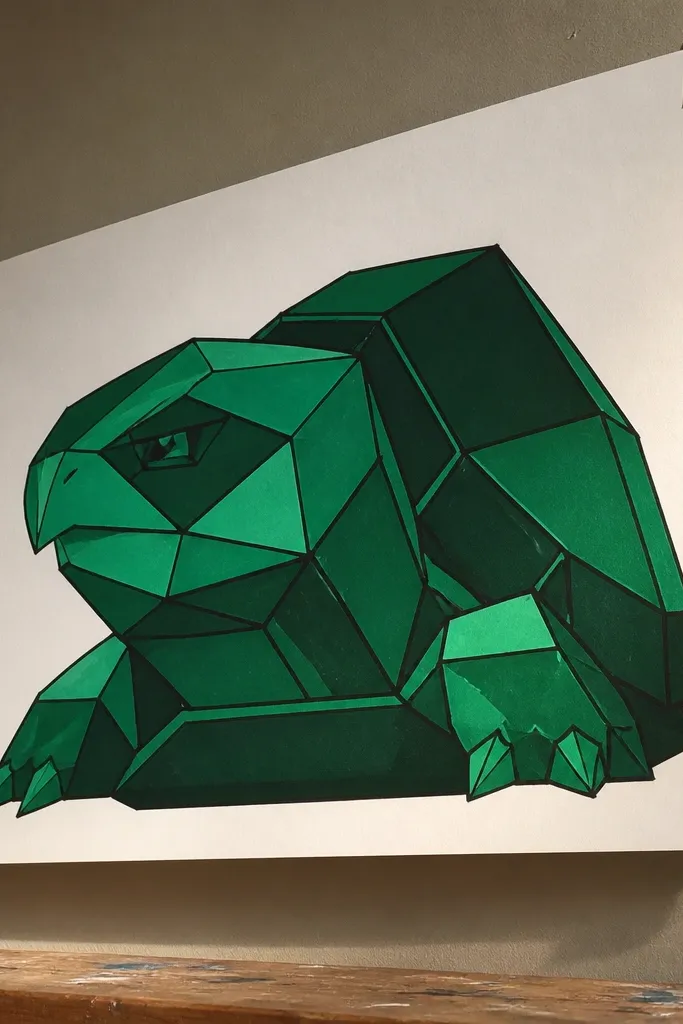
This is a modern Turtle Drawing when you treat the head like a low-poly sculpture. You draw the face with straight-edged facets, then shade each plane with one color value. Instead of smooth blending, use hard transitions between green tones. The result looks graphic and stylized, like a poster illustration. It also teaches a real skill: how to shade by planes, which makes your turtles look more 3D even with simple markers.
Step 1: Sketch the turtle head using geometric blocks — wedge shapes for the cheeks, a rectangle for the snout area, and a curved cap for the top shell edge. Step 2: Define 6-10 facets with thin lines, then fill each facet with either base green, shadow green, or highlight yellow-green. Step 3: Add the mask stripes as flat shapes with clean edges, not blended gradients.
Keep facet edges darker than the fill so the geometry reads immediately.
Avoid random facet sizes; use a consistent rhythm so the face doesn’t look lopsided.
8. Shell Scale Pattern Turtle with Repeatable Border
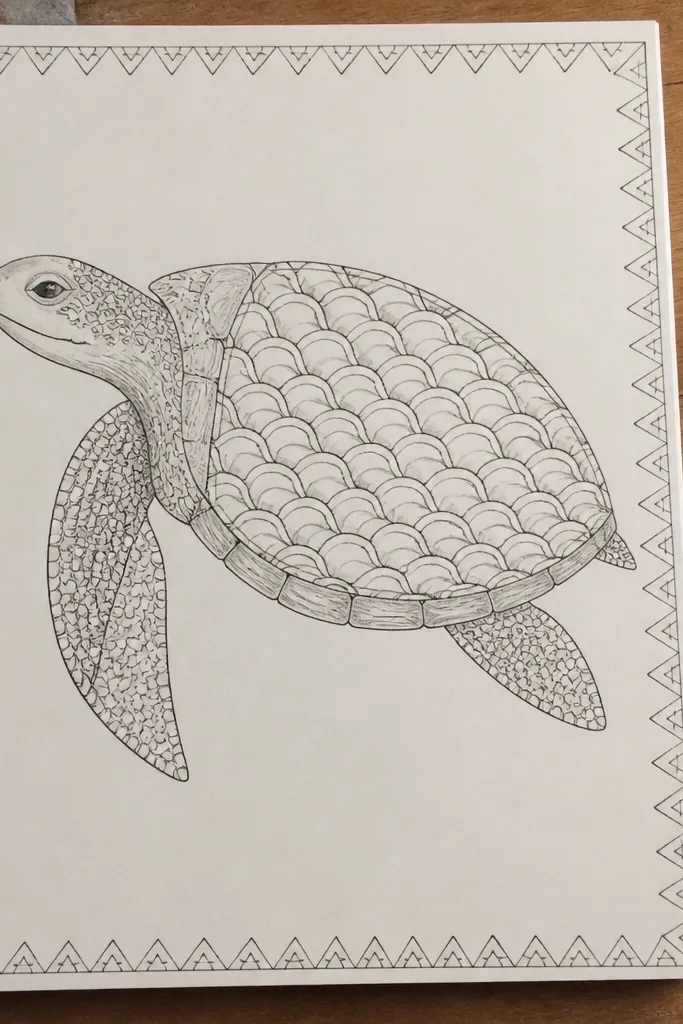
This is the clean, modern look you get when the shell pattern is repeatable. You pick one scale shape and repeat it in rows with consistent spacing. Then you add a border pattern around the whole drawing — like small triangles or rectangles — so the piece looks designed, not incidental. It’s great for sketchbook pages because you can stop after the shell pattern and still have a finished look. The border also helps photos because it creates a frame.
Step 1: Sketch the turtle and shell outline, then draw a simple row guide with two curved lines dividing the shell into bands. Step 2: Create one scale template shape (like a teardrop or rounded diamond) and repeat it across each band with even gaps. Step 3: Ink the pattern once it’s consistent, then color with base green and alternating shadow stripes in darker green.
Mark the spacing points lightly with a pencil dot grid so the repeats stay aligned.
Don’t mix scale shapes; one scale style keeps the modern graphic feel.
9. Profile Turtle with One-Line Perspective Shell Rim
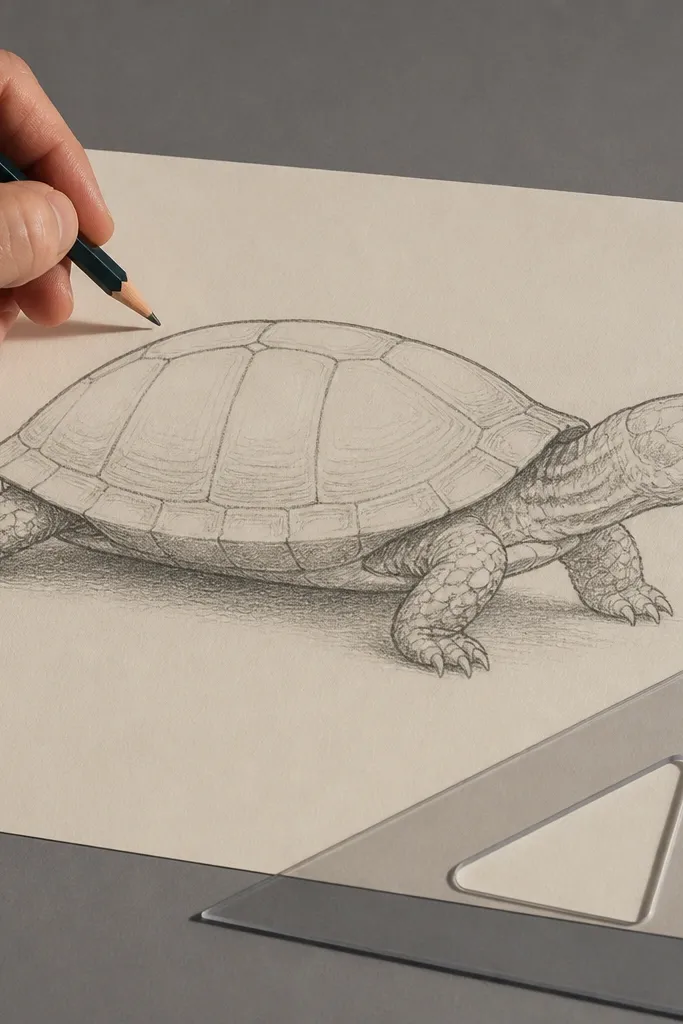
Side profile is where a lot of people lose the turtle’s shape. This idea fixes that by using one strong perspective rim line around the shell. You draw the shell rim as a single continuous curve that tilts away from the viewer, then you build the shell interior with that rim as your guide. The modern Turtle Drawing look comes from crisp contour lines and clean shading that follows the rim. It’s also a great exercise in drawing forms, not just characters.
Step 1: Draw the head in profile, placing the eye slightly forward and the snout curve cleanly. Step 2: Build the shell by drawing one rim line first, then add the shell thickness with a second line that stays parallel. Step 3: Shade with one direction — under the head and along the far side of the shell — using a darker green marker.
Use a ruler for the rim line if you’re struggling; straight helps you learn the curve.
Avoid freehand shell thickness; if it wobbles, the turtle looks flat.
10. Mask Stripes Ombré with Marker Bleed Control
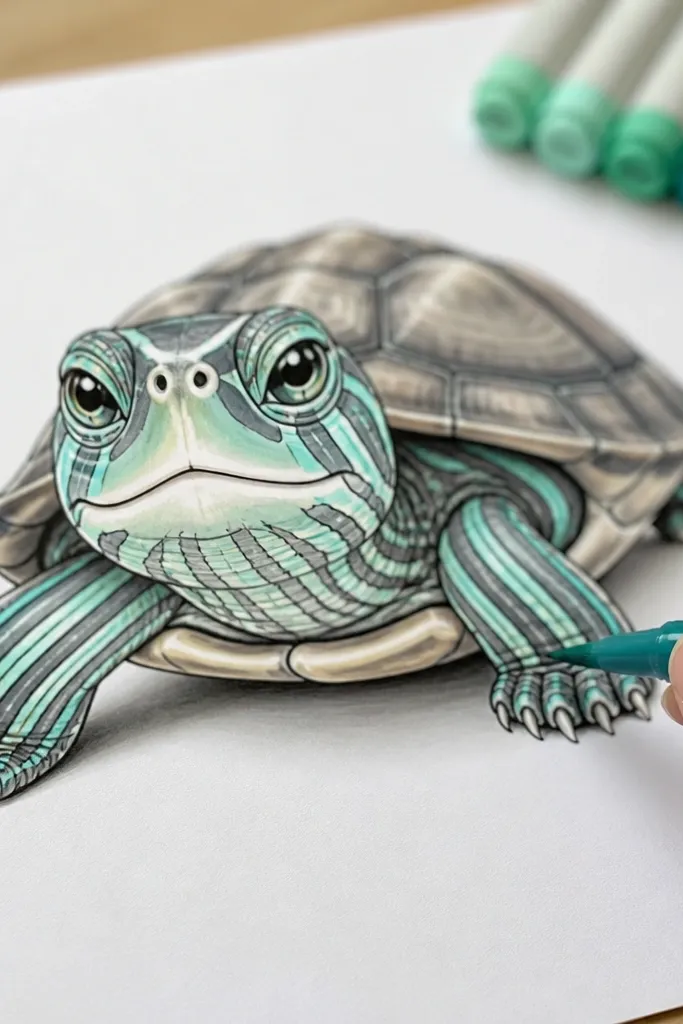
This look is modern because the stripes do the styling work. Instead of shading the whole face, you create an ombré on the mask stripes using marker layering. The trick is controlling bleed: keep the marker strokes small and layer from light to dark, so the edges stay sharp where you want them. The shell stays simpler with flat color and minimal pattern, so the mask remains the focal point. Photos pop because the mask stripes create a strong vertical rhythm.
Step 1: Line the turtle and keep the mask stripe outlines clean with a fineliner. Step 2: Color the stripes using three tones — light, mid, dark — applying the light first, then mid, then dark only at the bottom edges. Step 3: Add a thin highlight line on the top of the mask and a darker shadow under the chin to anchor the face.
Let each marker layer dry for 30-60 seconds so the ombré doesn’t turn muddy.
Don’t flood the stripe area; heavy saturation kills the crisp modern edge.
11. Night City Silhouette Turtle with Moonlight Rim
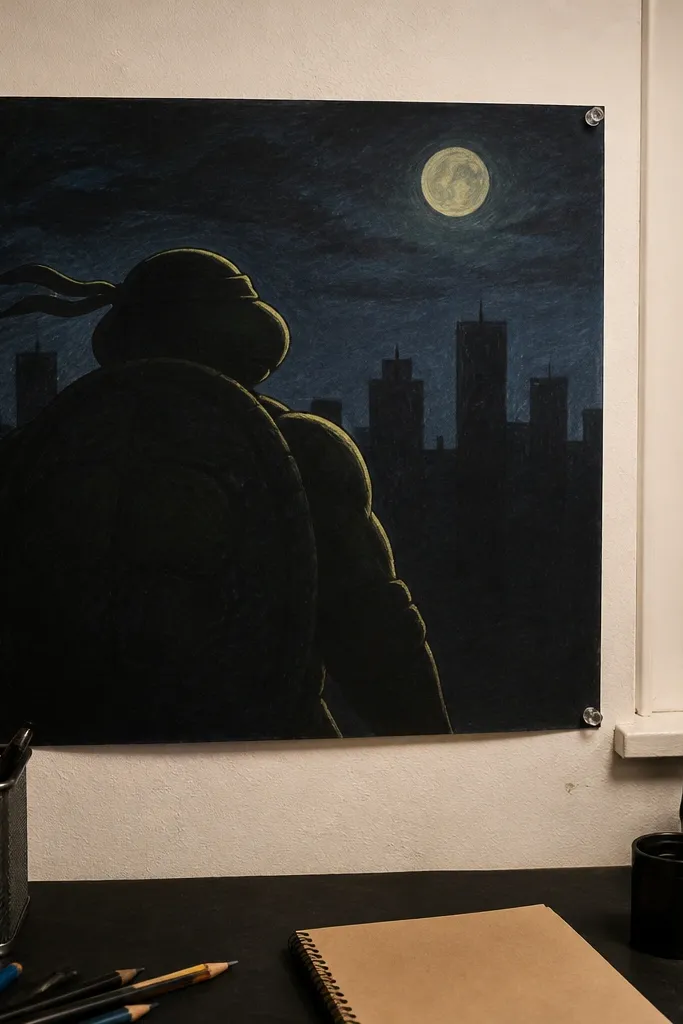
Step 1: Sketch the turtle pose, then fill the turtle body with a dark green-black marker. Step 2: Draw a skyline behind using only 8-12 blocky building silhouettes and a dark ground line. Step 3: Add rim light: use a pale yellow-green to draw a thin line along the outer edge where the moonlight hits, then add a small highlight on the mask stripe.
This one looks like a poster because the background is simple and the turtle edge is treated like light. Draw the turtle mostly as a silhouette in deep green-black, then add a thin rim light around the head, shell, and arm edges in pale yellow-green. The city skyline behind it uses flat shapes — no detailed buildings — so the rim light stays the hero. It’s modern because it’s graphic and limited-color. Your turtle reads instantly even with minimal detail.
AvoidAvoid detailed skyline; tiny windows make the background compete with the turtle.
Pro tipUse a white gel pen for the rim light if you want extra punch in photos.
12. Shell Topography Turtle with Contour Lines
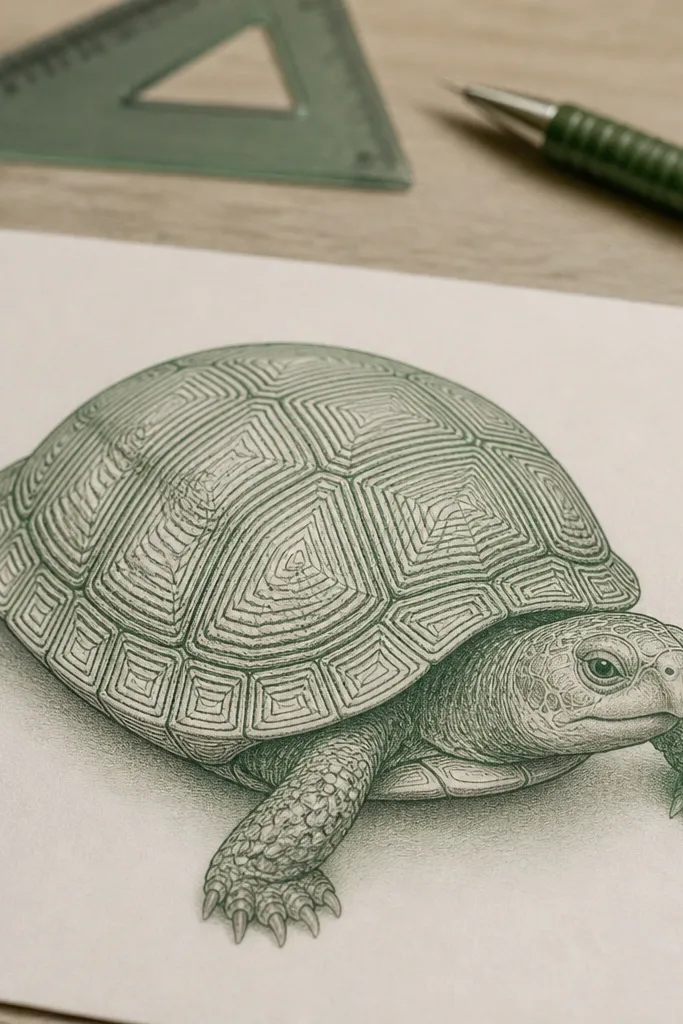
Topographic contour lines make the shell look instantly textured and modern. You draw contour lines that follow the shell curvature, then you use two green values so the lines are visible without turning the piece into a coloring page. Keep the face simpler with clean shading so the viewer’s eye goes from eyes to shell texture. This style also improves your sense of form because contour lines force you to think about curvature. It’s striking in photos because lines create a clear pattern at a glance.
Step 1: Sketch the turtle and shell, then draw contour lines that wrap around the shell in consistent spacing. Step 2: Color the shell base green, then shade one side with a darker green wash or marker. Step 3: Go over contour lines with a darker pen so they stay crisp and visible over the green fill.
Use thicker lines for the contour closest to the viewer so the shell reads as 3D.
Don’t let contour lines cross randomly; they must follow the shell shape.
13. Stencil Turtle with Spray-Style Background Dots
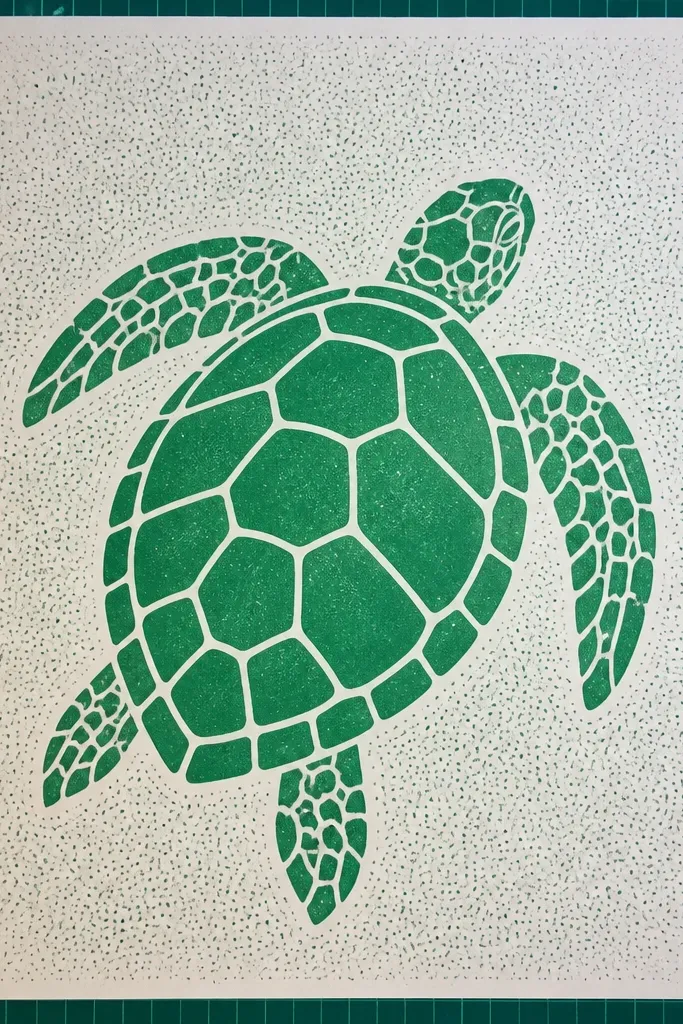
Step 1: Outline the turtle and simplify details into shapes: shell segments, arm bands, and mask stripe blocks. Step 2: Fill with flat green and a darker green for shadows, keeping transitions sharp. Step 3: For the background, mask the turtle with paper cutouts, then dab dots around it using a marker-loaded brush to create an even field.
Stencil style is a shortcut to modern because it looks graphic and controlled. You draw the turtle with strong block shapes, then you fill the interior with flat color. The background uses an even dot “spray” pattern made with a marker and a toothbrush or a stencil brush, so it looks like texture without smudges. Keep the turtle edges clean with a bold outline so it feels designed. This works great for wall art prints because it has that high-contrast, graphic look.
AvoidDon’t put the dot texture inside the turtle silhouette; keep it only in the background.
Pro tipMake a quick paper stencil from the turtle outline so your edges stay crisp across tries.
14. Chalk Pastel Turtle on Colored Paper
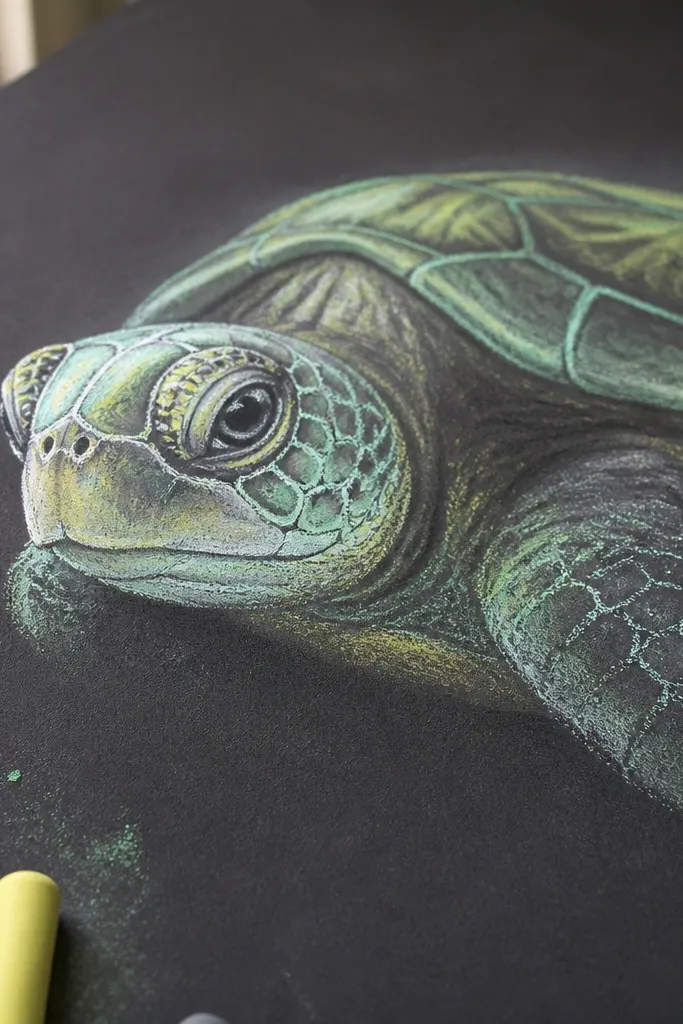
Colored paper changes everything for a modern Turtle Drawing. With dark paper, you can use bright chalk pastel or chalk-like sticks to create luminous highlights that look clean on camera. The shell pattern can be minimal — a few bold scale marks — because the highlight does the work. Shadows stay soft and gray, but the face outline stays crisp in dark pencil or charcoal. It looks modern because the contrast is built-in from the paper color.
Step 1: Use dark paper (black or deep charcoal) and sketch lightly with a soft pencil. Step 2: Build highlights first with bright green pastel, then add yellow-green on the top edges of the shell and mask stripes. Step 3: Add soft shadow areas with gray pastel, then outline key contours with charcoal pencil so the turtle doesn’t blur.
Fixative spray helps if you plan to move it, but test first so the colors don’t dull.
Avoid smearing the face outline; modern chalk looks clean when edges stay intentional.
15. Turtle Sticker Sheet with Die-Cut Outline
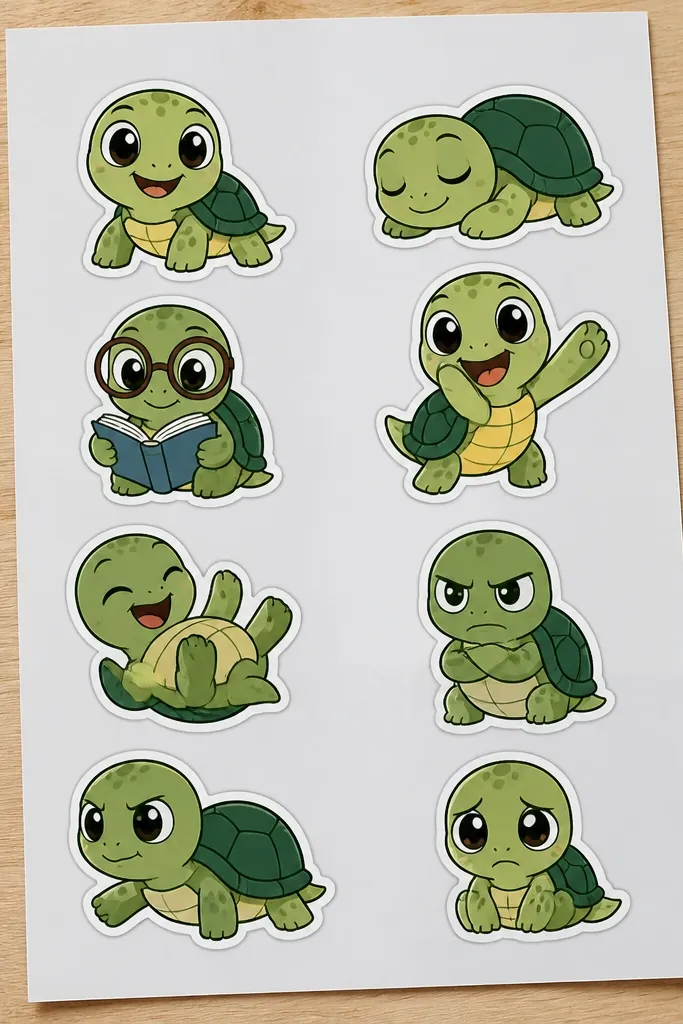
This is a modern Turtle Drawing format, not just a single image. You draw 6-8 mini turtle expressions and poses on one page, each with a bold die-cut outline and a small shadow line underneath. The look is photogenic because each sticker shape is readable and the page feels like a designed pack. Use flat color blocks and keep the shell pattern simplified so every sticker looks finished fast. It’s perfect if you want variety without sacrificing the clean look.
Step 1: Plan the layout in a grid with 1 cm gutters so stickers don’t crowd. Step 2: For each sticker, draw the turtle in a simplified style, then outline with a thick black marker for the die-cut edge. Step 3: Color flat with two greens and one accent for the mask, then add a tiny shadow line beneath each sticker shape.
Make one consistent shadow direction across the whole sheet so it looks like one set.
Avoid tiny details in each sticker; the sticker look needs bold shapes.
16. Retro-Modern Turtle with Halftone Dot Shadows
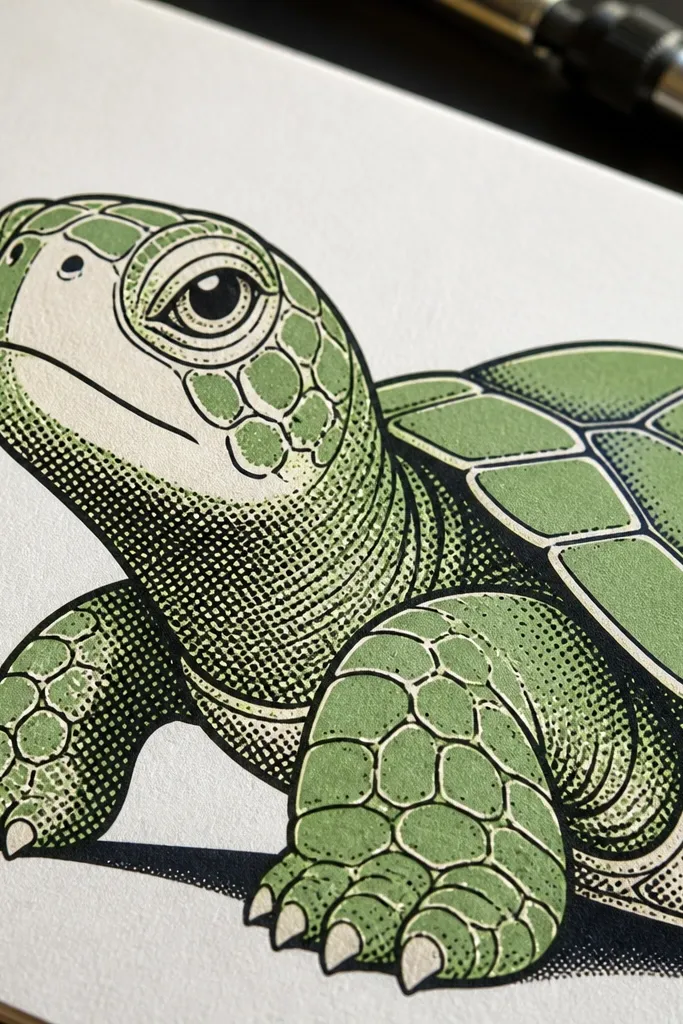
Halftone dots are retro, but they read modern when you limit them to shadow zones. Draw the turtle with clean solid lines and flat green fill, then replace shading with halftone dots that get denser in the darkest areas. Keep highlights solid and clean. This gives you texture without muddy blending and it photographs well because dots hold their shape. It also teaches a useful shading method you can reuse anywhere.
Step 1: Line the turtle with fineliner and fill the base green solid using a marker. Step 2: Choose three shadow regions and draw halftone dots inside them, starting sparse and increasing density near creases. Step 3: Add a darker outline on shell segments so the dot shading doesn’t disappear against the green.
Use a fine black pen for dots so they stay crisp at small sizes.
Don’t dot the entire shell; keep dots only where shadows should be.
17. Turtle in Motion with Speed-Line Spiral
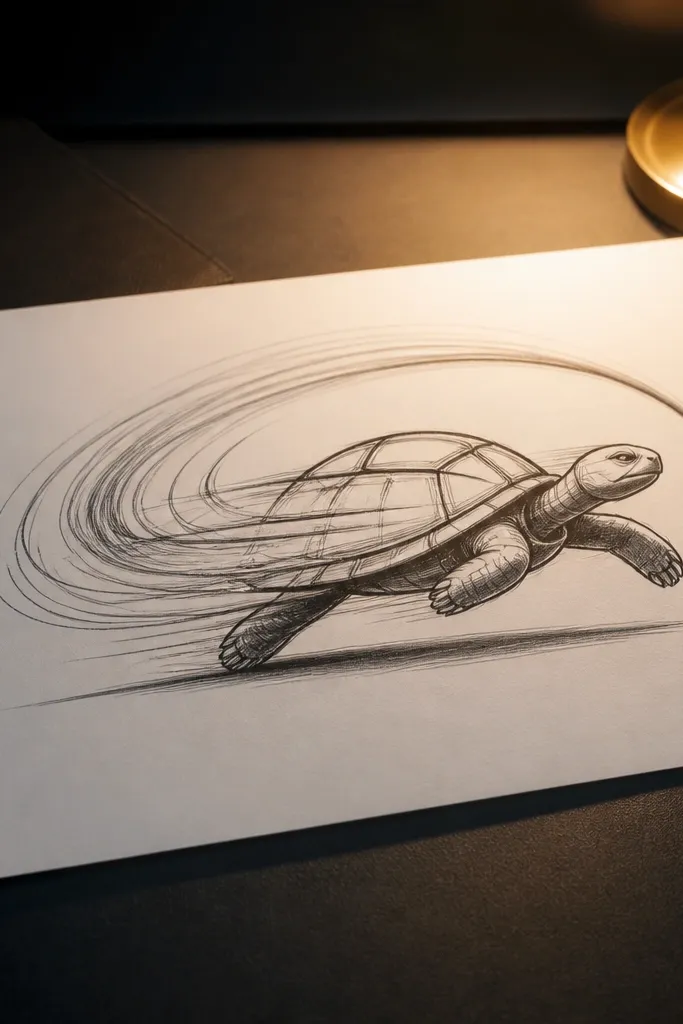
Step 1: Sketch the running pose with simplified shapes for arms and legs, then draw a spiral guideline behind the shell. Step 2: Add speed lines along that spiral, keeping them evenly spaced and tapering slightly toward the outer edge. Step 3: Color the turtle with flat green plus a darker green shadow under the belly and feet, leaving the background mostly plain.
Motion lines can look messy, but a spiral gives you order. Draw the turtle mid-run with one leg forward, then add a spiral of speed lines behind the shell that curves around the body. Keep the turtle’s interior details minimal so the motion background is still easy to read. The modern Turtle Drawing feel comes from the clean silhouette and one consistent shadow under the feet, so it looks like it’s moving in a real space.
AvoidAvoid random speed lines in every direction; pick one spiral path.
Pro tipUse the same line weight for all speed lines so the spiral looks intentional.
18. Shell Rim Glow Turtle with Metallic Gel Highlights
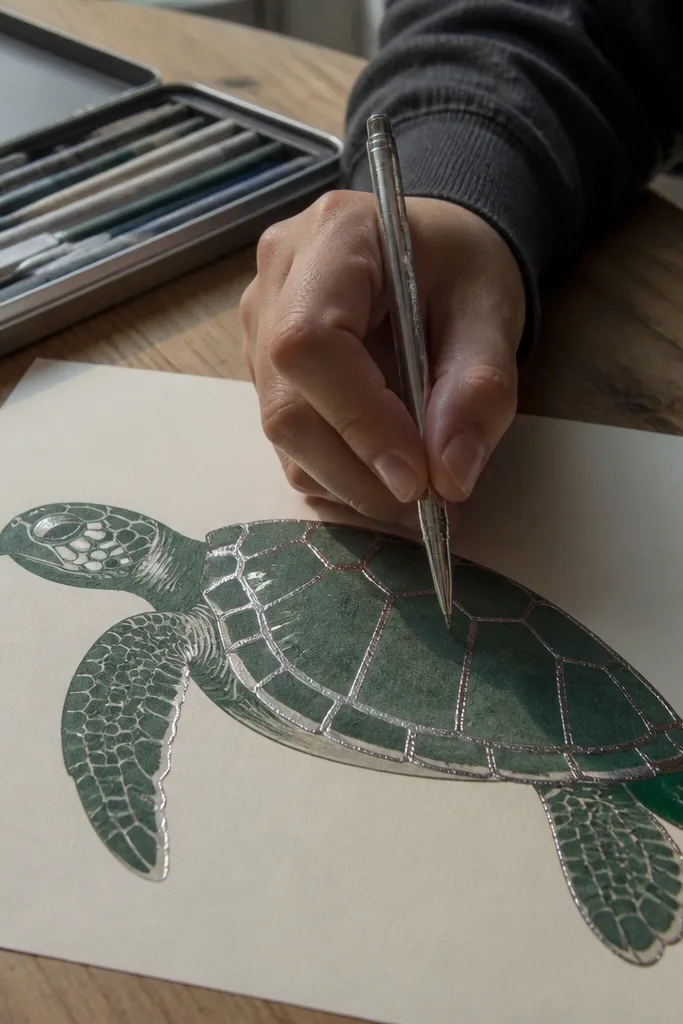
Step 1: Line and fill the turtle with green base and darker shadow green under arms and shell underside. Step 2: Add a pale green highlight on the top of the shell, then outline the shell edge with a metallic silver gel pen in a thin band. Step 3: Add two small metallic accents on the mask stripe and one on the knuckle.
Metallic gel highlights make a Turtle Drawing look modern fast because they catch light in photos. You draw a normal turtle, then add a thin metallic rim line along the shell edge and a couple of mask highlights. Keep the rest flat so the metallic doesn’t look like glitter. The look is clean and graphic, especially if you use a dark background or deep shadow areas. This is the kind of drawing that looks better under a phone light.
AvoidAvoid metallic on the whole shell; keep it to edges and two or three accents.
Pro tipLet metallic gel dry fully before touching anything; smears happen fast.
19. Monochrome Ink Turtle with One Neon Outline
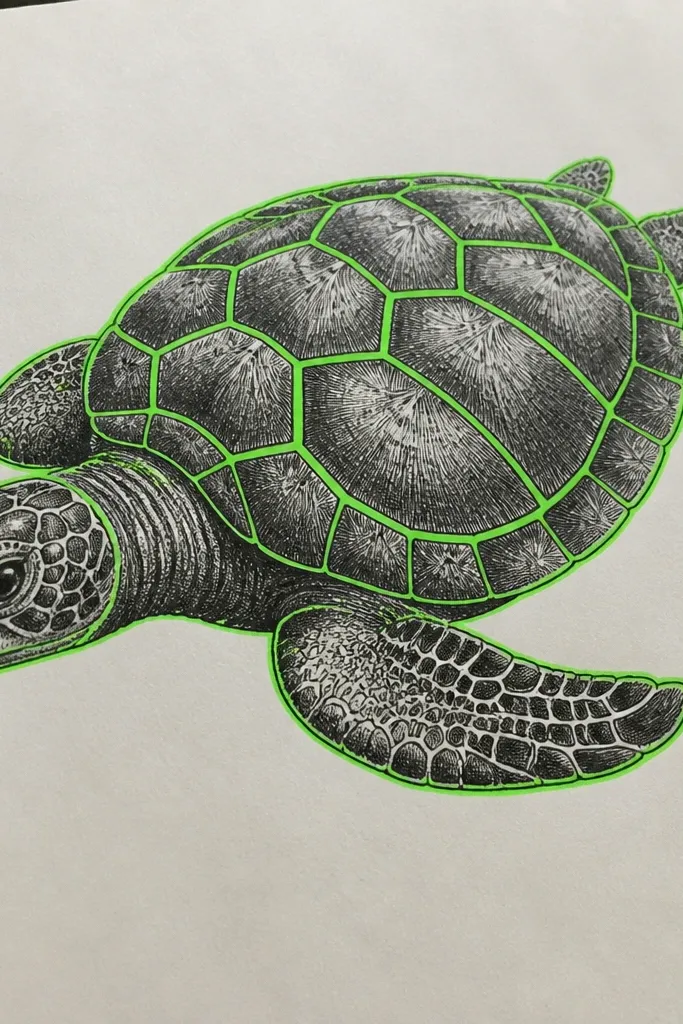
Monochrome ink looks sharp when you control contrast and keep one neon accent. Draw the turtle in black and gray only, using crosshatching for deeper areas like under the chin and between shell segments. Then add one neon outline color — like lime green or electric teal — around the outer silhouette and the shell segment borders. That neon border makes it feel modern and graphic without turning it into a rainbow drawing. It’s also a great option if you want it to look good even if your color skills are still building.
Step 1: Sketch and ink the turtle with a fineliner, then shade with gray marker or pencil using crosshatching. Step 2: Color nothing else — keep shell and body monochrome. Step 3: Use a neon marker to trace the outer silhouette and major shell segment lines, then add a neon dot or small line on the mask stripe.
Choose one neon color and stick to it; mixing neon tones makes the border look noisy.
Don’t leave neon only on tiny details; the neon needs to frame the whole turtle.
20. Mixed Media Turtle Collage with Paper Cuts Shell Segments
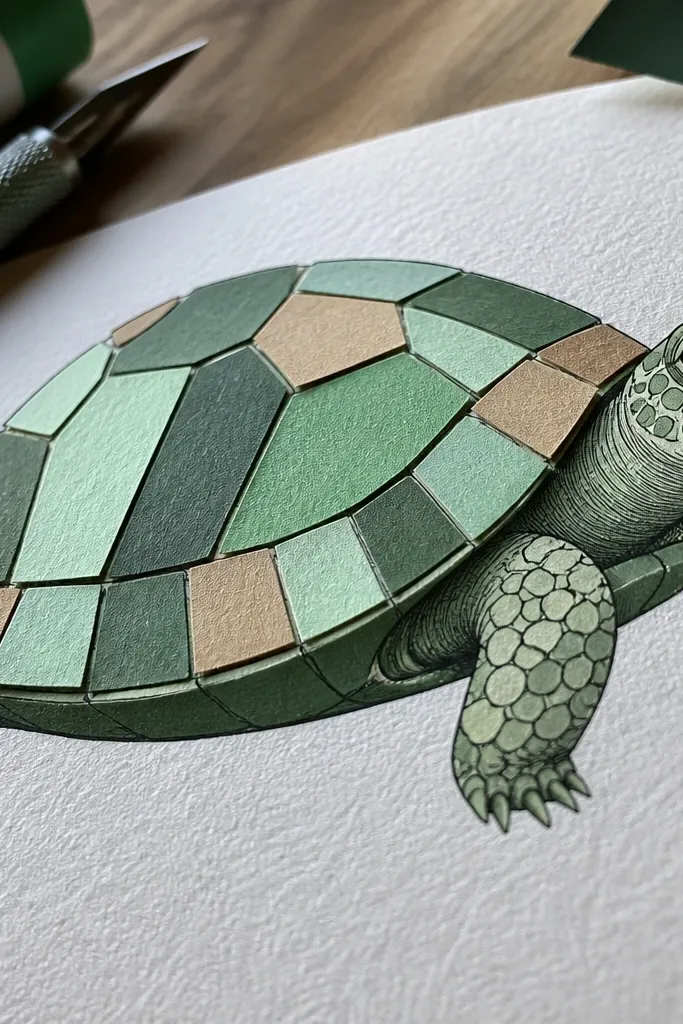
Collage makes a Turtle Drawing look modern because the texture is physical. You cut small paper shapes for shell segments, glue them onto the shell area, then draw over the edges with a fineliner to lock everything in. Use two paper greens and one tan paper for depth, then keep the face drawn normally. This gives you dimension without heavy shading. It’s especially good for photos because paper edges cast tiny shadows.
Step 1: Sketch the turtle and outline the shell area, then cut 10-14 irregular shell segment shapes from green and tan paper. Step 2: Glue the pieces onto the shell area, leaving consistent gaps for the shell lines. Step 3: Draw over the gaps with fineliner, then add shading on the drawn parts with a darker green pencil.
Press the paper pieces under a book for 10 minutes so edges stay flat before you ink.
Avoid thick glue blobs; they warp paper edges and ruin the clean outline.



