
1. Triangle-Fin Baby Shark Buddy
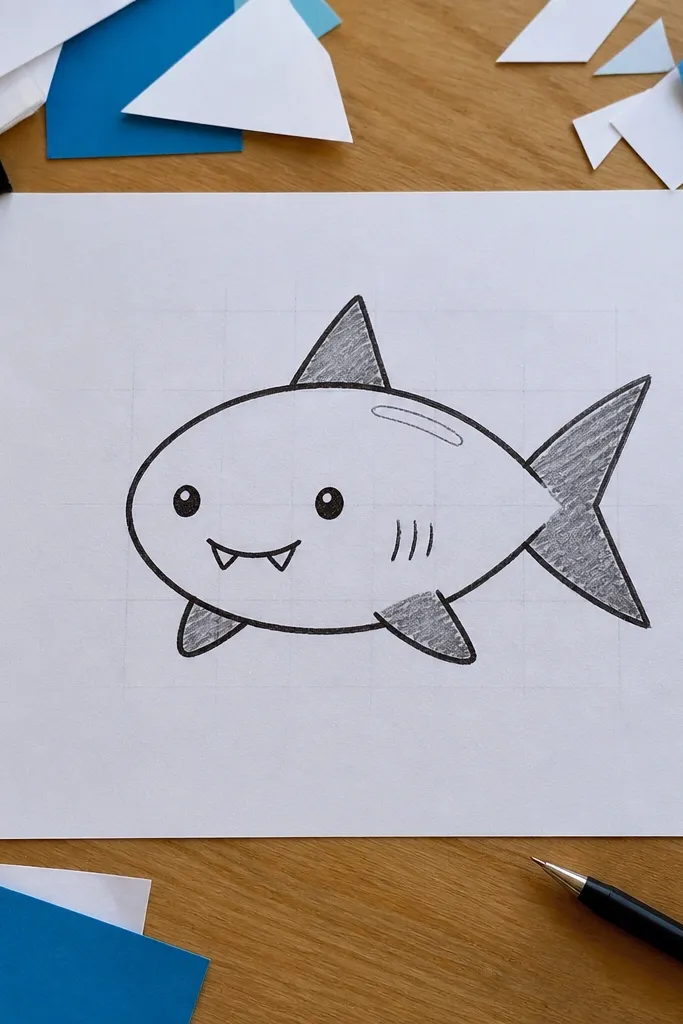
This one is for when you want a shark that looks cute and clean fast. The body is a rounded oval, the tail is a simple split triangle, and the dorsal fin is a single crisp triangle. Keep the mouth as a short curve with two tiny tooth bumps so it reads as friendly. Add two small dot eyes and one curved highlight on the eye to make it look alive in photos. It’s the easiest entry point for the whole list because it teaches consistent proportions: big head shape, small facial details, and fins that sit at believable angles.
Pro tipColor the belly with a light teal and leave the eye highlight untouched so the face pops.
Step 1: Draw a vertical oval for the body, then add a small rounded head bump at the top-left of the oval. Step 2: Place the dorsal fin as a triangle on the top edge, then add the pectoral fin as a smaller triangle near the mid-body. Step 3: Sketch the tail as two short lines meeting at a point, then split the tail tip with a shallow V. Step 4: Ink over the outline with a 0.5 or 0.7 pen, then add two dot eyes and a tiny curved smile.
AvoidDon’t draw lots of teeth — two tooth bumps and a smile curve look sharper than a full row.
2. Side-Profile Shark with One Clean Eye
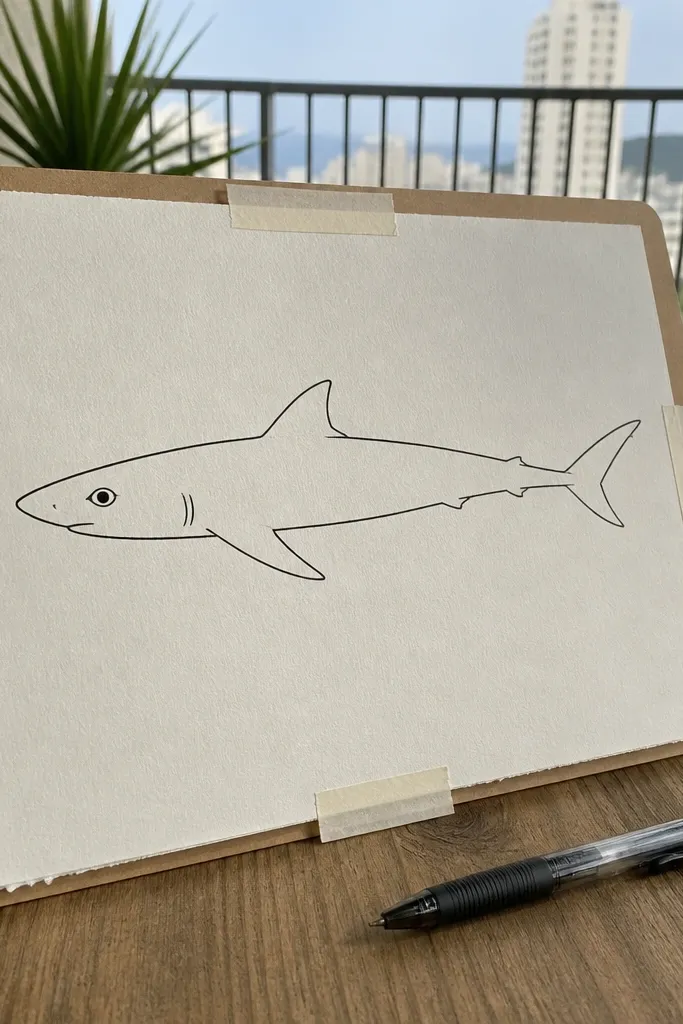
Side-profile sharks look instantly “real” even when they’re simple. This design uses a smooth spine curve: one long line for the back, one long line for the belly, and the tail built from a simple fork. The eye is the star — one almond shape with a dark pupil and a small white highlight. Keep the gill line as one short curved stroke behind the eye area, not a whole cluster. That single gill mark gives you realism without clutter, and it photographs well because the silhouette stays clean.
Pro tipShade only the top half of the body with navy so the belly stays pale for contrast.
Step 1: Draw a curved spine line from head to tail, then add a parallel belly line that tapers toward the tail. Step 2: Add the dorsal fin as a small trapezoid-like shape sitting on the spine line, then place the pectoral fin as a short angled wedge under it. Step 3: Fork the tail with two lines that separate slightly and meet back at the tip. Step 4: Ink, then draw one almond eye near the front third, plus a short gill curve.
AvoidAvoid putting the eye too far back — if the eye lands in the middle, it stops reading as a side-profile shark.
3. Shark Fin Only Logo (No Body)
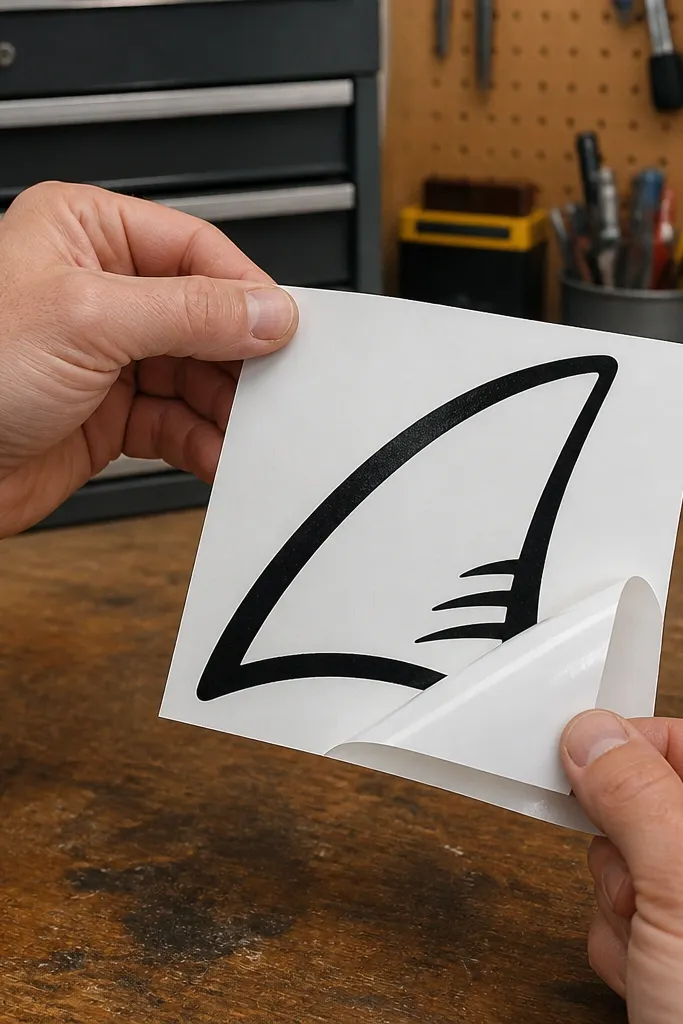
If your goal is aesthetic impact with zero sketch stress, draw just the fin. A fin-only design is graphic and works great as a page header, sticker label, or repeated pattern. Start with a strong outline that’s widest near the base, then taper to a pointed tip. Add three short “gill” lines along the inner curve so it still reads like a shark. Use a thick black outline and a single fill color like ocean blue to make the design pop in photos. This one is also a great way to practice symmetry because your fin must look intentional.
Step 1: Draw a teardrop-shaped fin profile with the widest part at the base and a sharp point at the top. Step 2: Add a small inner curve to suggest depth, then draw three short curved lines on the inner area. Step 3: Trace the outer edge with a bold pen or marker, then fill with one solid color. Step 4: Finish by leaving a thin uncolored highlight strip on one side.
Use a marker for the fill and a pen for the outline — the outline crispness is what makes it look like a finished logo.
Don’t add a full face — fin-only works because it stays minimal.
4. Bubble-Runner Shark with Motion Swirls
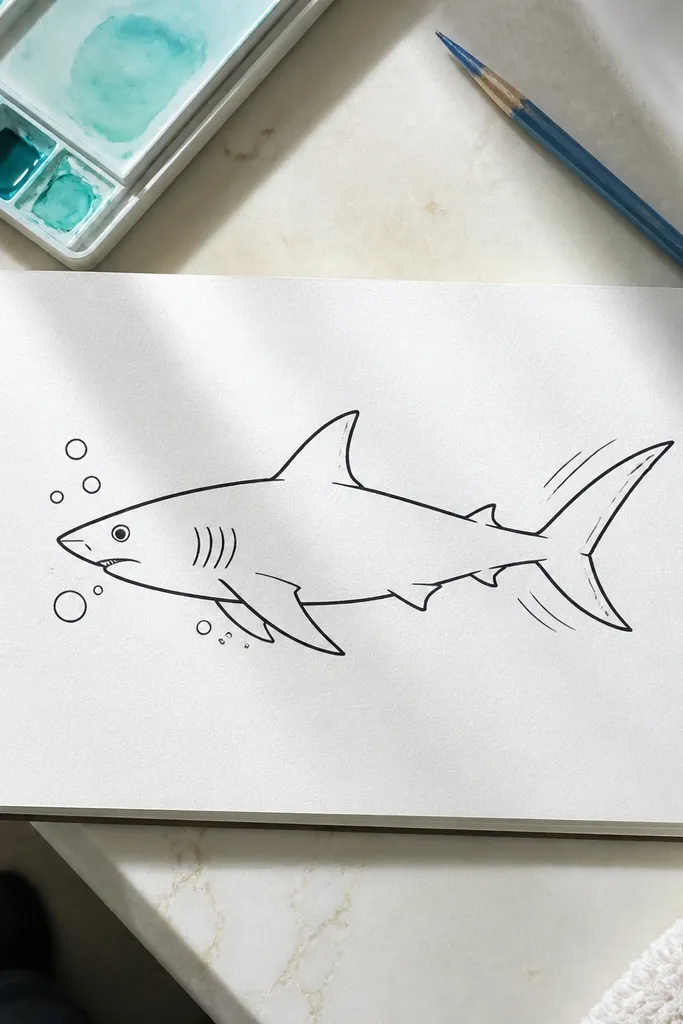
This shark is all about movement. The body stays simple, but you add bubbles and motion swirls that make it feel like it’s gliding across the page. Use a side-profile shark body, then add three to five bubbles of different sizes in front of the head and along the belly. Add two curved motion lines near the tail to imply speed. The look is photogenic because the bubbles create white negative space against blue marker washes. It’s also a confidence builder: once the motion elements are in, the shark reads even if your anatomy is still simple.
Step 1: Draw a side-profile shark body with one dorsal fin and a forked tail, keeping the outline clean. Step 2: Place bubbles in a staggered line from head to tail, varying sizes so they don’t look like a pattern sticker. Step 3: Add two curved motion lines behind the tail and one small splash arc near the mouth. Step 4: Ink, then color the water area with a light blue wash and leave bubbles uncolored.
Color the background, not the bubbles — leaving bubbles white makes the drawing look crisp.
Don’t overcrowd bubbles — five bubbles plus two motion lines is plenty.
5. Top-Down Shark Circle Body
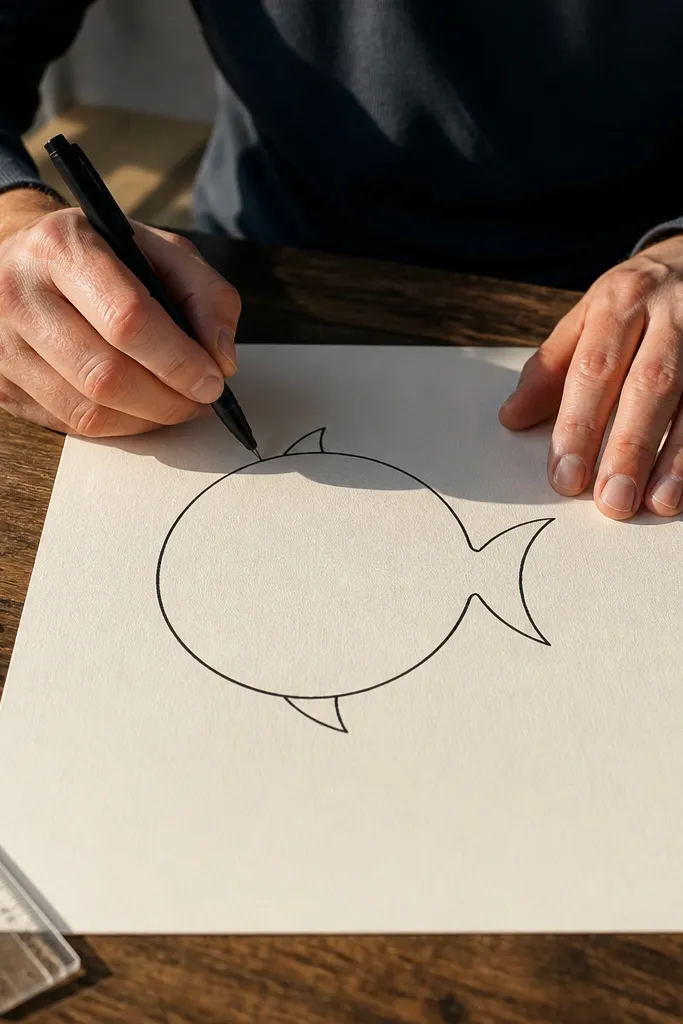
Top-down sharks look trendy and graphic because the viewer sees the shape like a map icon. This design starts with a circle for the body, then you carve the tail and fins using simple cut lines. The dorsal fin becomes a small triangle on the top edge of the circle, and the pectoral fin becomes a tiny wedge on the lower side. Add one eye as a small dot near the “front” edge and a short mouth curve. It’s easy to keep proportions consistent across multiple drawings, which is key if you’re doing 15 in one session.
Step 1: Draw a circle, then mark a front edge with a light pencil dot. Step 2: Add a tail notch by drawing a small V shape on the circle’s far edge, then connect it back to the circle. Step 3: Place dorsal and pectoral fins as small triangles/wedges on the circle boundary. Step 4: Ink the outer silhouette and add the eye and mouth.
Use a compass or a traced cup for the circle — perfect circles make the whole set look intentional.
Avoid making the fins too big — small fins keep the top-down icon readable.
6. Shark Head with Big Mouth Grin
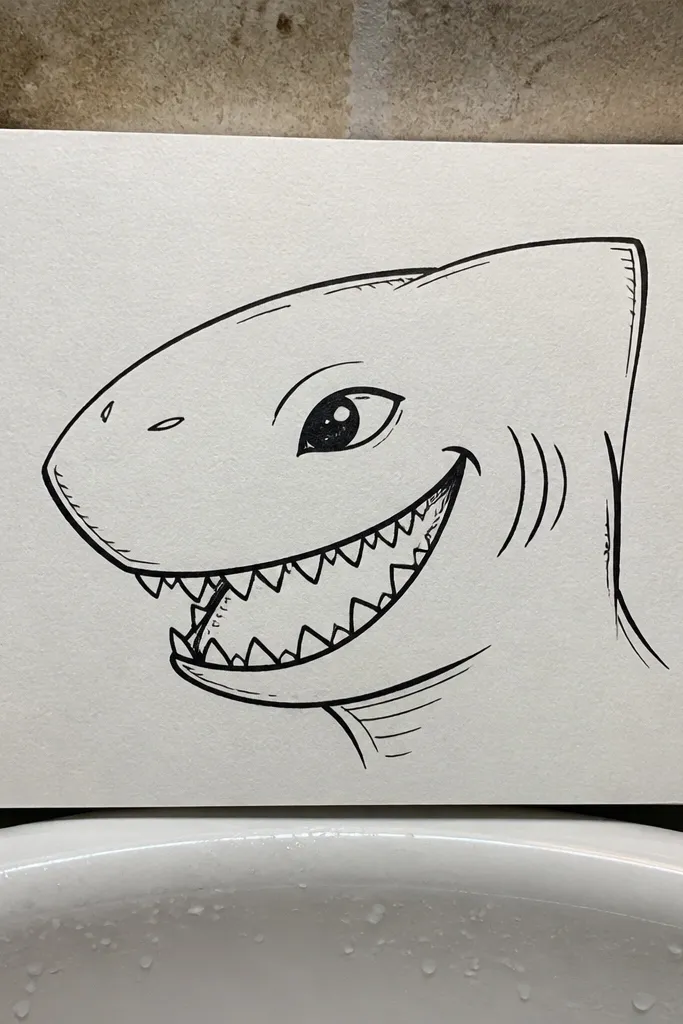
Big-mouth shark heads look instantly expressive and are perfect for a page full of repeatable drawings. Keep the head as a rounded wedge shape, then draw a wide grin with evenly spaced small triangular teeth. The eye is again simple: almond outline, dark pupil, and one white highlight. Add one gill line and a few short contour lines around the snout for depth. This style works with marker coloring because the teeth area gives you natural contrast. If you’re aiming for aesthetic variety on one page, this head design gives you a totally different silhouette than full-body sharks.
Step 1: Draw a rounded wedge for the head, wider at the base and tapering forward. Step 2: Add the dorsal fin behind the top edge as a small triangle, then place the pectoral fin low on the side. Step 3: Draw a wide mouth arc and fill it with 6-10 small tooth triangles. Step 4: Ink and add one gill line, then finish with the eye and highlight.
Color the mouth area with a slightly darker gray-blue than the head for teeth clarity.
Don’t draw teeth as rectangles — triangles read cleaner and look more like shark teeth.
7. Geometric Shark with Sharp Angles
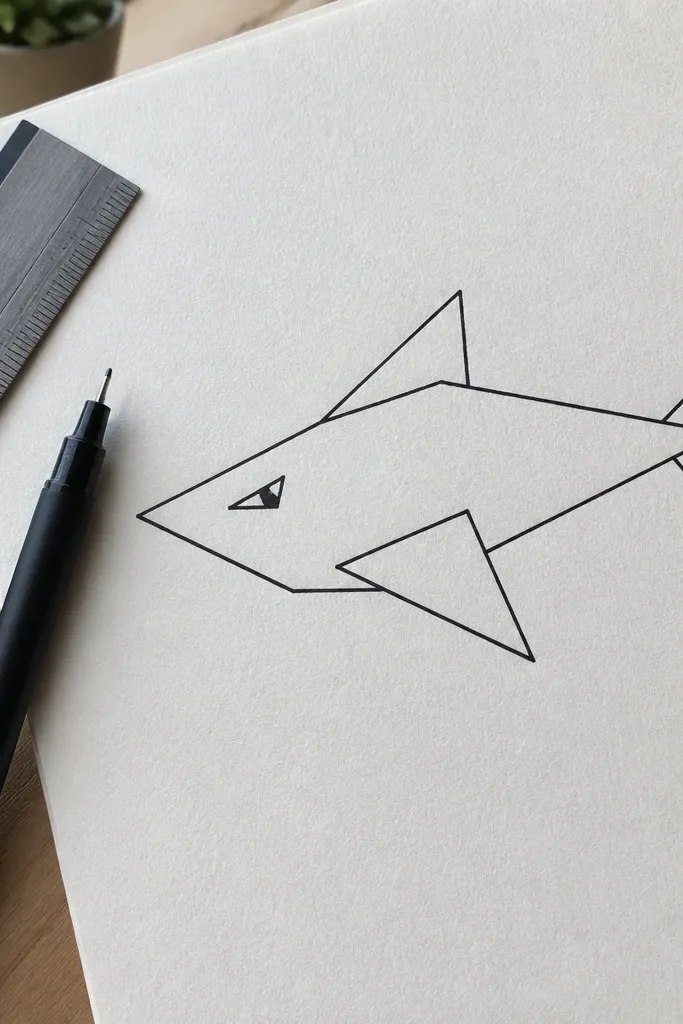
Geometric sharks give you that clean, modern poster look. Instead of curves, you build the shark from triangles and trapezoids: a trapezoid body, a triangle dorsal fin, and a tail made from two large triangles. The eye can be a single angled almond or even a simple dot with a highlight. This style is forgiving because geometric shapes hide sketchy lines — if your angles are bold and consistent, the drawing looks intentional. It’s also great for coloring: fill each shape with a different shade of teal and navy and let the white lines separate them.
Step 1: Sketch a trapezoid body, then add a pointed triangle tail on one end. Step 2: Build the dorsal fin from a triangle sitting on the top edge and add a small trapezoid pectoral fin on the side. Step 3: Add a simple eye mark and a short mouth line using straight strokes. Step 4: Ink all outer edges thickly, then color each major shape with solid markers.
Leave a narrow white gap between colored shapes so the geometry reads in photos.
Avoid blending colors into each other — sharp edges are the whole point.
8. Hatch-Texture Shark Skin Study
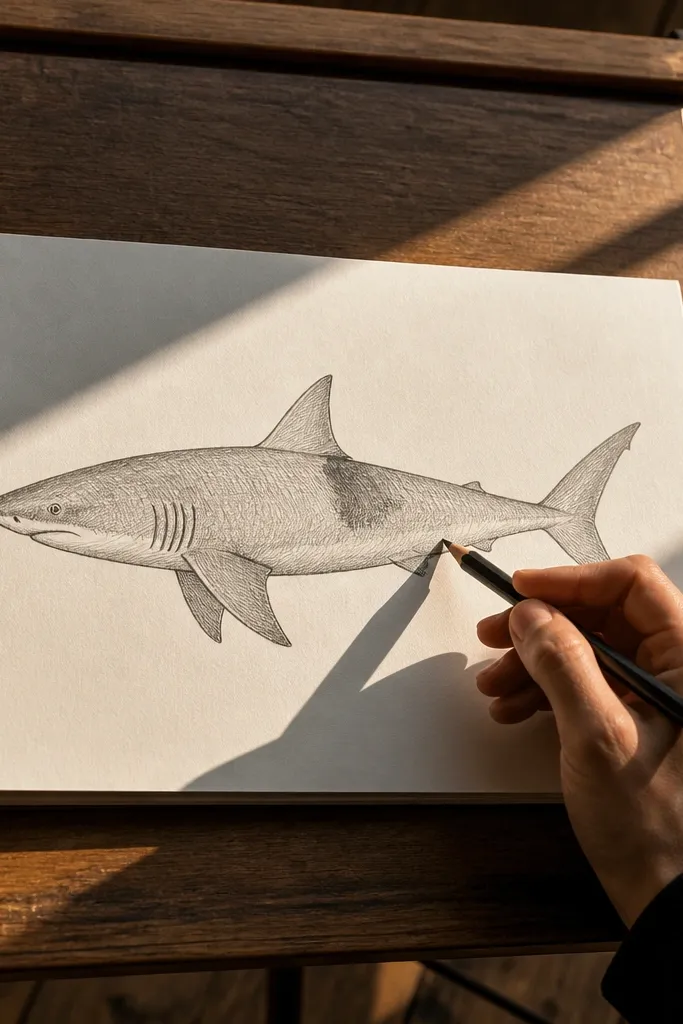
This one is for texture lovers. You keep the outline simple, then fill the body with controlled hatch lines that follow the body curve. The trick is direction: hatch lines should angle slightly toward the tail so they feel like skin movement, not random scribbles. Add a single darker band near the dorsal fin so the shading feels intentional. Use a clean eye with one highlight and two tiny gill strokes. It’s photogenic because hatch texture catches light and creates a satisfying contrast against white paper.
Step 1: Draw a side-profile shark with a clean torso curve, dorsal fin triangle, and forked tail. Step 2: Ink the outline, then lightly pencil guidelines for hatch direction across the body. Step 3: Use a fine pen to draw hatch lines from back toward belly, keeping spacing even. Step 4: Add one darker hatch band near the dorsal fin and finish with the eye and gills.
Start hatch lines near the spine and stop them before the belly so the belly stays lighter.
Don’t crosshatch the entire body — one direction looks sharper and cleaner.
9. Shark in a Bubble Frame
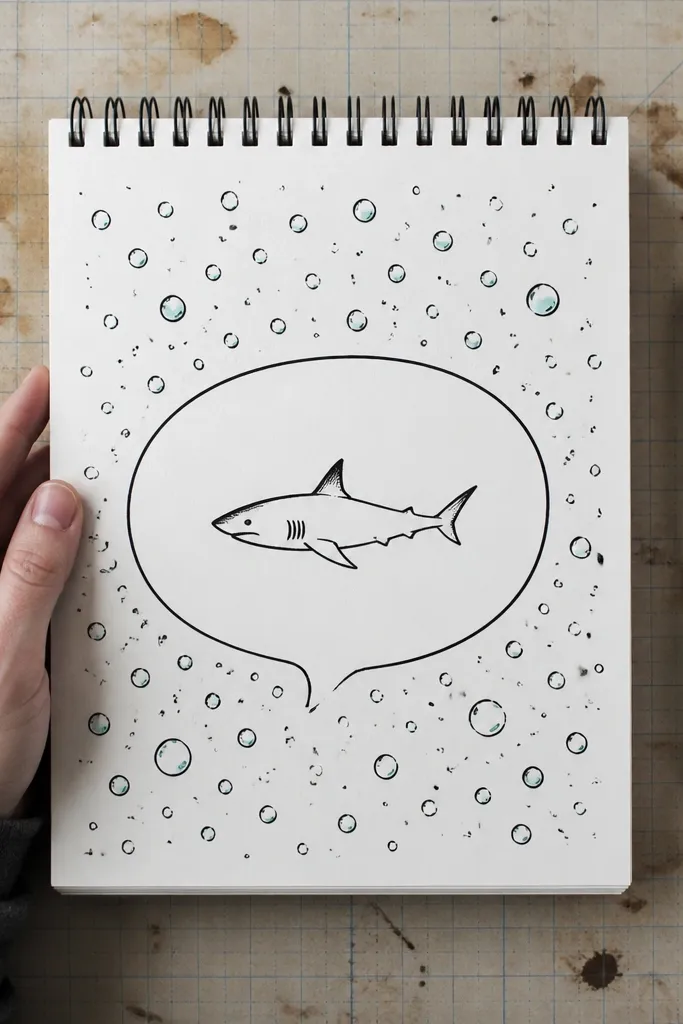
Frame drawings make your shark look finished even when you keep it simple. Put the shark in the center, then draw a rounded bubble outline around it like a speech bubble. Fill the outer area with small bubbles that vary in size, but keep the shark itself minimal. This gives you two layers of interest: the shark silhouette and the bubble frame. It’s aesthetic because the bubble outline creates a natural border for photos and stickers. Use a dark outline and two-tone coloring: one color for the shark, one for the bubble frame.
Pro tipColor the frame slightly darker than the shark so the border reads clearly.
Step 1: Draw a side-profile shark in the center of the page, with a simple dorsal fin and tail. Step 2: Surround it with a big rounded bubble outline, leaving a consistent gap. Step 3: Add 8-12 small bubbles outside the frame, scattered but not touching. Step 4: Ink everything, then color the shark and the main bubble frame with solid marker colors.
AvoidAvoid letting the small bubbles overlap the shark outline — keep them outside the border gap.
10. Shark Fin in Water Ripple Circles
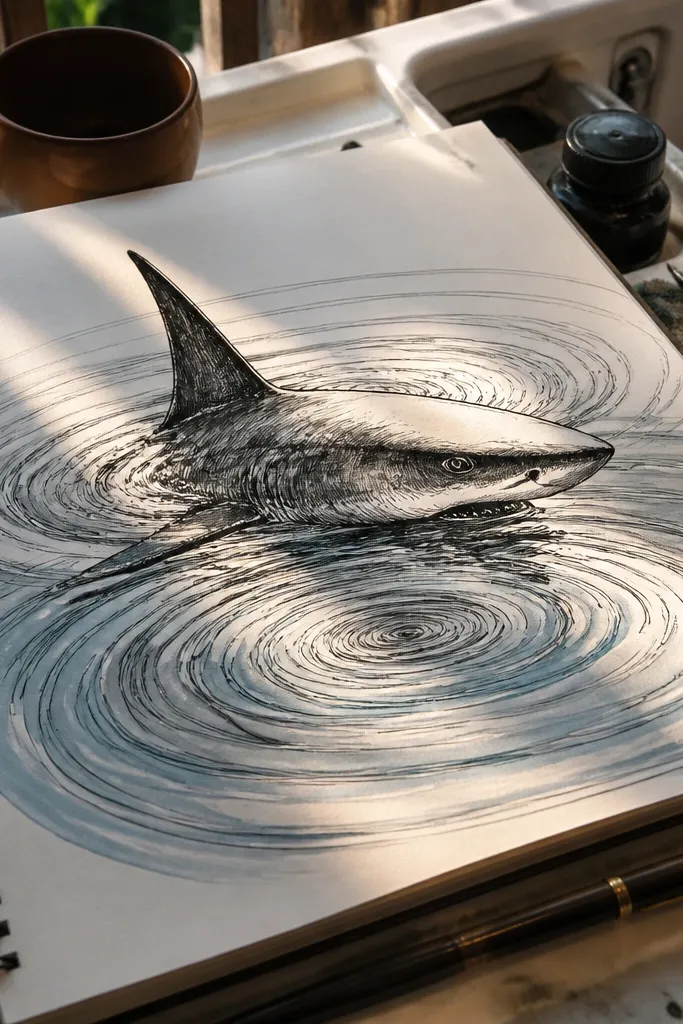
This design looks like a scene even though it’s simple. Draw a half-body shark with the fin and head breaking the waterline, then add ripple circles beneath and around it. The ripples are the visual engine — they guide the eye and make the drawing feel dynamic. Keep the shark shape minimal: one dorsal fin, one eye, and a short mouth curve. Use thin line ripples and a thicker outline for the shark so the hierarchy is clear in photos.
Step 1: Draw a waterline as a slightly curved horizontal line across the page. Step 2: Above the line, draw the shark head and dorsal fin using clean outline shapes, then add one eye. Step 3: Below the line, draw 5-7 ripple circles that expand outward, spacing them evenly. Step 4: Ink and color the shark body with teal while keeping ripples as line-only or light pencil shading.
Make the closest ripple the darkest and let the far ripples fade with lighter line weight.
Don’t draw ripples too close together — the page gets noisy fast.
11. Chibi Shark with Sweater Stripe Pattern
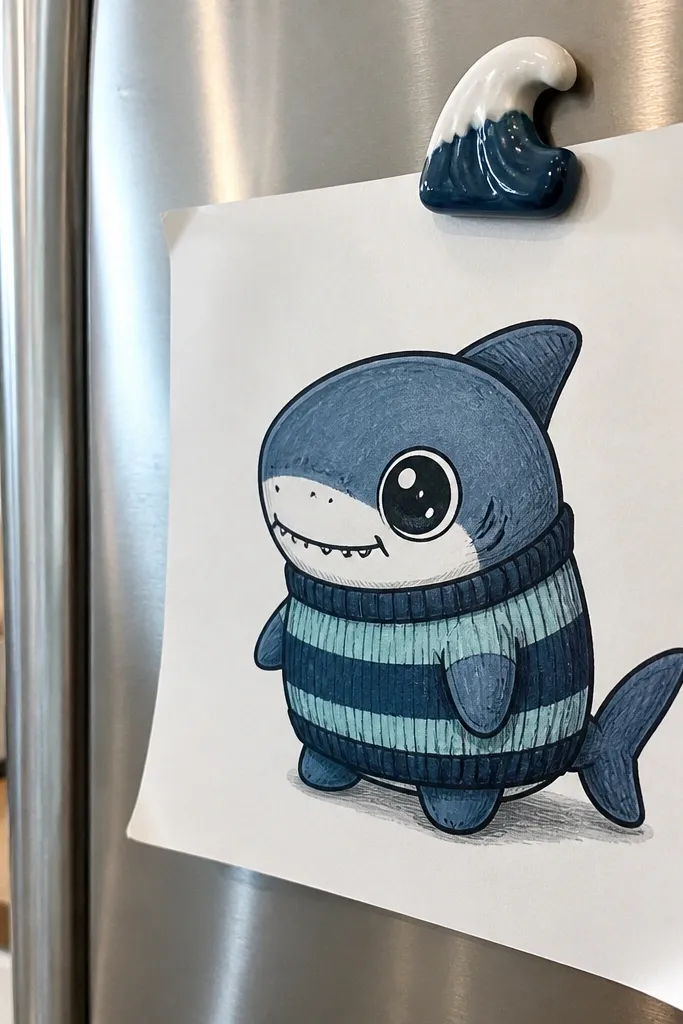
Chibi sharks are the fastest way to get an adorable, aesthetic result. You keep the body short and round, exaggerate the eye size, and add a tiny sweater stripe pattern across the belly. The sweater gives you a built-in design element, which is why this looks good even with limited coloring. Use two stripe bands — one near the top of the belly and one near the bottom — and keep them clean. This style is great for filling a page with variety because it’s simple to repeat with small changes in stripe color and fin position.
Pro tipKeep the sweater stripes straight and thick — tiny, wobbly stripes look messy in photos.
Step 1: Draw a round chibi body with a small head bump, then add a tiny dorsal fin as a triangle on top. Step 2: Add pectoral fins as small angled shapes on the sides and draw two big eyes as filled dots with white highlights. Step 3: Sketch a simple “sweater” band across the belly and add two or three stripe lines. Step 4: Ink the outline, then color with marker: one color for the shark, one for the sweater stripes.
AvoidAvoid adding extra clothing details — the stripes are enough.
12. Shark and Seaweed Silhouette
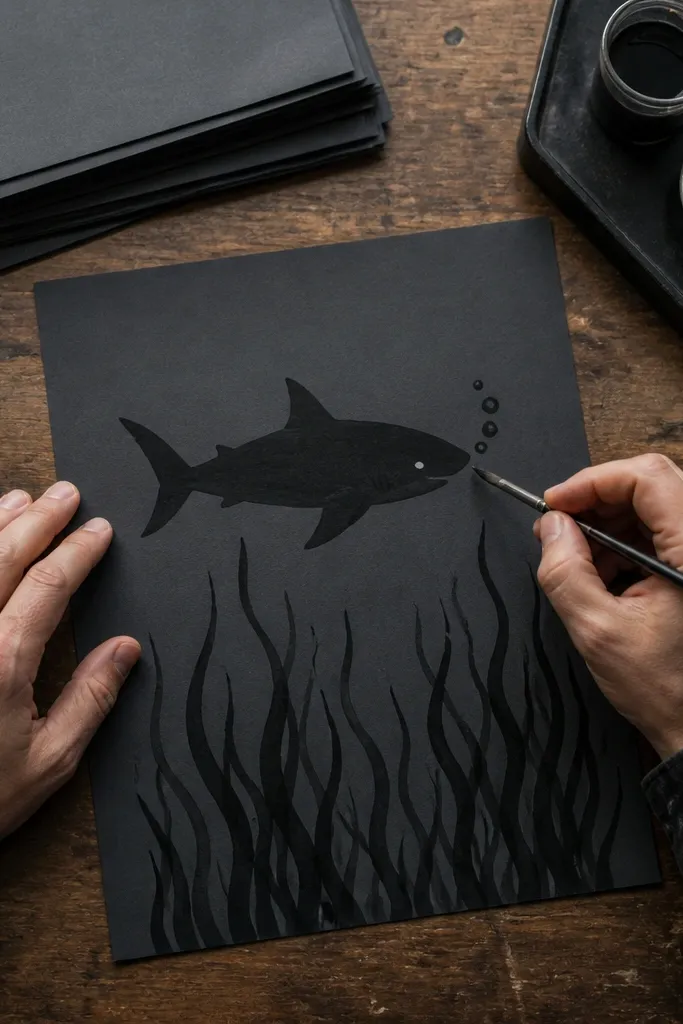
Silhouette drawings look high-end because they rely on shape, not tiny details. Make the shark a solid dark shape with one eye highlight cut out (leave it white), and draw seaweed as tall wavy lines rising from the bottom. Add 3-4 bubbles near the shark’s mouth for balance. This is perfect if you want a dramatic look without rendering texture across the whole body. Use one strong color for the silhouette like deep navy or black, then keep the background lighter with light teal wash.
Step 1: Sketch the shark outline lightly, then fill it in solid with a dark marker or brush pen, leaving a small white eye highlight. Step 2: Draw seaweed from the bottom edge using long wavy lines with side branches. Step 3: Add a few bubbles rising near the shark’s front and a simple waterline gradient with light pencil or marker. Step 4: Ink any seaweed branches you want darker, then stop — silhouettes don’t need extra linework.
Choose one background wash color and keep it light; silhouettes look best against pale paper tones.
Don’t outline the silhouette with thin lines — it defeats the clean, graphic look.
13. Shark Skeleton Doodle (Fun Anatomy)
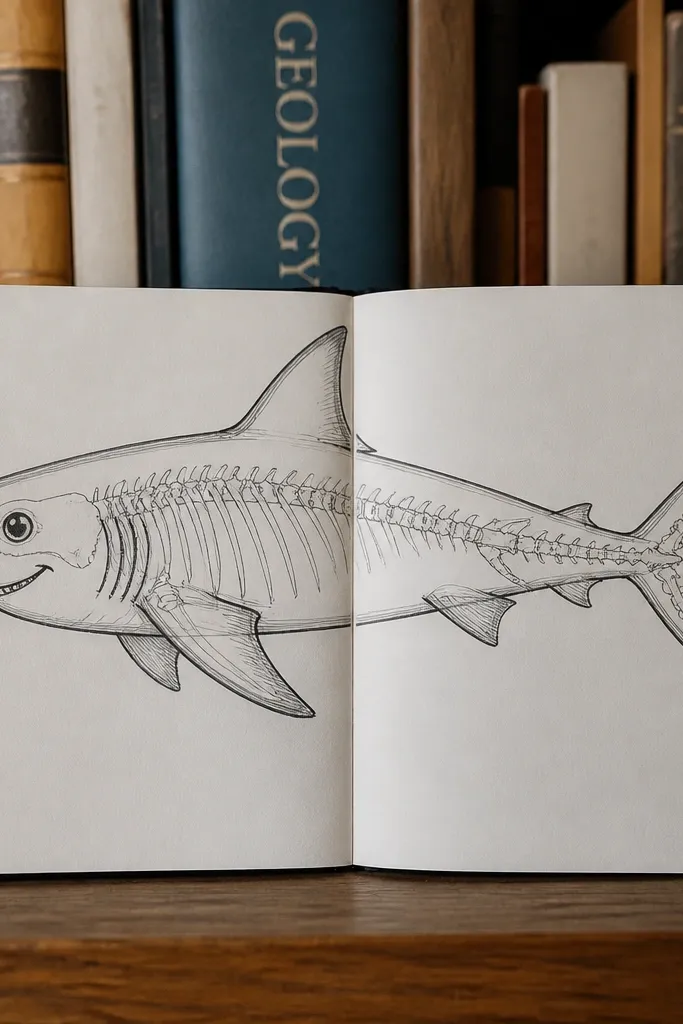
This is the “science but cute” shark drawing that still stays simple. You draw a normal shark outline, then add internal line doodles like ribs or a spine — think of it as a minimal skeleton diagram. Keep the internal lines light and evenly spaced, and choose one expression: one smiling mouth makes it friendly. The eye stays bold with a highlight so it reads as a character. This look is photogenic because the internal lines create a second layer without needing heavy coloring.
Pro tipUse a lighter pen or thinner nib for the internal “bones” so they don’t overpower the face.
Step 1: Draw a side-profile shark outline with dorsal fin and tail, keeping the outer silhouette clean. Step 2: Inside the body, draw a curved spine line from head to tail, then add 4-6 rib lines branching down. Step 3: Add a simple mouth curve and one almond eye with a highlight. Step 4: Ink the outer outline darker than the internal lines so the hierarchy is obvious.
AvoidAvoid adding too many rib lines — 4-6 keeps it readable.
14. Shark Wearing Sunglasses (Minimal Color Pop)
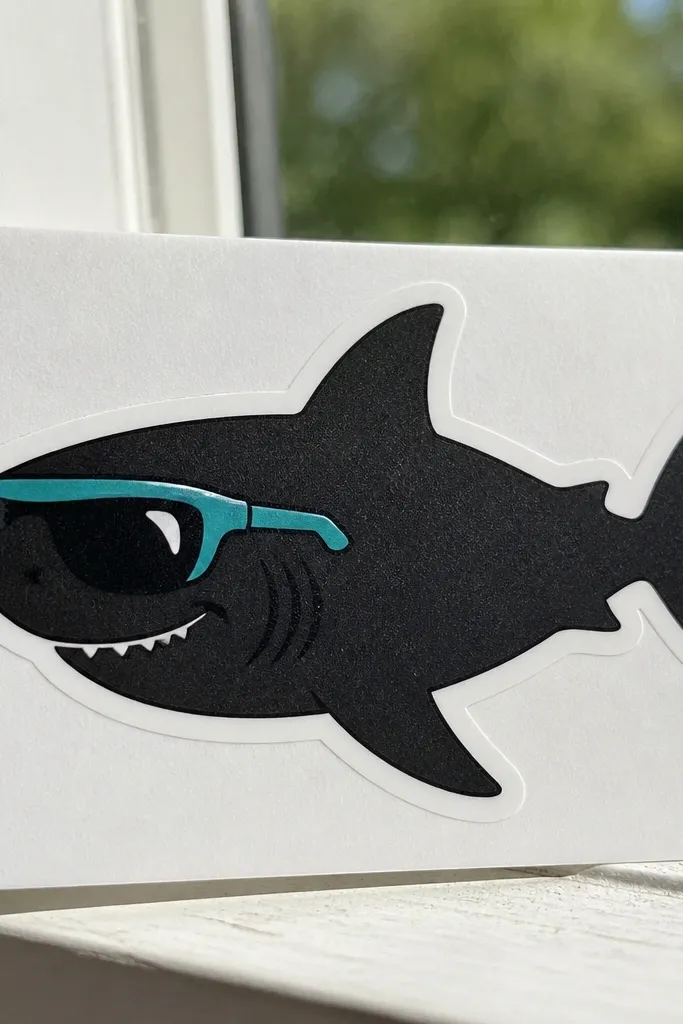
This one is a personality drawing. The shark stays simple — side profile with dorsal fin and tail — but the sunglasses create an instant style cue. Draw the sunglasses as one curved band across the eye area with two small side arms. Add a small highlight on the sunglasses lens and keep the shark color limited to one teal tone. This design is great for aesthetic pages because it gives you a strong focal shape that’s easy to color and re-create across multiple sharks.
Step 1: Draw a side-profile shark outline with a clean torso curve and forked tail, then place the eye spot. Step 2: Draw sunglasses over the eye: one main curved band plus two small arms that connect to the band ends. Step 3: Ink the outline and sunglasses, then color the shark and leave the lens area slightly lighter. Step 4: Add one small mouth curve and a single gill line.
Color the sunglasses with a dark gray-blue and leave a small white lens shine for instant depth.
Avoid drawing sunglasses too big — if they cover the whole head, the shark silhouette disappears.
15. Shark with Watercolor Wash and White Highlights
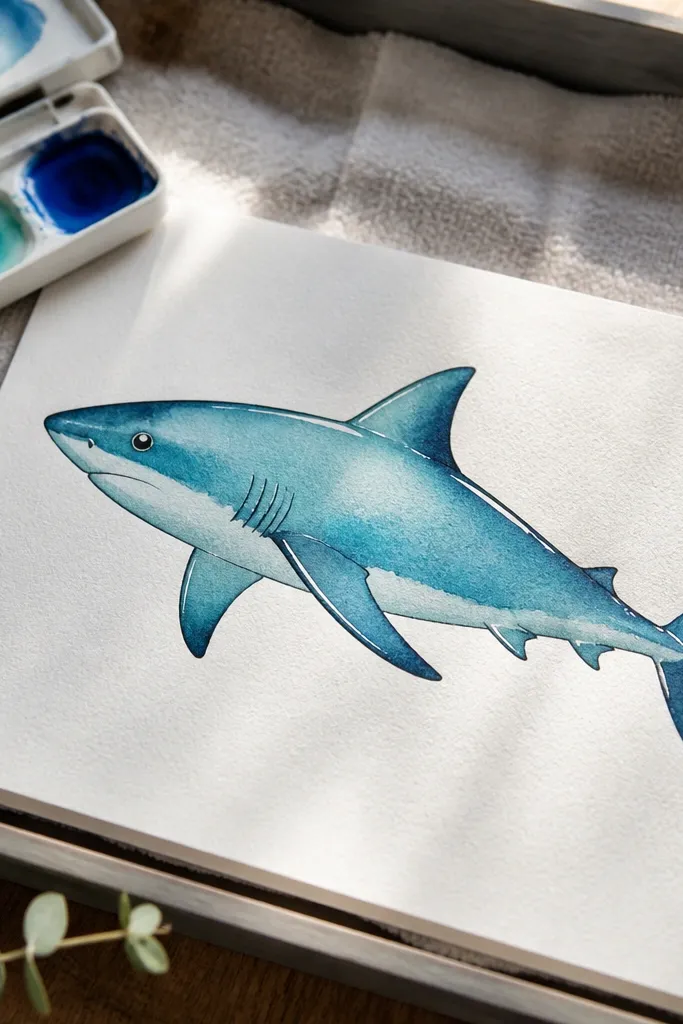
This is the “pretty paper” version that looks soft but still sharp. You draw the shark in pencil, ink the outline, then add a watercolor wash inside the body shape. The key is leaving white highlight spots unpainted: one on the eye, two on the body curve. Keep the wash limited to one or two tones like aqua + navy edges so it doesn’t turn muddy. It’s photogenic because the edges look organic while the silhouette stays crisp from the ink lines.
Pro tipPaint up to the ink lines, not over them — ink bleeding ruins the crisp look.
Step 1: Pencil in a simple side-profile shark body and fins, then ink the outline with a pen. Step 2: Wet the inside of the body lightly with clean water, then apply aqua wash, keeping a lighter center. Step 3: Add a darker navy wash only near the dorsal fin and tail, then stop before it spreads too far. Step 4: Use a white gel pen or white paint to add two highlight spots and one eye shine once the wash dries.
AvoidAvoid heavy over-wetting — watercolor blooms make the fins blur.



