
1. Lantern Fox in a Night Window
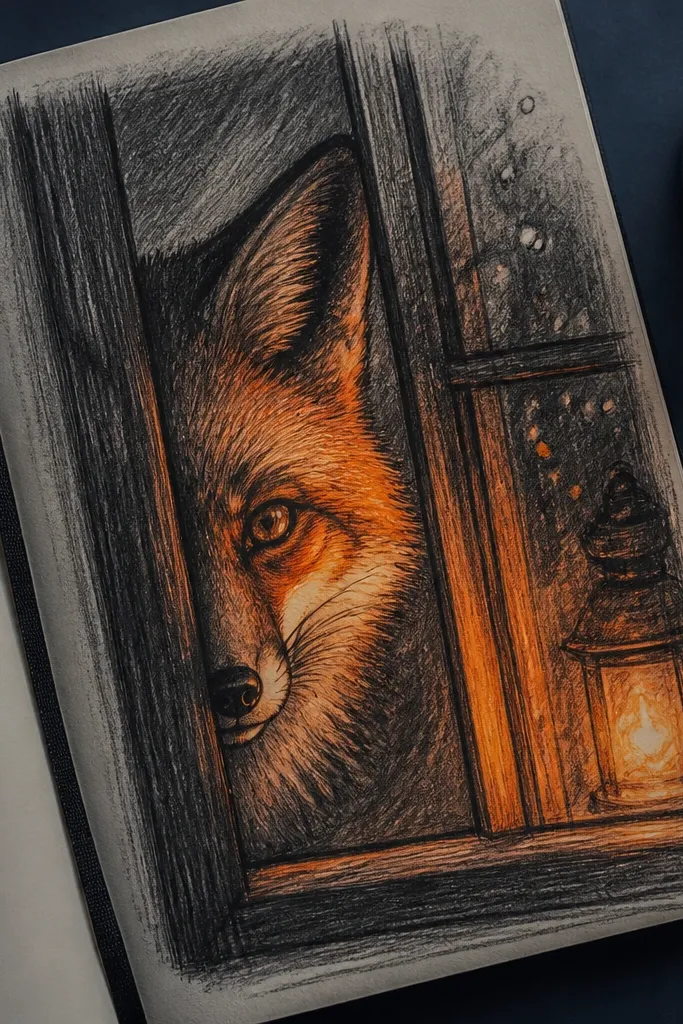
Step 1: Sketch a rectangular window frame first, then place the fox head so the nose sits about one third up from the bottom of the rectangle. Step 2: Draw the lantern as a rounded box with a handle, then color the lantern light area with diluted yellow-orange, leaving the darkest fur shadows untouched. Step 3: Add fineliner details to the eyes, ear edges, and window trim, then glaze a thin navy wash behind the window so everything looks lit from inside.
Draw the fox as a half-portrait peeking from a window frame. The whole look comes from the lantern light: keep your fox fur mostly warm and let the glow wash over the cheek and nose. Use a deep navy background so the orange fur pops, then add small window specks for texture. This is a great theme if you like cozy moods and want your drawing to look cinematic even with simple shapes. It also reads well when photographed because the window border gives instant composition.
AvoidDon’t outline every fur strand — keep fur lines thicker near the face and lighter on the edges.
Pro tipUse a kneaded eraser to lift highlights on the lantern glow and the tip of the nose.
2. Autumn Maple Fox with Falling Seeds
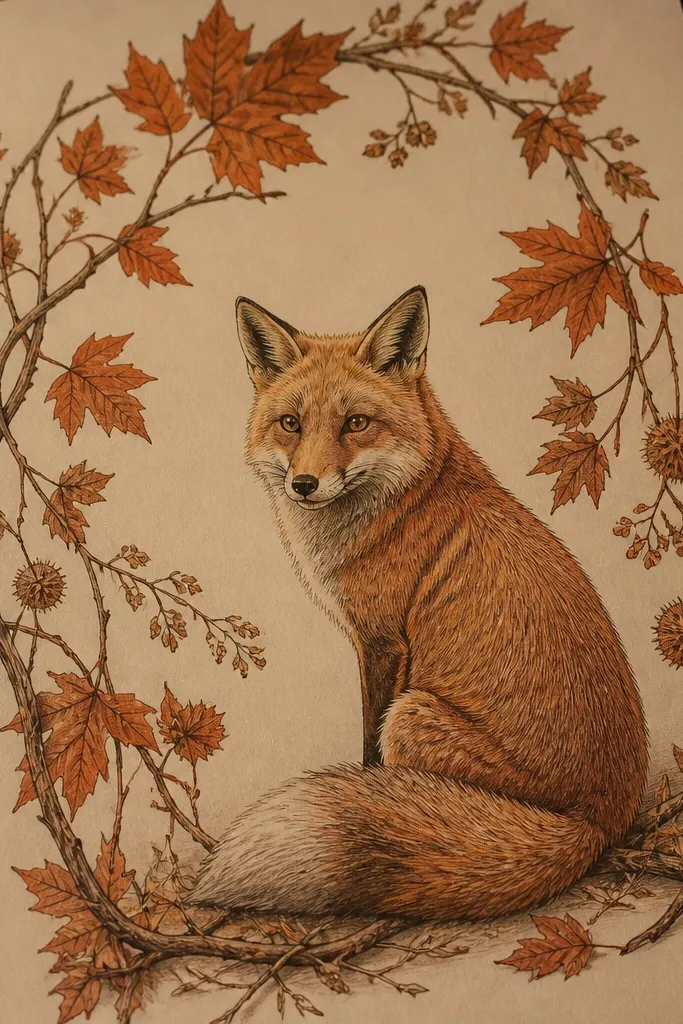
Step 1: Lightly sketch a curved branch across the top third, then tuck the fox beneath it with the head centered. Step 2: Add leaf shapes in clusters, then draw thin seed pods with forked tips drifting downward. Step 3: Shade the fox with a 2B pencil for under-fur shadow and a small amount of burnt orange wash on the cheek and ear interior; finish with a dark brown outline around the branch and paws.
This one looks like a greeting card because the maple branch creates a natural frame around the fox. Draw the fox seated low, then let maple leaves and seed pods arc across the page to guide the eye. Keep the palette warm: burnt orange, pale cream, and dark brown for the fur shadows. The fox’s expression matters here — slightly raised brows and a closed mouth make it feel calm, not frantic. It’s also easy to photograph since the falling seed shapes add movement without clutter.
AvoidSkip full leaf-by-leaf texture; use simple silhouettes and let shading do the work.
Pro tipVary leaf size: big shapes near the branch, tiny ones near the bottom to create depth.
3. Snow Globe Fox with Sparkle Dots
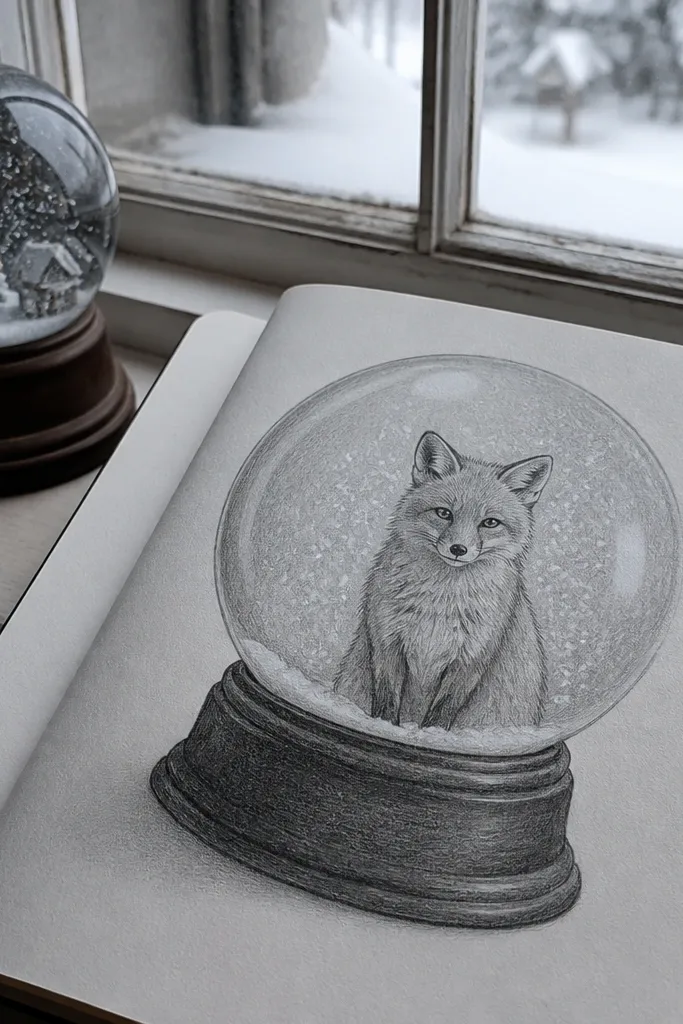
Step 1: Sketch a circle for the globe, add a thick base ellipse below, and draw two horizontal glass bands across the circle. Step 2: Place the fox head behind the lower glass band so the nose sits in the center. Step 3: Shade the fox with pencil and add a diluted cool gray wash to the snow area; finally, sprinkle sparkle dots with a white gel pen or opaque white paint.
A snow globe theme forces you to simplify the background and makes the fox look instantly “designed.” Draw a globe rim first, then place the fox just behind the glass line so it feels contained. The photogenic part is the sparkle field: tiny dots of white and light gray scattered evenly give that winter magic look. Keep your fox fur warm and your snow cool, then add a faint blue tint to the globe interior. This sketch is perfect if you want a themed fox drawing that looks cute without heavy detail.
AvoidDon’t overfill the globe; too many dots make the fox look lost.
Pro tipKeep sparkle dots randomly sized but leave a little breathing room around the fox face so it stays readable.
4. Mushroom Cottage Fox in a Spotted Garden
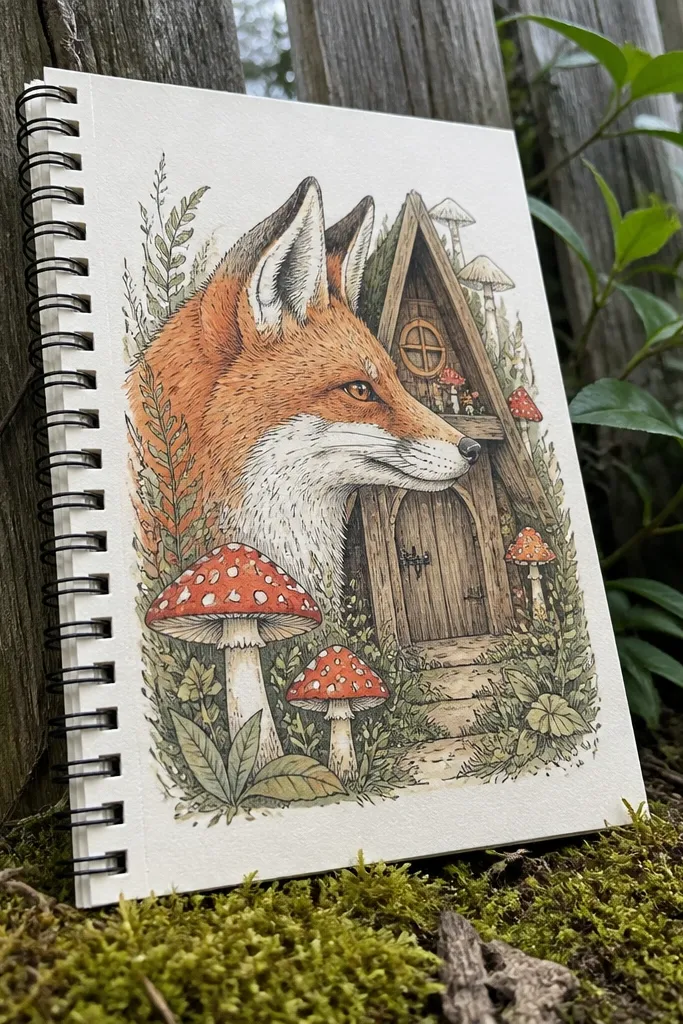
This is a “storybook” themed fox drawing that still looks clean. The trick is to treat mushrooms like graphic icons: bold caps, clear white spots, and simple stems. Place the fox in profile so the eye and snout stay sharp, then add a tiny cottage shape behind it — like a small door or roof triangle. Use red, cream, and dark green for the garden base. The contrast between red mushrooms and warm fox fur makes it pop on a page photo.
Step 1: Sketch a low horizon line for the garden, then block in mushroom clusters on the left and right edges. Step 2: Draw the fox in profile with the body tucked near the bottom center, then add a small roof triangle or door rectangle behind the fox. Step 3: Color mushrooms with red wash, dot white spots, and shade the grass with dark green pencil strokes; outline everything with a fineliner for crisp edges.
Add one small mushroom slightly out of focus by using lighter line weight, so the composition looks layered.
Don’t shade mushroom spots with gray; keep spots clean white for the graphic punch.
5. Book Stack Fox Reading a Secret Letter
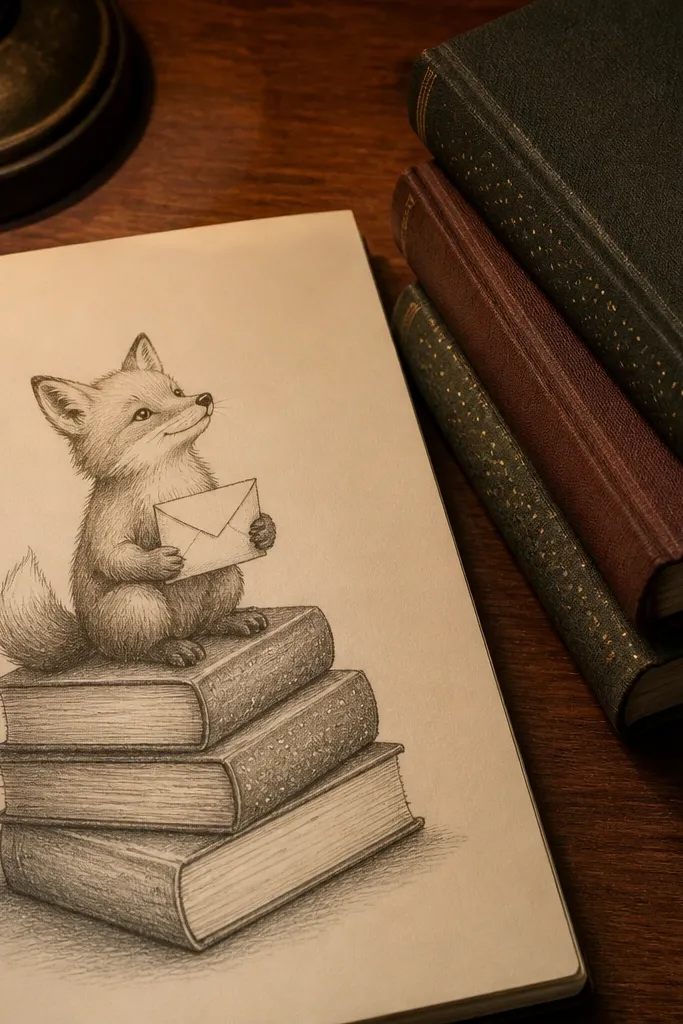
Step 1: Block in three book rectangles with slightly different angles, then sketch the fox sitting on the top book with paws near the spine. Step 2: Draw the envelope — one diagonal fold line and a flap — then add a border frame around the envelope using thin fineliner. Step 3: Color book covers in two tones and use the third tone only for the envelope; shade the fox under the chin and along the belly with 2B pencil.
Books are the easiest way to make a themed fox drawing look intentional because they give you built-in geometry. Draw a stack of three books, then have the fox sit on the top one holding an envelope or letter. Pick one accent pattern for the books (simple stripes or tiny dots) so the whole page stays cohesive. This theme also gives you a chance to show neat line work: crisp book edges and a clean envelope border make the fox look more “illustration” than sketch.
AvoidAvoid random color on every book; pick two book colors and repeat them.
Pro tipUse a ruler for book edges, even if you freehand the fox — it makes the whole drawing look cleaner.
6. Sunset Cliff Fox with Wind-Swept Fur
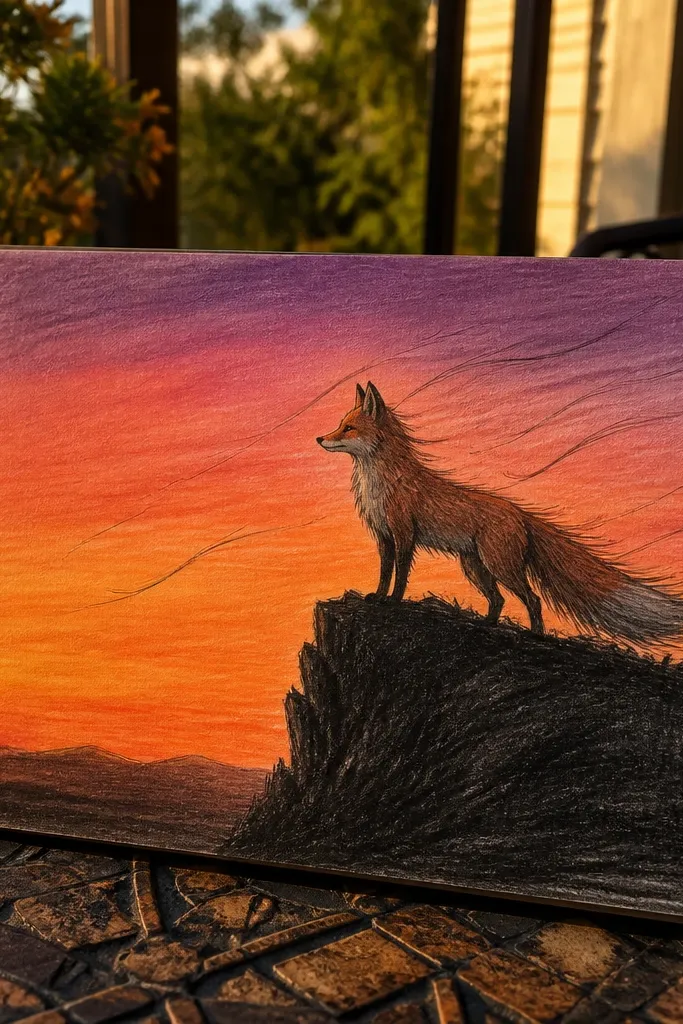
Step 1: Sketch a jagged cliff line at the bottom, then draw the fox in a three-quarter pose with its head toward the horizon. Step 2: Add wind lines across the page using fineliner, then draw fur strokes that follow the wind direction on the ear and cheek. Step 3: Paint the sky with three diluted washes from bottom to top, then shade the fox with pencil and add a thin dark outline to separate it from the sky.
This theme is all about motion. Put the fox on a cliff silhouette, then draw wind lines that sweep across the page and push the fur direction. A sunset gradient makes it photogenic: orange near the horizon, then pink and purple higher up. Keep the cliff dark charcoal so the fox’s outline stays visible. The wind lines also help your shading — you can use longer fur strokes on the side facing the wind.
AvoidDon’t shade the sky with heavy gray; it kills the sunset color.
Pro tipStart the sky wash first, then draw wind lines on top so they stay crisp.
7. Candlelit Fox in a Circle of Stars
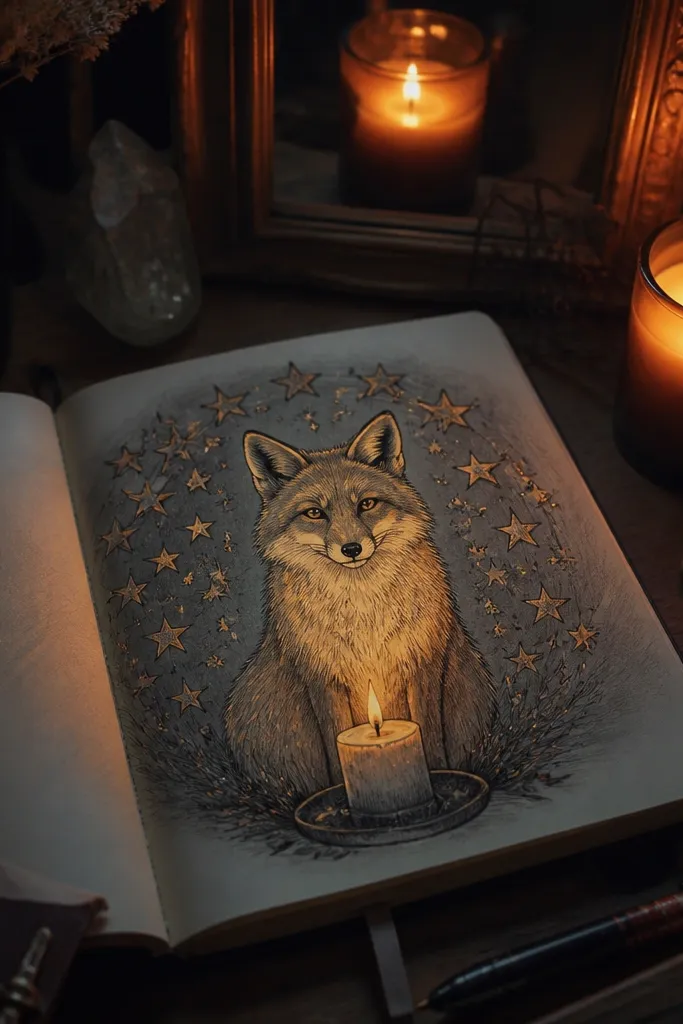
Step 1: Draw a circle guide, then place the fox in the center with the candle slightly forward. Step 2: Add star shapes evenly around the circle, keeping them consistent in size and spacing. Step 3: Color the flame with a yellow-orange core and a faint red ring, then glaze a tiny warm wash over the fox’s muzzle; use charcoal or 4B pencil for the cool shadows and outline with fineliner.
A candle theme looks elegant without being fussy. Draw a simple circle of stars around the fox, then place a lit candle in the foreground so the flame becomes your focal point. Use warm cream and orange for the candle light, then keep everything else in cool gray-blue. This gives you contrast: the flame glow warms the fox face, while the star ring stays crisp and cool. It’s a good pick if you want a themed fox drawing that feels magical but still minimal.
AvoidSkip thick black outlines on the background stars; keep them thin so the candle flame stays the brightest spot.
Pro tipUse a white gel pen to dot tiny highlights on the candle wax and the star tips.
8. Tea Time Fox with Patterned Cup Steam
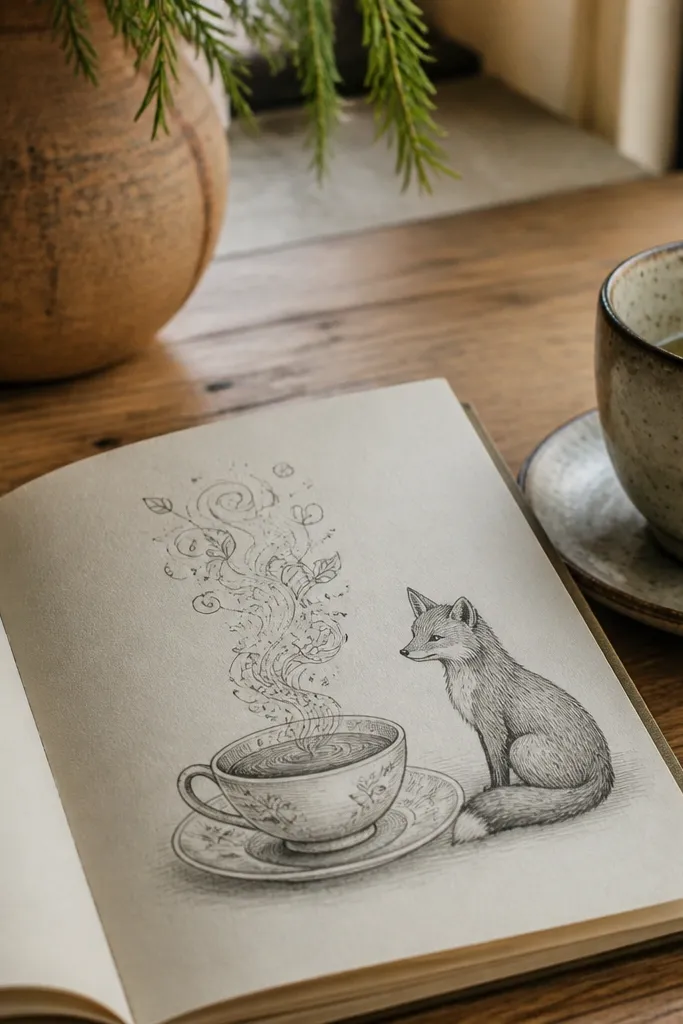
Step 1: Sketch the teacup and saucer first, then place the fox so its face tilts toward the cup. Step 2: Draw steam rising in three to five strands, each strand filled with a repeating pattern (like wave lines). Step 3: Color the steam lightly with a diluted cream wash, then add warm tea tint at the cup bottom; shade the fox underside with 4B pencil and soften with a blending stump.
Steam is the easiest place to make a fox theme look designer. Draw the fox beside a teacup, then turn the steam into a repeating pattern: tiny waves, dots, or little leaf curls. Keep the cup and saucer in clean line work, then shade the fox with soft pencil so the pattern stays visible. The warm background wash makes the steam feel cozy and helps the fox read clearly. This one photographs well because the steam lines lead the eye upward.
AvoidDon’t over-darken the steam; it should look light and airy, not like smoke ink.
Pro tipKeep the steam pattern small and consistent in thickness for a crisp, printed look.
9. Fox in a Terrarium Glass Jar
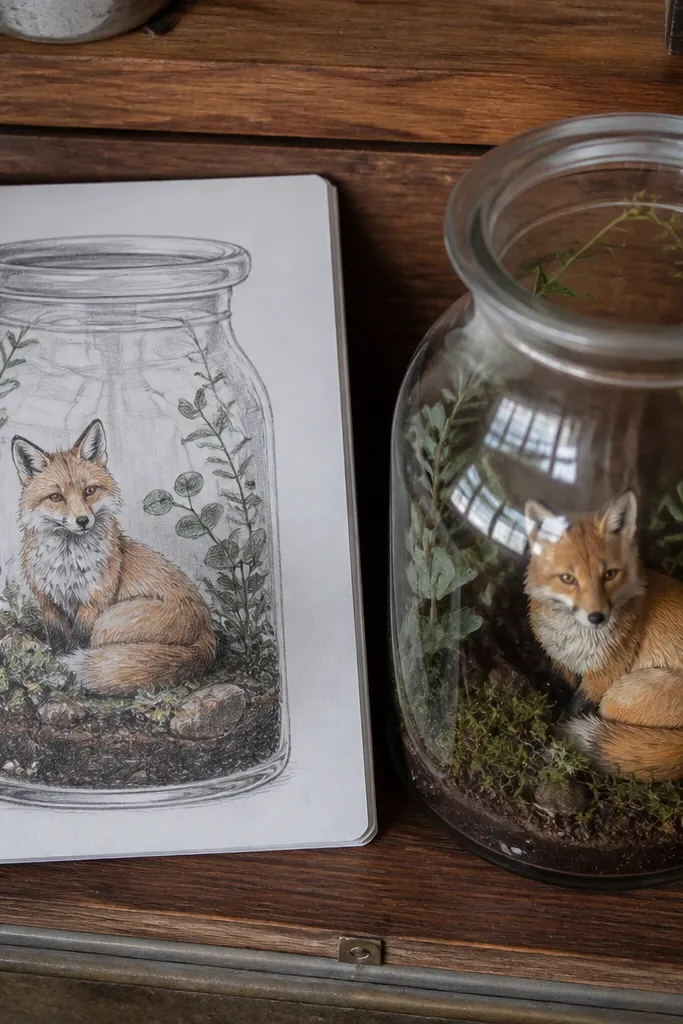
Step 1: Outline the jar shape with a rounded rectangle and a thick top rim, then add a curved highlight band on the right side. Step 2: Draw soil at the base and two or three plant clumps, then place the fox behind the jar opening area. Step 3: Shade the fox lightly, add a thin cool wash over the jar interior, then reinforce jar edges with fineliner and leave the highlight area mostly unpainted.
Terrarium drawings are photogenic because glass lets you play with highlights. Draw a jar with a thick rim, then place the fox behind the glass so you can add curved reflections on the jar surface. Use soil tones for the bottom and small plant shapes around the sides. Keep the fox’s fur warm and add a cool tint to the jar interior so the whole scene looks “contained.” This themed fox drawing looks polished even if your fox anatomy is simple because the jar structure does the heavy lifting.
AvoidAvoid painting the jar rim fully opaque; glass needs transparent-looking edges.
Pro tipUse a white gel pen for the jar highlight — it stays bright on camera.
10. Fox and Snowy Pine Branches
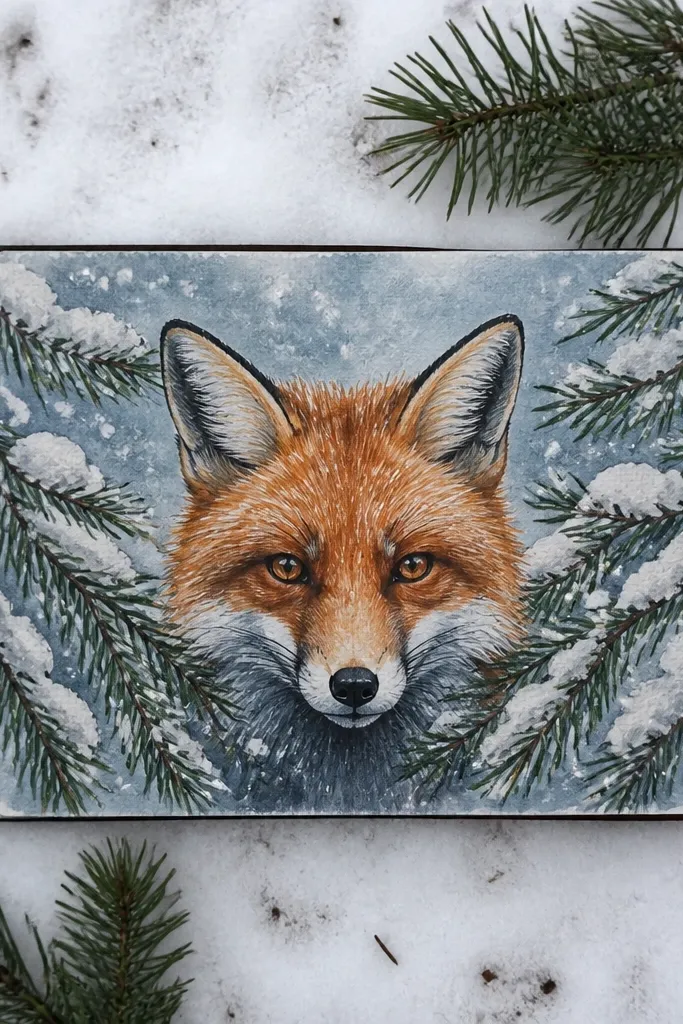
This scene looks instantly wintery because pine branches create a layered frame around the fox. Draw the fox’s face between two branches, then add snow on the upper needles as small clumps and dots. Keep the background pale blue wash so the snow looks bright. The fox fur should stay warm, with darker shadow under the chin and around the ear base. It’s a great choice if you like detailed textures but still want a clean composition.
Step 1: Sketch two big pine branch silhouettes framing the fox, then position the fox face in the gap between them. Step 2: Add needle strokes in short V shapes on the branches and place snow clumps on the top edges. Step 3: Use a light blue wash for the background, shade the fox with pencil, then outline the fox face and ear edges so it doesn’t blend into the snowy tones.
Snow clumps look better in small groups — three to five per branch area beats one big blob.
Don’t make every needle the same length; vary them so the branches feel alive.
11. Hot Cocoa Fox with Marshmallow Clouds
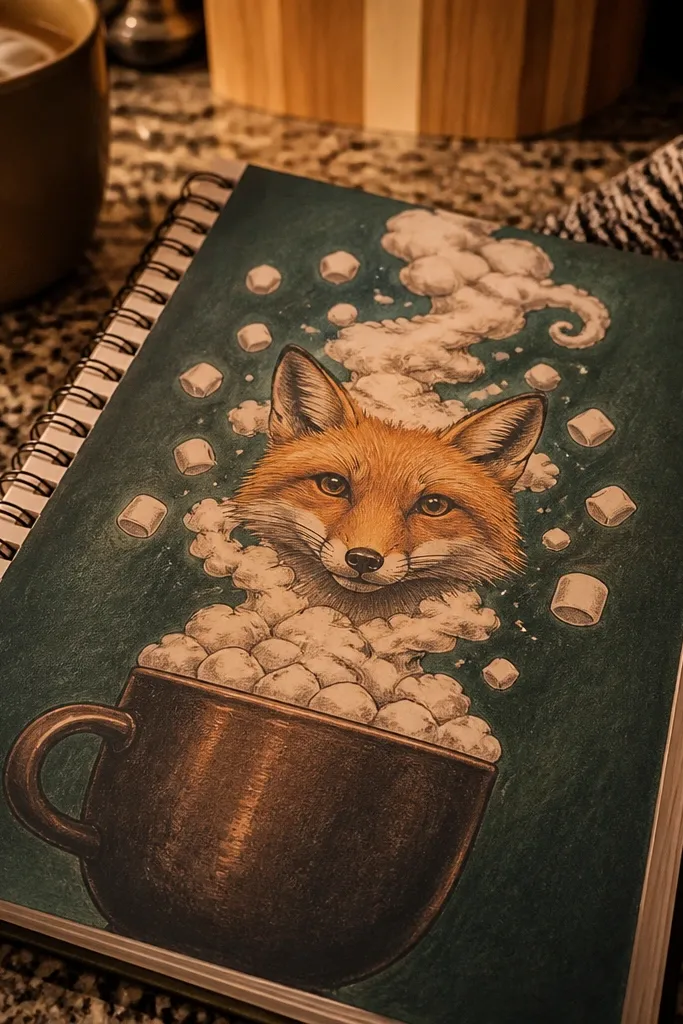
Step 1: Sketch the mug first with a simple oval top and a handle, then place the fox behind the mug so its paws can rest near the handle. Step 2: Draw marshmallows as rounded cloud clusters above the mug, then add tiny drips or shadow under each one. Step 3: Color the cocoa with a brown wash, keep marshmallows mostly white with light gray shadows, and shade the fox with pencil; finish with a dark outline around mug and fox face.
Marshmallow clouds are your theme engine here. Draw a mug in the foreground, then turn marshmallows into soft cloud shapes that drift upward around the fox. Use chocolate brown for the mug, cream for marshmallows, and a deep teal or forest green background for contrast. The fox face stays warm and centered, while the marshmallow shapes add a playful, airy feel. It’s quick, cute, and very photogenic on a page because the cloud forms create a clear top-to-bottom flow.
AvoidDon’t outline the marshmallows too thick; thin lines keep them soft.
Pro tipAdd one highlight streak on the mug — it makes the cocoa look glossy.
12. Fox with Geometric Moon Phases
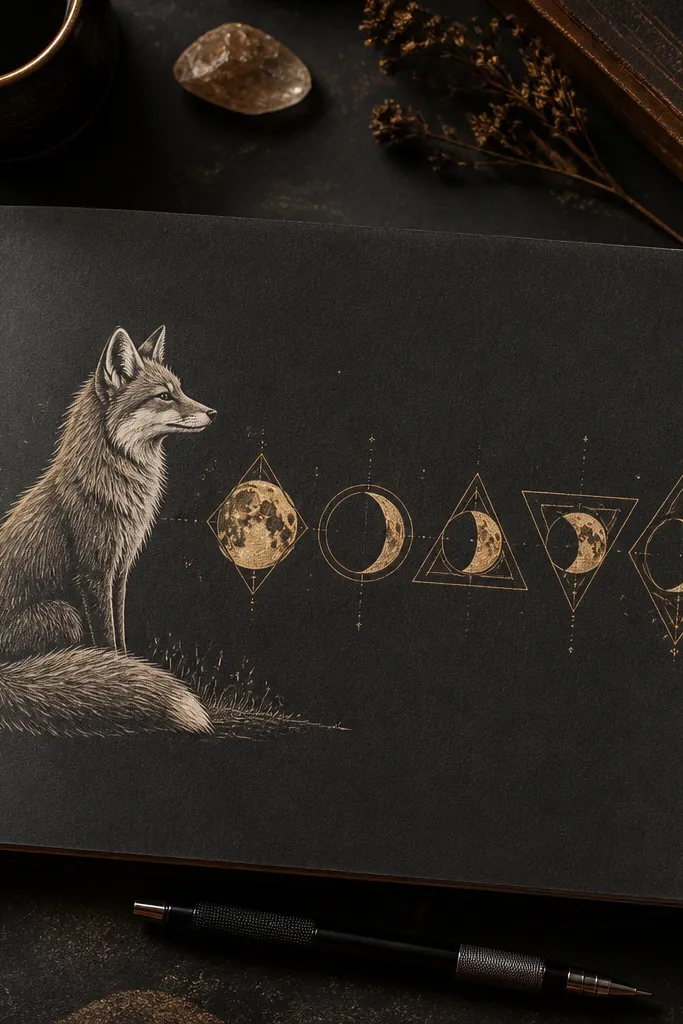
Step 1: Draw the moons as a horizontal row of circles cut with triangles or rectangles so each phase looks different but consistent. Step 2: Place the fox on the left or right with its nose pointing toward the moons, then simplify fur into directional strokes. Step 3: Color the moons with one accent wash or marker, add a dark charcoal background wash, and outline the fox lightly so it stays crisp against the dark field.
If you want a themed fox drawing that looks modern, this is the one. Draw a fox in profile next to a row of moon shapes — each moon clipped into a different geometric form. Use a dark background, then pick one bright accent color for the moons like pale gold or mint. The fox stays simple with a few fur stroke groups, letting the moon shapes carry the graphic style. This works especially well for photo because the geometric row reads instantly even from a distance.
AvoidAvoid mixing multiple moon colors; one accent color keeps it graphic.
Pro tipUse a template circle for the moons so their sizes match — it makes the whole row look intentional.
13. Fox Under a Rainbow Umbrella
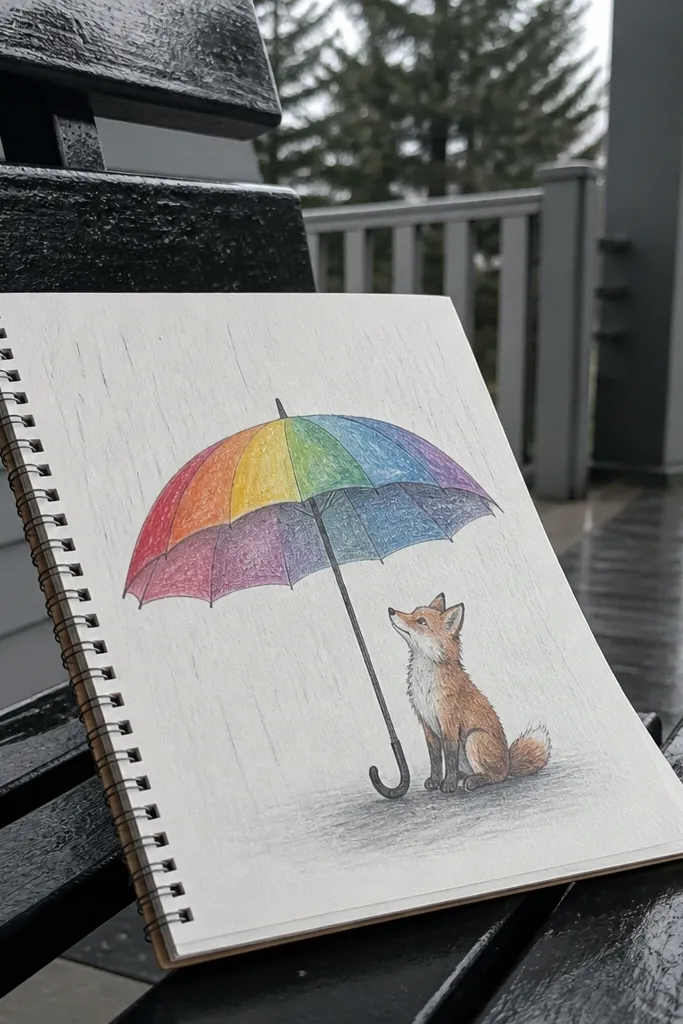
Step 1: Sketch the umbrella ribs as curved lines, then draw a top canopy arc over the fox’s head. Step 2: Add rainbow stripes evenly from top to edge, then draw raindrops as short vertical lines that pass behind the fox. Step 3: Shade the fox with pencil and add a thin dark outline on the umbrella edge; leave the raindrops mostly uncolored with a light gray wash.
Umbrellas are perfect for themed fox drawing because they create a built-in arc that frames the fox. Draw the umbrella open, then stripe it with smooth rainbow bands. Add raindrops falling vertically, but keep them light so the stripes remain the focus. The fox can be small under the umbrella, with its face turned up toward the raindrops. Use a neutral gray background so the rainbow stays bright. This sketch reads “fun” without requiring heavy shading.
AvoidDon’t color the background dark — it dulls the umbrella stripes.
Pro tipKeep stripe spacing consistent by lightly marking the ribs first with pencil.
14. Fox in a Vintage Camera Viewfinder
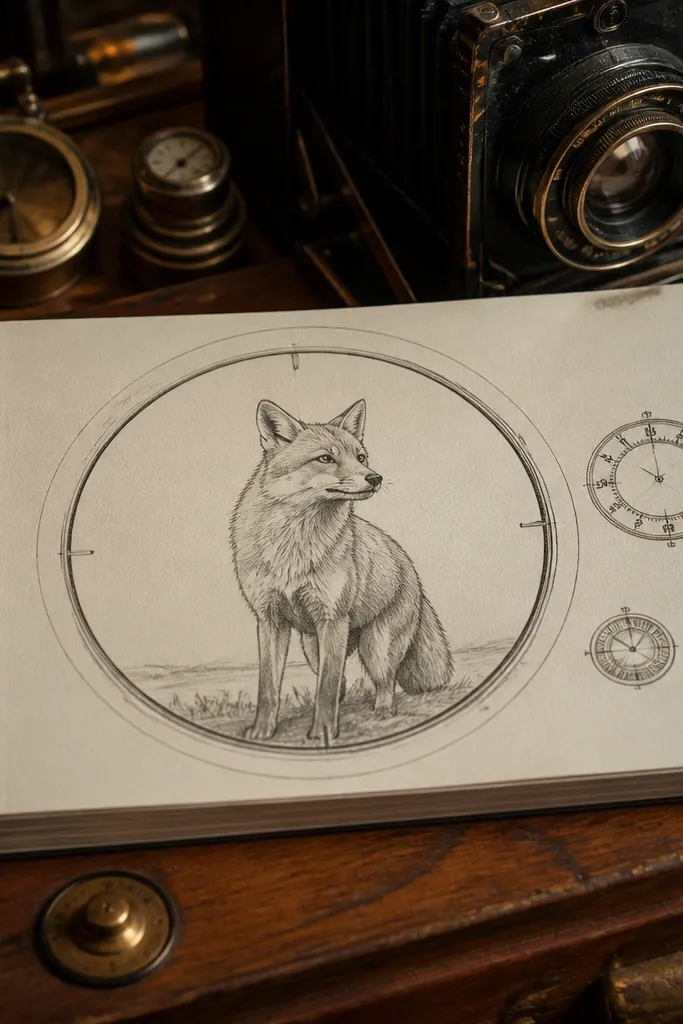
Step 1: Draw a thick outer camera body rectangle, then add a large circle viewfinder in the center. Step 2: Inside the circle, draw the fox face with a clear silhouette and simple fur strokes; add one background element like a tiny hill line. Step 3: Color the camera ring sepia, add teal accents to dials, and outline everything with fineliner; keep the viewfinder interior lighter so the fox pops.
This one makes your drawing feel like a photo even though it’s paper. Draw a big viewfinder circle, then place the fox inside like it’s being photographed. Add two or three vintage dial details outside the circle so the frame looks real. Keep the fox face detailed enough to be readable, but let the camera ring carry the design. Use muted colors: sepia brown, cream, and a small amount of teal for dial accents. It’s a strong choice if you want something aesthetic and structured.
AvoidAvoid cluttering the camera body with too many tiny buttons; keep it to 2-3 shapes.
Pro tipUse a compass or a jar lid for the viewfinder circle so it stays perfectly round.
15. Fox and Vines on a Hanging Pot
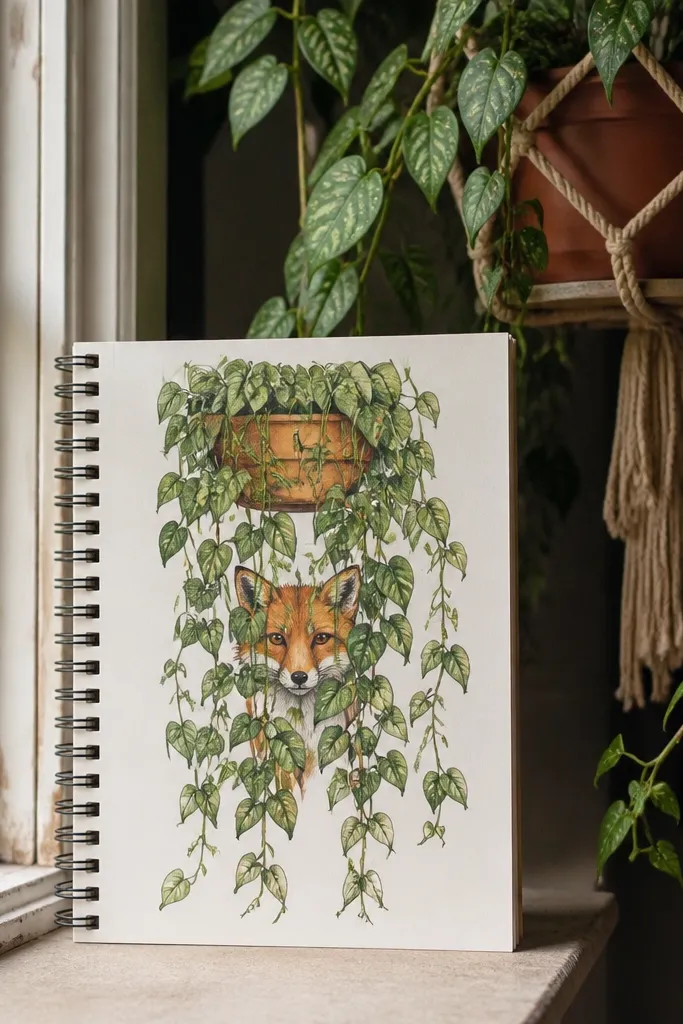
Step 1: Sketch the pot rim and hanging straps, then draw the fox inside or just behind the rim. Step 2: Add vine lines that curve outward and downward, then attach leaf shapes along the vines with simple pointed ovals. Step 3: Color leaves with layered green tones using pencil or watercolor pencil, shade the fox under the rim, and outline vine stems with a darker pencil for contrast.
Hanging pots look great because they create a top anchor and a downward flow. Draw a pot shape at the top, then let vines trail down around the fox. The fox can sit inside the pot rim or peek from behind the leaves. Use greens plus one warm accent color for the fox and pot highlights. This theme also gives you a natural place to practice line confidence: leaf veins and vine curves look best when your lines are smooth and consistent. It’s photogenic because the vertical vines guide the eye.
AvoidDon’t overcrowd the pot; leave some negative space so the fox face stays clear.
Pro tipMake the vine stems slightly thinner as they go downward — it adds depth fast.
16. Fox in a Star Map with Constellations
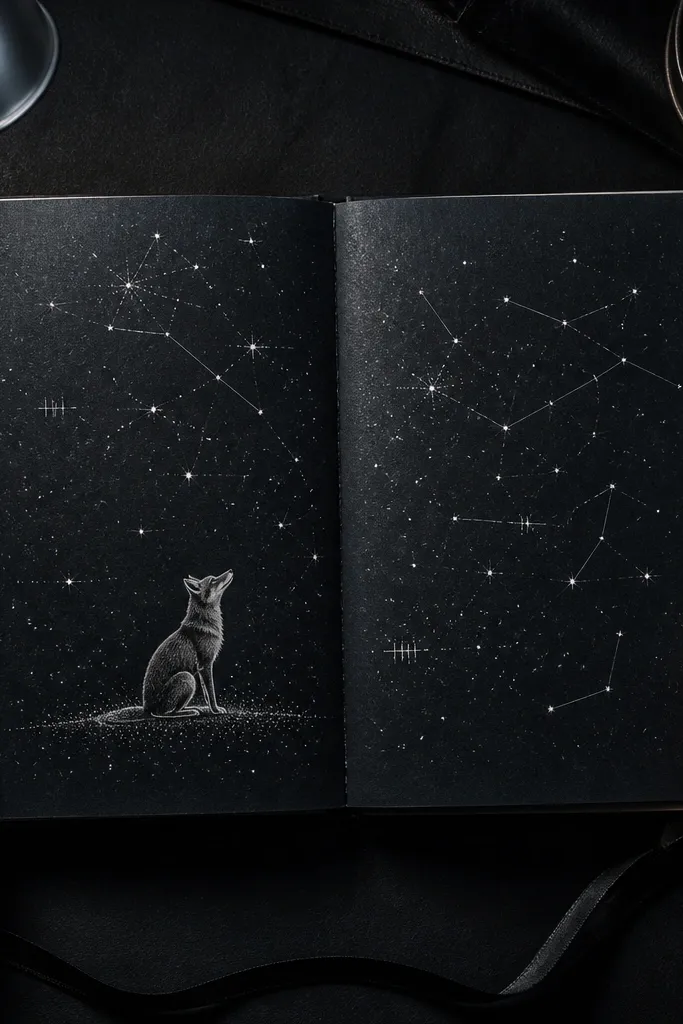
Step 1: Shade the background with a light charcoal tone, then place a small cluster of stars around the fox. Step 2: Draw constellation lines as thin straight segments and connect them with slightly larger dots at the ends. Step 3: Add one accent constellation line in dusty gold (marker or gel pen), then outline the fox with fineliner so it stays crisp against the dark field.
Star maps look clean and “designed” because the dot-and-line system is organized. Draw the fox sitting on a small patch of stars, then connect a few constellations around it. Add tiny label marks like short tick marks or simple symbols, not full readable text. Keep the palette black or deep charcoal, off-white dots, and one muted accent like dusty gold for the constellation lines. This themed fox drawing is visually striking because it has structure — dots, lines, and a centered subject.
AvoidDon’t draw too many constellations; 2-3 connected shapes is enough.
Pro tipUse a needle or toothpick to place tiny dot stars if you don’t have a dotting tool.
17. Fox with Tea Leaves Floating Like Hearts
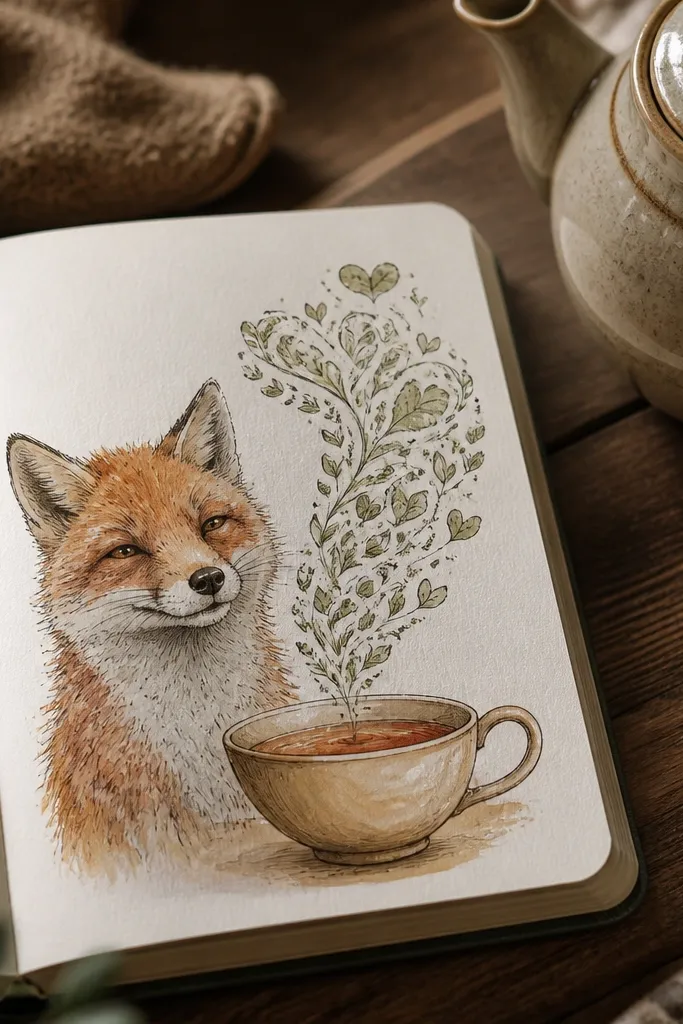
Step 1: Sketch the cup and saucer, then draw the fox behind it with its muzzle near the cup rim. Step 2: Draw leaf shapes rising in clusters that form partial heart silhouettes, leaving gaps so they don’t become a solid blob. Step 3: Color cup with warm brown wash, leaves with muted green-brown, and add soft shadow under the fox chin; finish with a clean outline around the cup and fox face.
This theme turns “steam” into heart clusters without making it cheesy. Draw a cup, then fill the rising space with small leaf shapes that curve into heart-like groupings. The fox face can be calm, with one eye slightly more expressive than the other. Use a warm tea color for the cup and a soft green-brown for the leaves. Keep the background pale so the leaf shapes stand out. It’s photogenic because the heart cluster gives instant meaning, even with minimal detail.
AvoidAvoid using a bright red for the hearts; tea-themed colors look more cohesive.
Pro tipMake leaf shapes different sizes so the heart clusters feel airy, not stamped.
18. Fox in a Frame of Autumn Weather Icons
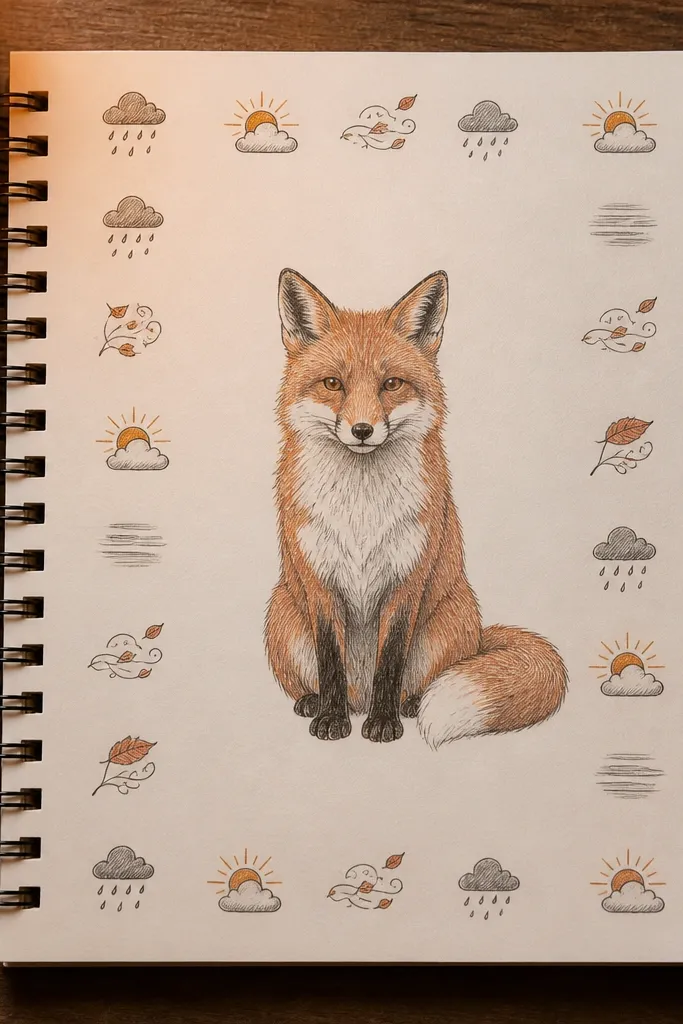
Step 1: Lightly sketch a rectangular border and mark small icon boxes along the edges. Step 2: Draw the fox in the center with a simple face and ear outlines, then add one small prop in the fox’s paws like a tiny leaf. Step 3: Fill the border with weather icons in the same line weight, then color only the sun or leaf icon with orange while keeping clouds and fog in gray.
Weather icons make a themed fox drawing feel like a set of stickers. Create a border around the page with tiny icons: cloud with raindrops, sun behind clouds, leaf swirl, and fog lines. Put the fox in the center, facing forward, with simple fur shading so it doesn’t compete with the icons. Use a limited palette like orange, cream, and charcoal. This works well for people who want theme variety but hate drawing full scenes — the border does the work.
AvoidDon’t add too many icon types; pick 3-4 and repeat them around the frame.
Pro tipKeep all icons the same height so the border looks like a grid, not a pile.
19. Fox with Candy Stripe Scarf and Sweets
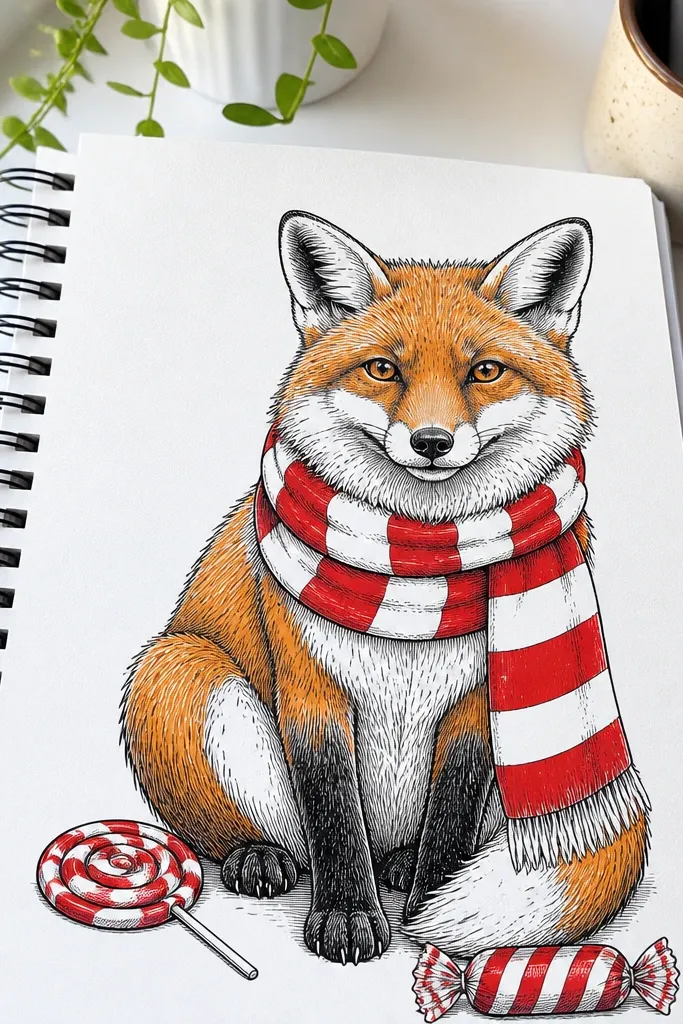
Step 1: Draw the fox bust and add a scarf that wraps around the neck with two or three thick folds. Step 2: Stripe the scarf with alternating colors using marker or watercolor pencil, then draw one lollipop and one wrapped candy with matching stripe accents. Step 3: Shade the fox with pencil under the scarf and around the cheek, then outline the scarf folds with fineliner for crisp edges.
This themed fox drawing is about bold color hits. Draw a scarf with thick candy stripes and repeat the same stripe pattern across the scarf and a couple of sweets. Place a lollipop and a wrapped candy near the fox paws for instant theme clarity. Use a clean white page background so the saturated colors look bright in photos. Your shading can stay simple because the stripes and candy shapes carry the aesthetic. It’s a good weekend project if you want a fun, graphic look without complex scenery.
AvoidAvoid thin, wobbly stripes; thick stripes forgive imperfect lines and still look intentional.
Pro tipLeave tiny gaps between stripe bands so they read as separate bands on camera.
20. Fox Portrait with Minimalist Color Block Background
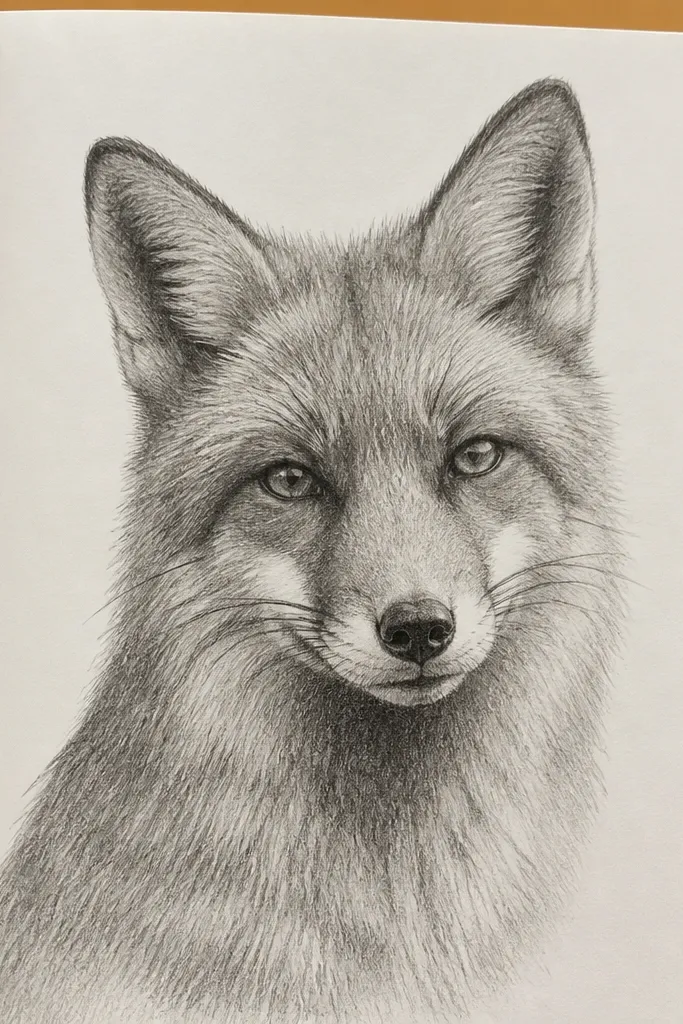
Step 1: Sketch the fox face in the center with a clear eye and nose shape, then block in two or three geometric background shapes behind it. Step 2: Color the background shapes first with marker or flat watercolor, keeping edges crisp; let dry. Step 3: Shade the fox with 2B pencil for shadows and blend lightly, then go over key lines with fineliner and add a small highlight dot on the nose.
Sometimes the best themed fox drawing is almost boring in the background and loud in the fox. Use a minimalist color block behind the fox — two or three solid shapes with sharp edges. Keep fur shading controlled: dark shadow under the chin, lighter highlight on the cheek, and a clean nose outline. This makes your fox look like an illustration print, and it photographs cleanly because there’s no busy texture competing for attention. It’s also fast: you can finish this in under an hour with a fineliner and one wash or marker.
AvoidDon’t add extra background doodles; the color blocks are the theme.
Pro tipUse painter’s tape to mask the background blocks for perfectly straight edges.



