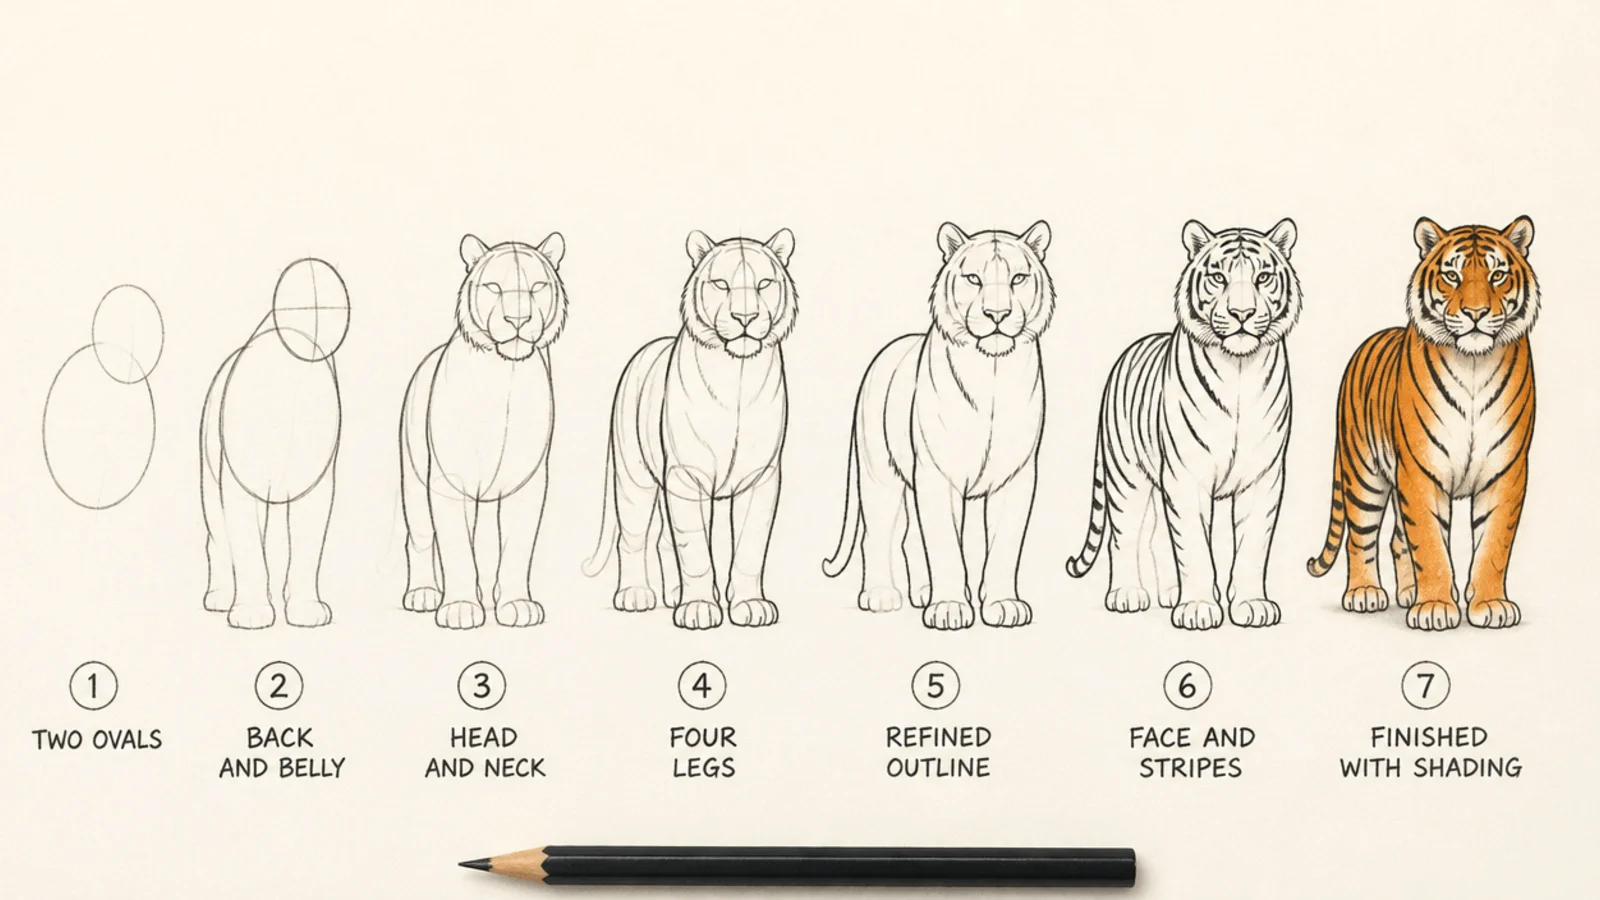
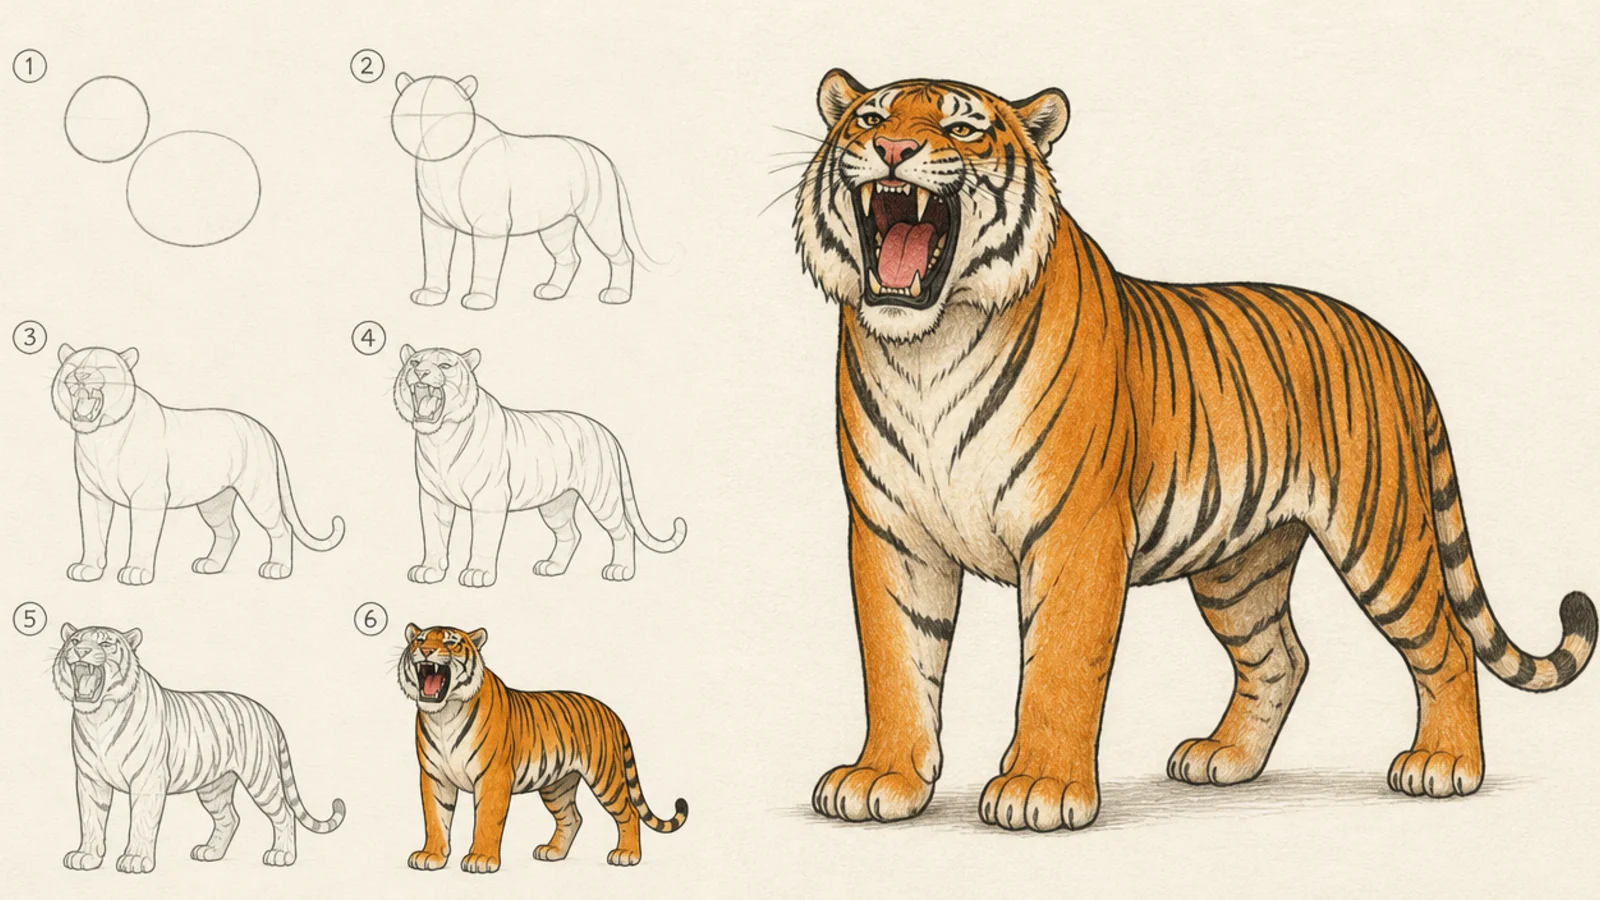
Drawing a whole tiger is far easier than it looks once you follow the right order. Work from the big shapes to the small details — build the body from two ovals, add the back line and legs, then the head, and save the stripes and shading for last. That sequence keeps you from fussing over stripes before the tiger even has a body. This tutorial walks you through 7 simple steps that build a complete standing tiger, plus a few bonus variations to try once you have the basic animal down.
The single most important rule for drawing any animal is to build the big shapes before the details. Start a tiger with two ovals — a bigger chest and a smaller hip — joined by a curved back, because that framework sets the whole proportion before you commit to a single line. If you start with an eye or a stripe, you box yourself in and the body comes out wrong.
Before you start, keep your tools simple — one pencil for the light construction, a softer one for the darks, and an eraser to clean up the guides. Have a reference nearby for the leg positions and the stripe flow, and keep every early line light so you can adjust the skeleton before you commit to the outline.
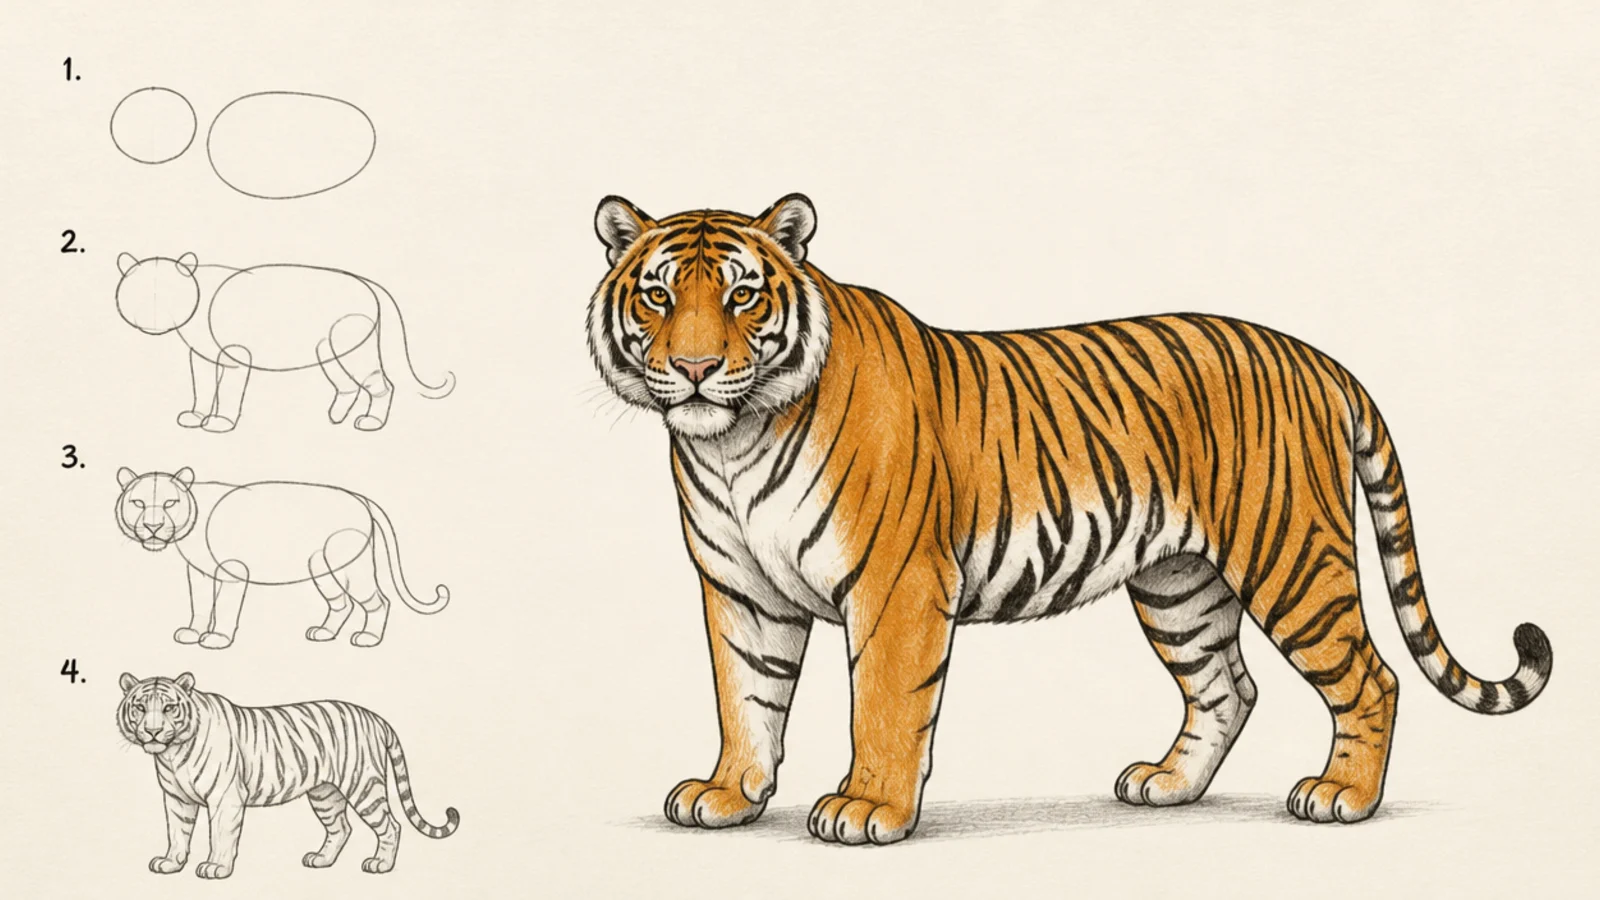
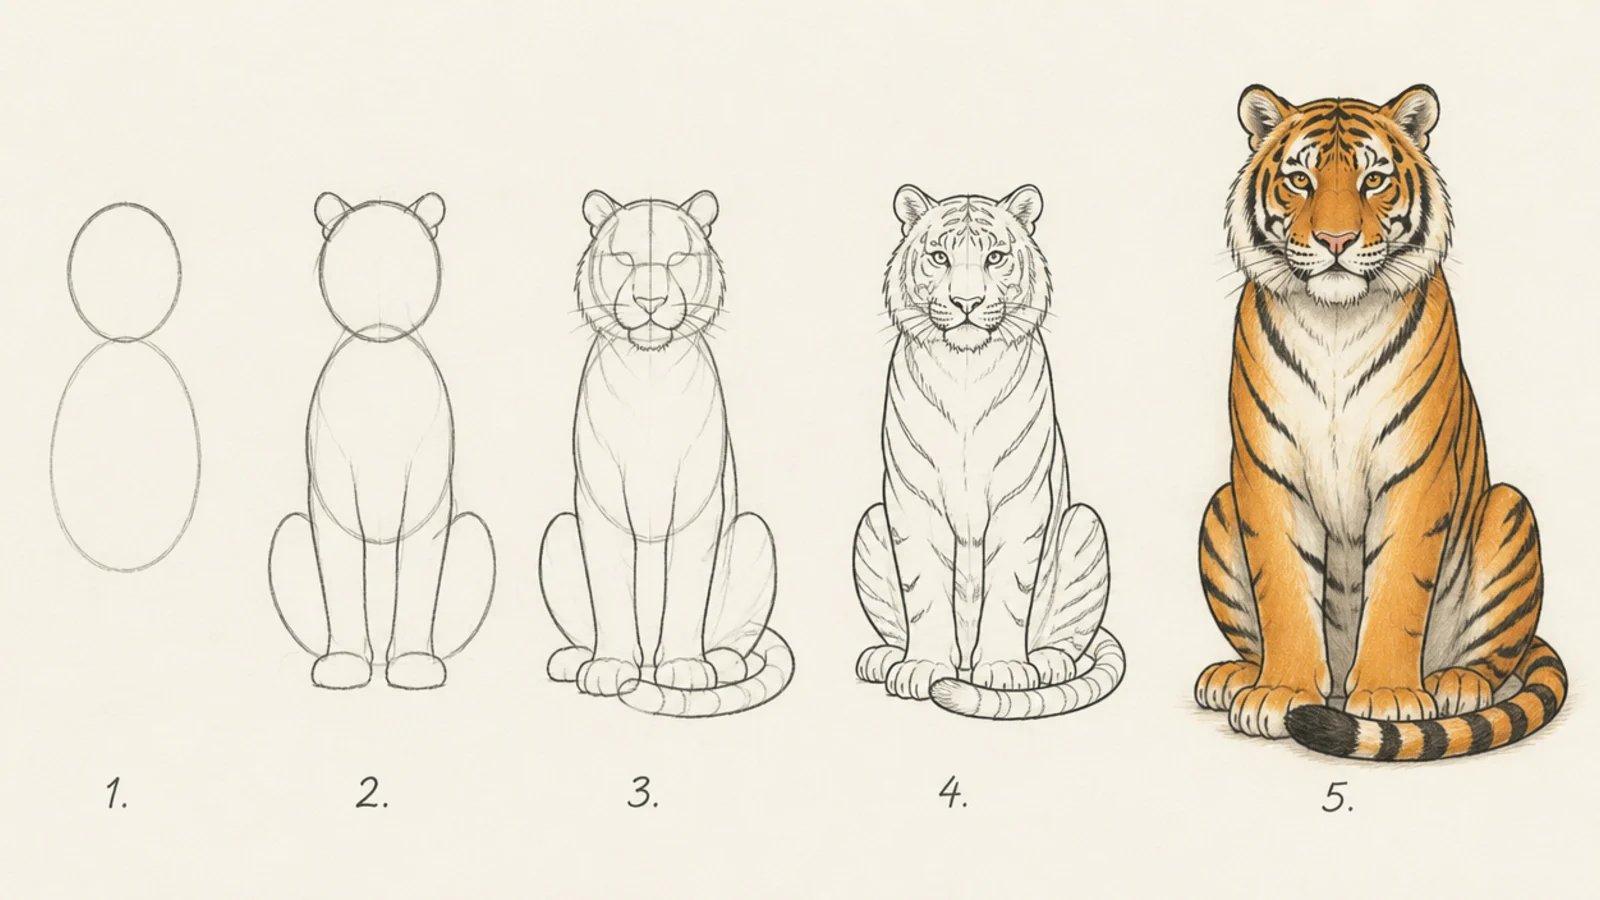
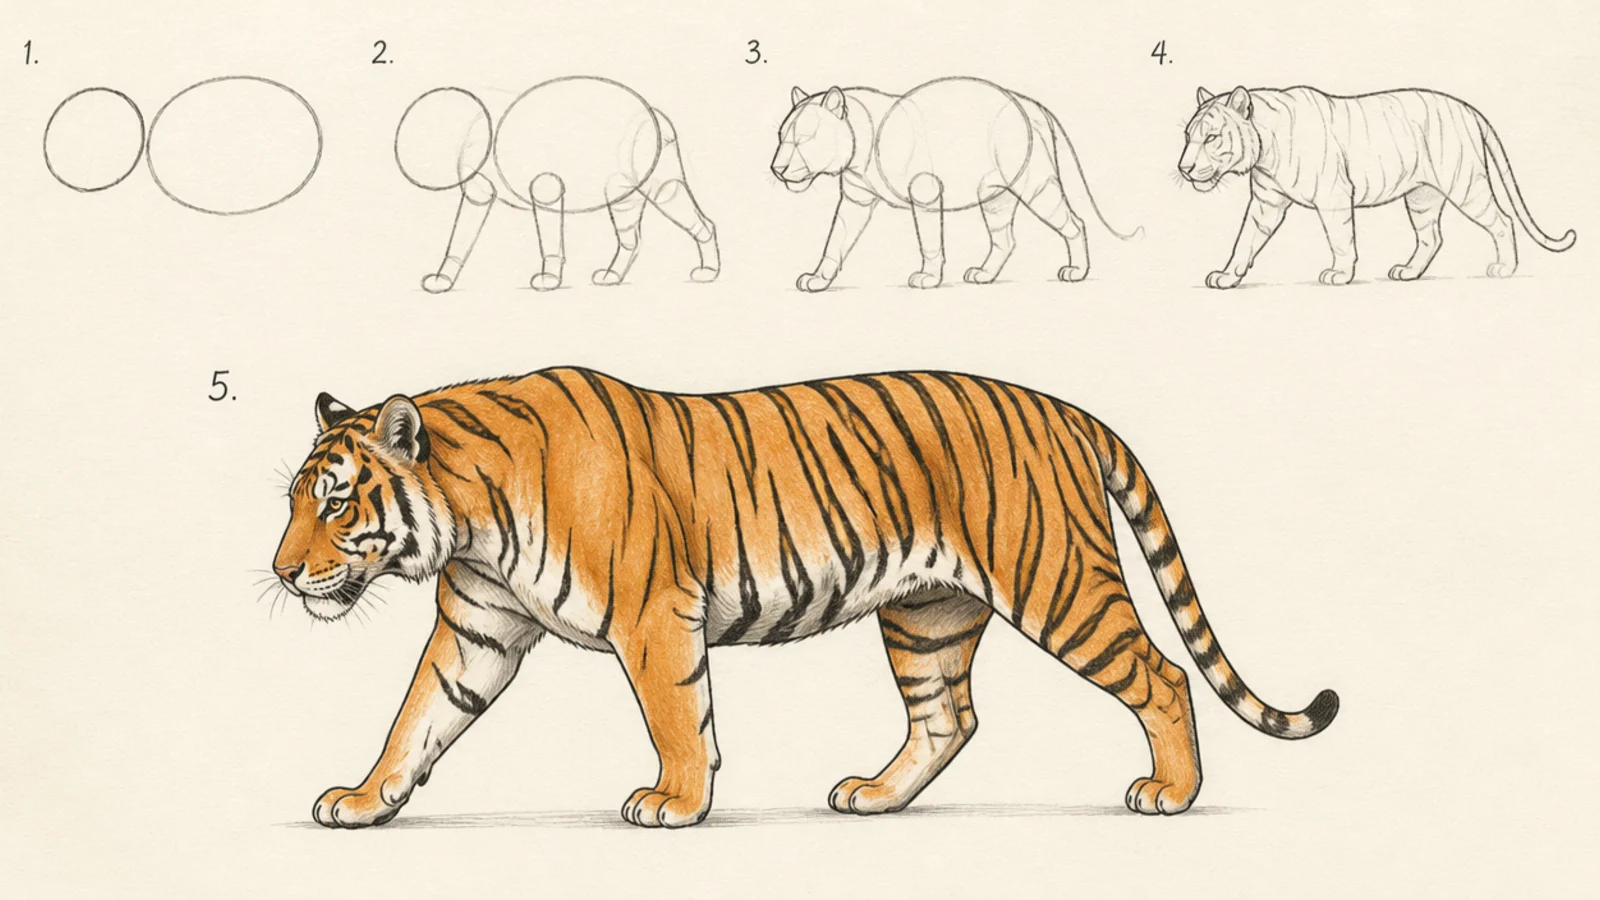
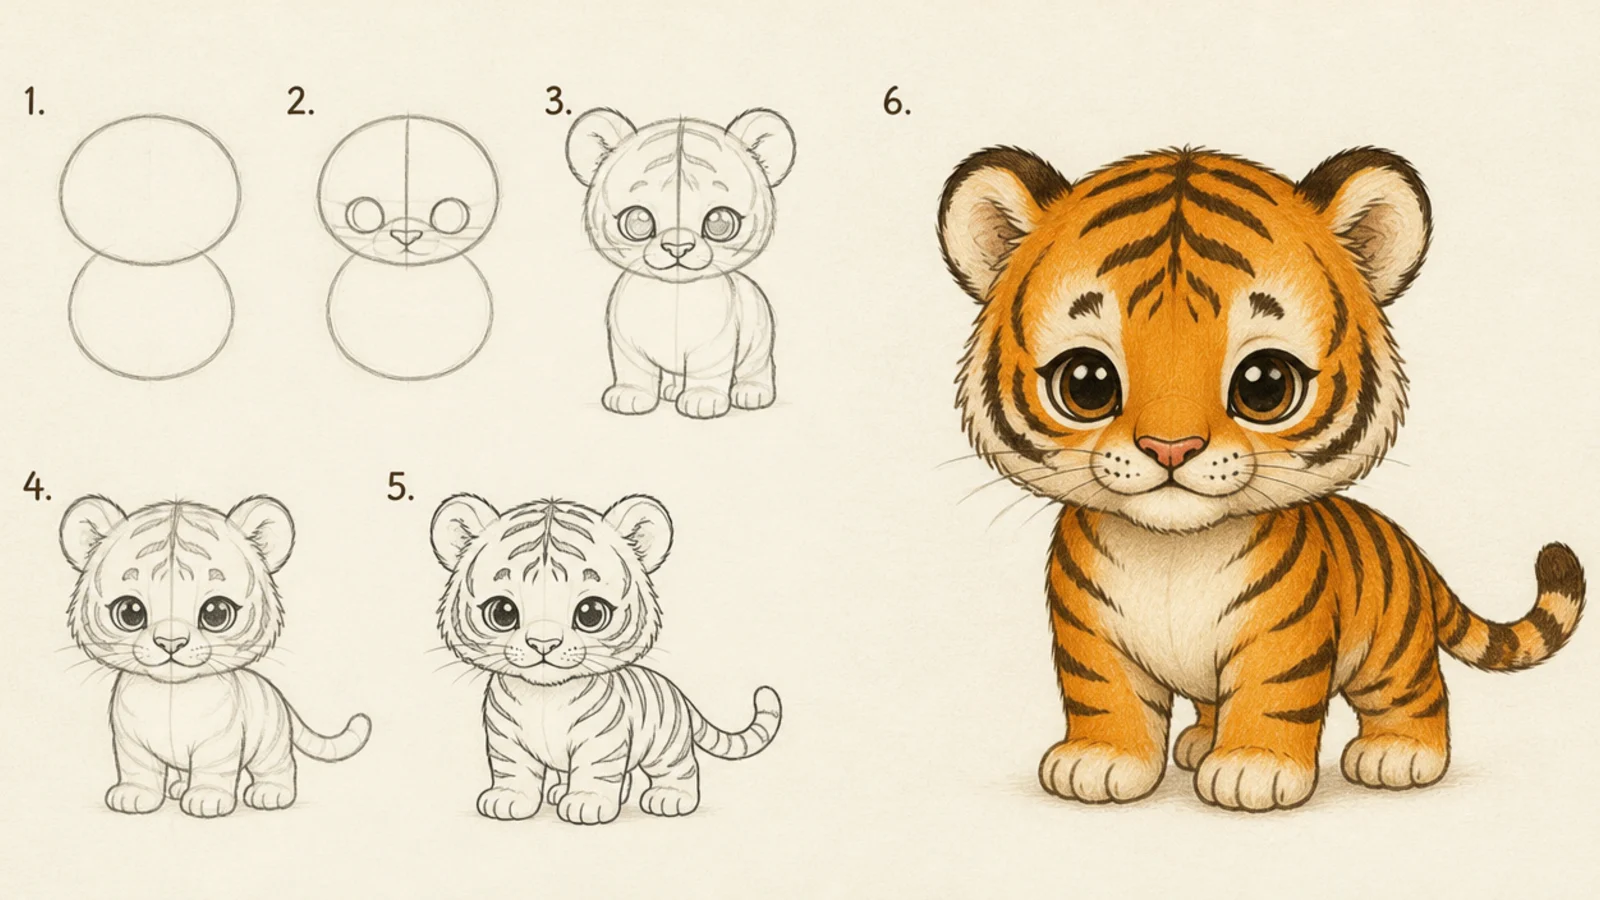
These seven steps take you from a blank page to a finished standing tiger, and the bonus variations after show how to adapt the same method for a sitting tiger, a walking pose, a cub, and more. Follow the steps once as written, then make the tiger your own.
Step by step
Draw the two body ovals. Lightly draw two ovals — a bigger one for the chest and shoulders and a slightly smaller one for the hips — spaced about one oval-width apart. These set the tiger’s whole proportion before any detail. Keep them light and loose; you are building a framework, not the final outline. Getting these two ovals the right size and distance apart is the foundation the entire tiger stands on.
Connect the back and belly. Join the two ovals with a gently curved line along the top for the back and another along the bottom for the belly. This turns the two separate ovals into one continuous body. Keep the back line smooth with a slight dip in the middle, and let the belly sag a little between the legs. Now you have the tiger’s torso as a single connected shape to build on.
Add the head and neck. Draw a circle for the head off the front of the chest oval, roughly the size of the smaller hip oval, and connect it with a short thick neck. Add a small muzzle box on the front of the head circle. Set the head a little lower than the top of the back so the tiger has a natural, slightly lowered posture. Keep it light — features come later.
Draw the four legs. Drop two front legs from the chest oval and two back legs from the hip oval, all as simple tubes of equal thickness ending in rounded paws. Bend the back legs forward at the knee and keep the front legs straighter. Make sure all four paws sit on the same ground line so the tiger stands level. These tubes off the two ovals keep the legs even and correctly placed.
Refine the outline. Now draw the final outline around your whole framework in one cleaner line, smoothing the ovals, back, legs, and head into a single tiger silhouette. Add the ears on the head, shape the muzzle and jaw, and taper the tail out from the hips. Once the outline looks right, lighten or erase the construction ovals underneath so only the clean tiger shape remains.
Draw the face and stripes. On the head, add the eyes, nose, and the W-shaped mouth, keeping the muzzle wide. Then flow the stripes over the whole body — short tapering marks that start thick at the spine and narrow down the sides, wrapping around the back, ribs, legs, and tail. Add stripes on the face radiating from the center line. Keep them bold and a little irregular rather than many thin, even bands.
Shade and finish. Bring the tiger to life with shading. Darken the belly, the underside of the chin, the far legs, and the shaded side of the body to give it volume, keeping the back and near side lighter. Deepen the stripes, add a highlight in each eye, and stroke short fur marks along the edges. This final light-and-dark pass turns a flat outline into a solid tiger with real form and weight.
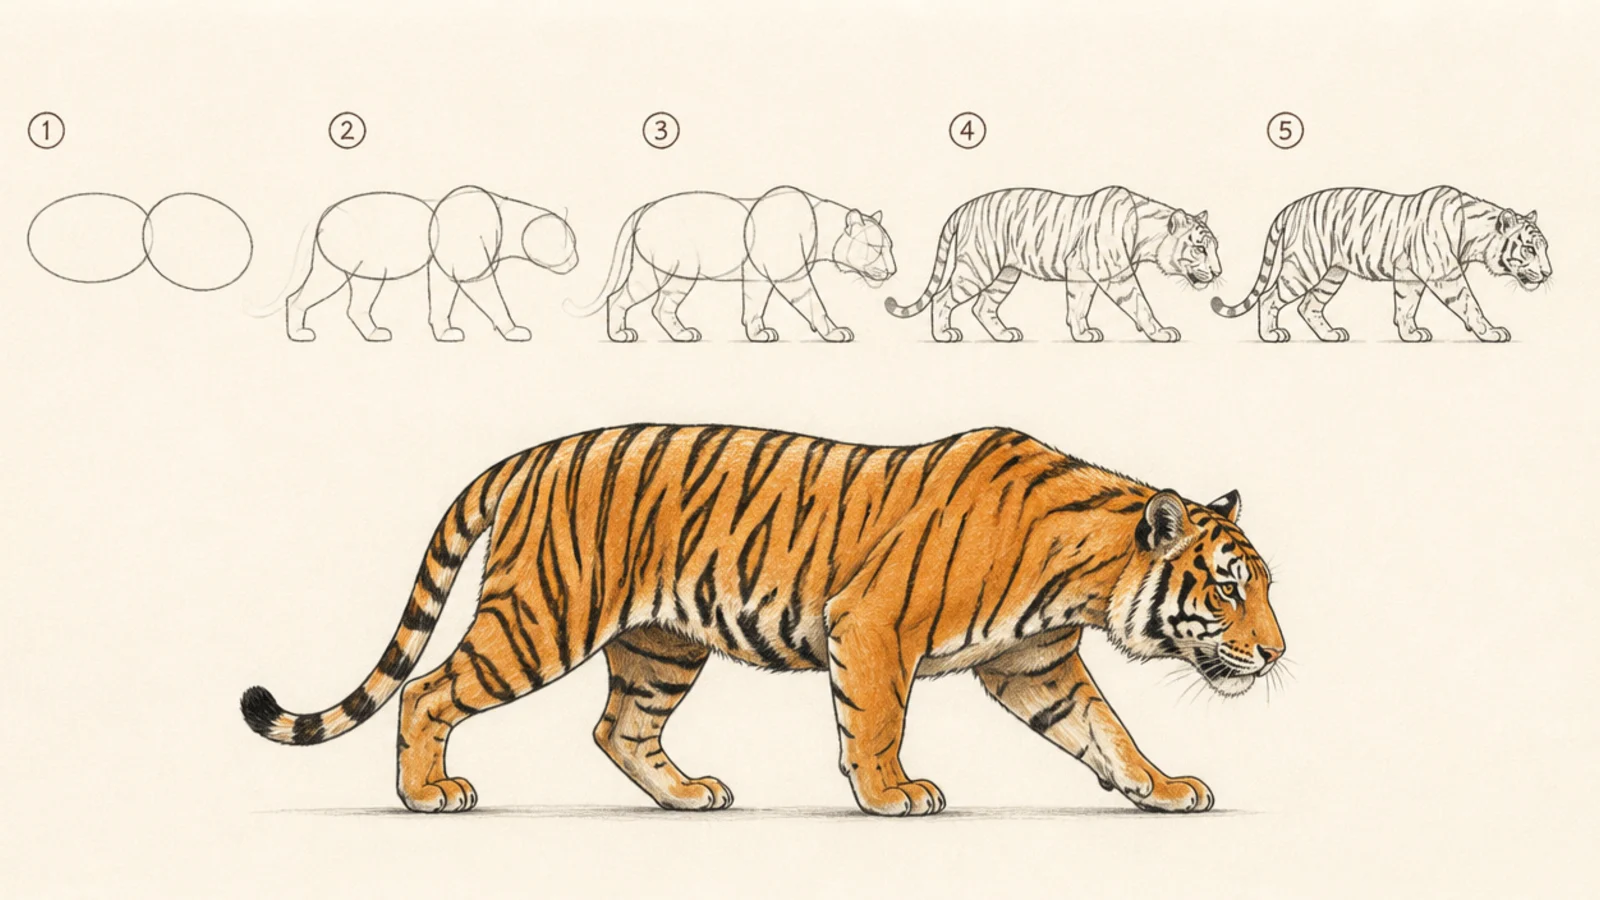
The same method lowered into a stalking prowl. It shows how dropping the whole body and head reads instantly as hunting.
Build the two ovals long and low, bend the legs slightly for a crouch, and drop the head level with the spine. Add a low tail and stripes.
Keep the head and back on one low line for a stalking prowl.
Don’t raise the head; a prowl keeps everything low and level.
Quick answers
How do you draw a tiger step by step for beginners?
Start with two ovals for the chest and hips joined by a curved back, add a round head off the front, then drop four tube legs and a curved tail. Draw the face, flow the stripes over the back and sides, and finish with shading. Building the body framework first and saving stripes and detail for last is what makes a whole tiger achievable for a beginner.
What is the hardest part of drawing a tiger?
For most beginners it is the proportions and the legs, which is why the two-oval body method matters so much. Getting the chest and hip ovals the right size and spacing before adding legs keeps the tiger from coming out too long or short. The stripes look intimidating but are actually forgiving — they just wrap the body in tapering marks.
How do I draw tiger legs correctly?
Drop two front legs from the chest oval and two back legs from the hip oval, keeping them the same thickness as simple tubes with rounded paws. The back legs bend forward at the knee while the front legs stay straighter. Drawing them as tubes off the two ovals, rather than freehand, keeps all four legs even and correctly placed under the body.
How do I add tiger stripes without ruining the drawing?
Add them last, after the body, head, and face are set, so you can place them on a finished form. Draw each stripe as a short mark that is thicker where it starts near the spine and tapers to a point down the sides. Use five or six bold stripes rather than many thin ones, and let them wrap around the body’s curve rather than sitting flat.