
1. Winter Fox in a Snow Frame
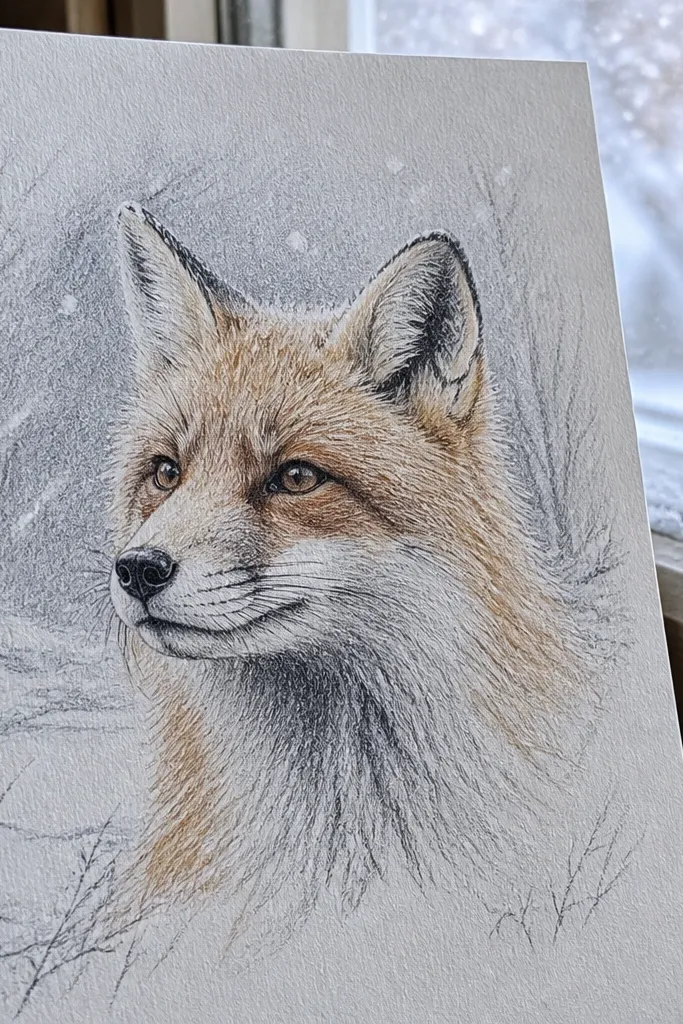
Start with a clean head circle and snout wedge, then keep the face slightly turned to show one cheek catching light. Use cool gray shading for the muzzle and under-chin area, then add a few darker strokes around the eye socket to keep the expression sharp. The “snow frame” is part of the look: leave white space around the fox and shade only under the border like a light shadow. This project is great for year-round fox drawing because the winter palette forces you to practice controlled value, not just outlines. Skill level is easy, and it takes about 20-25 minutes if you stop after the first fur pass.
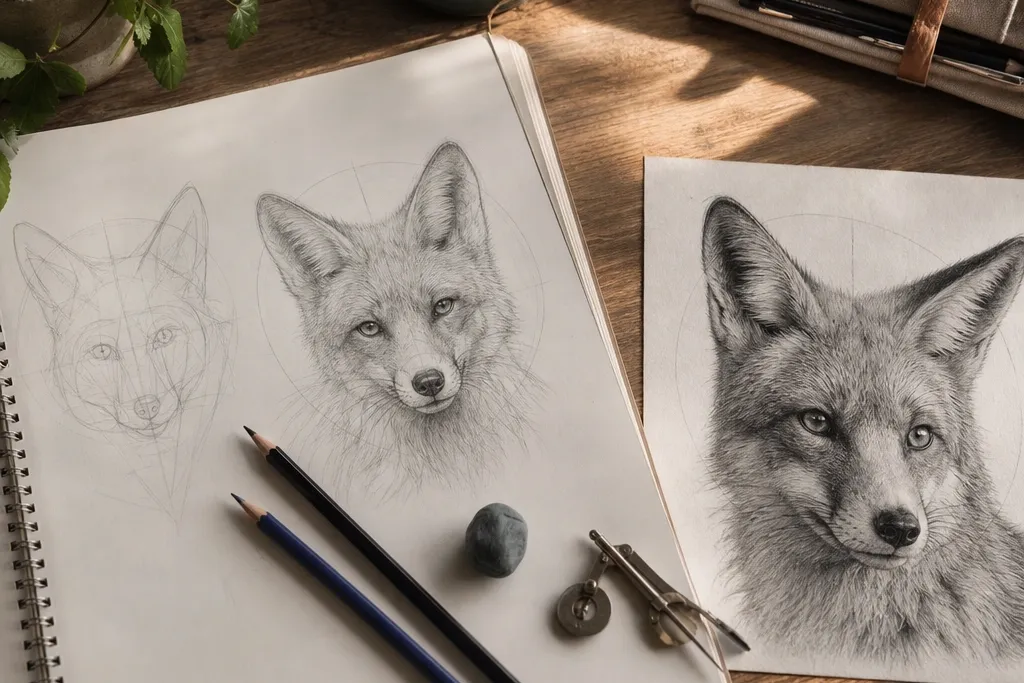
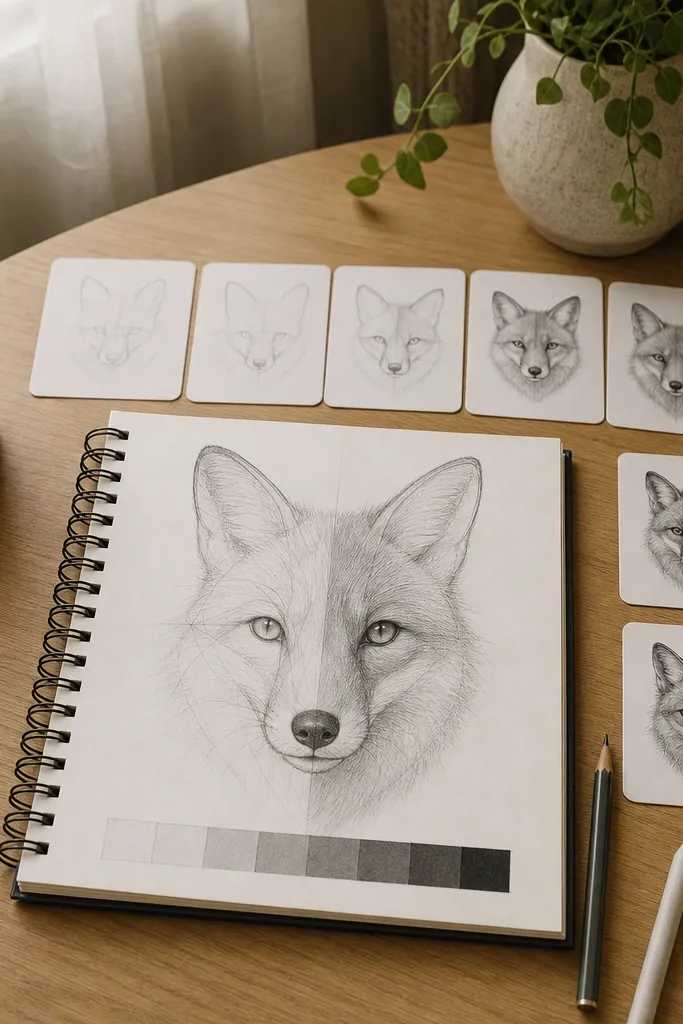
First, draw a head circle and add a vertical center line, then place the eye line at one third of the head height. Add two ear triangles and a snout wedge that reaches just past the eye line, then sketch the jaw curve under the cheek. Second, shade under the ear base, around the eye socket, and under the chin using HB for mid-gray and 4B for deeper pockets. Finally, leave the background white, then outline a snow “window” border with light gray and a single darker strip at the bottom edge.
Use a kneaded eraser to lift highlights on the muzzle instead of adding more white pen.
Don’t fill the background with gray — it flattens the fox and ruins the snowy look.
2. Spring Fox with Dewy Muzzle Highlights
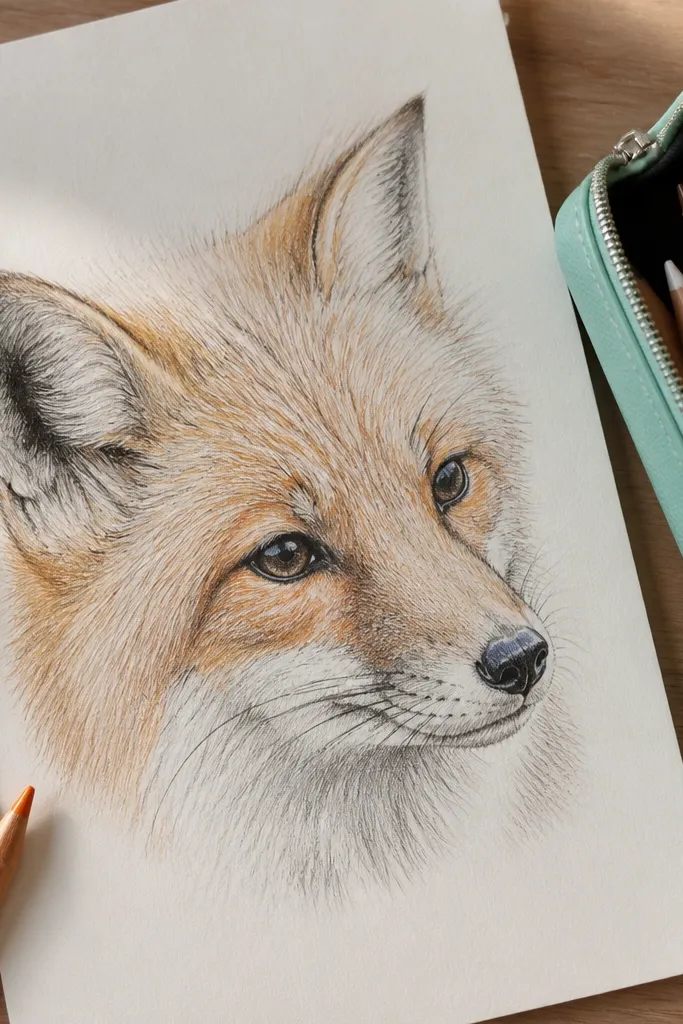
This one is about glossy, fresh-looking highlights. Build the face with the same construction plan, then add fur marks that stay light on the forehead and get darker only near the eye and cheek. The dew effect comes from a few tight white highlights on the nose tip, the top edge of the muzzle, and tiny dots on the fur. It looks photogenic because the contrast is controlled: darker shadows frame the face while the highlights pop. It’s beginner-friendly and feels springy without needing any color.
First, sketch the head circle, ear triangles, and snout wedge, then draw the jaw line so it curves under the cheek instead of meeting the snout too sharply. Second, shade the eye socket and inner ear fold with 4B, then add light fur direction marks from the forehead toward the center. Finally, use a white gel pen for three main highlight zones: nose tip, muzzle top ridge, and two small highlight dots near the cheek.
Pro tipMake the highlight marks shorter than you think — tiny strokes read more like dew than big blobs.
AvoidDon’t outline the entire fox in white — it turns into a sticker border.
3. Summer Fox Profile with Long Fur Flow
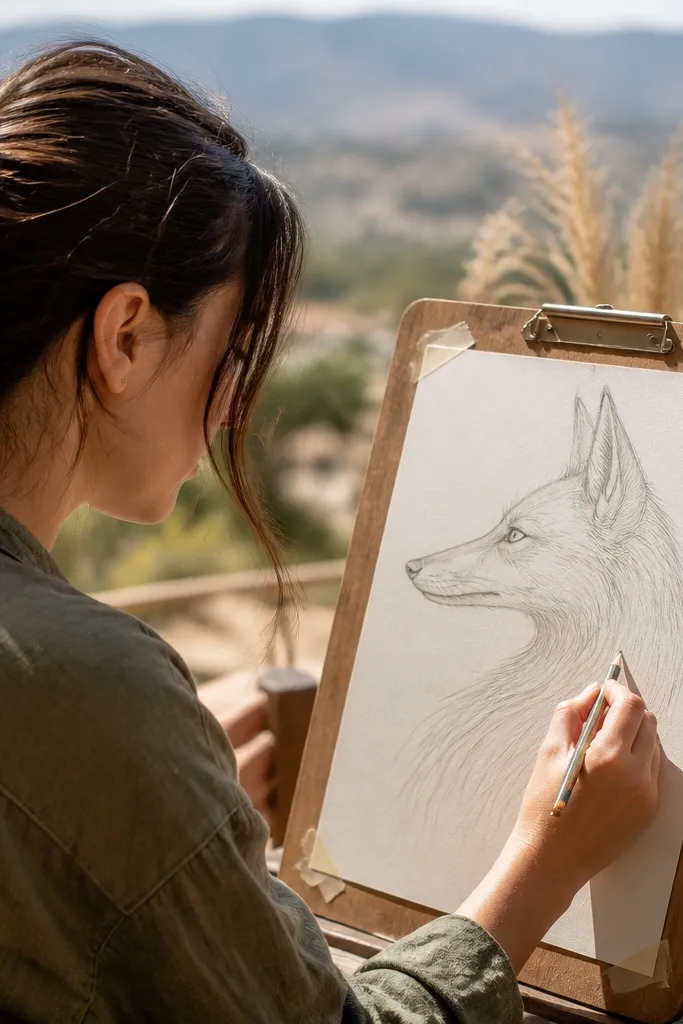
A profile drawing forces better nose and jaw proportions. Keep the snout wedge longer than the head circle suggests, then build the jaw line so it dips slightly before rising toward the chin. For the aesthetic, focus on long fur flow: draw strokes that start at the base of the neck and sweep backward. This makes the fox look airy and “in motion,” which photographs well even without background scenery. It’s a medium-easy project that teaches you how fur direction changes along the face.
First, draw an oval for the skull, then add a long snout wedge that ends in a small nose triangle. Place the eye about halfway along the skull length, then sketch the ear as a triangle with a slight tilt backward. Second, block the neck and chest with a curved line, then add fur strokes that run in one direction — from neck base toward the shoulder. Finally, add a tail tuft with a few thicker strokes and a shadow under the jaw using HB to 4B gradient.
Before darkening, map three fur directions with light pencil so your final strokes look consistent.
Don’t scribble fur across the snout — keep the muzzle smoother with only a few directional lines.
4. Autumn Fox in Warm Earth Tones (Pencil Only)
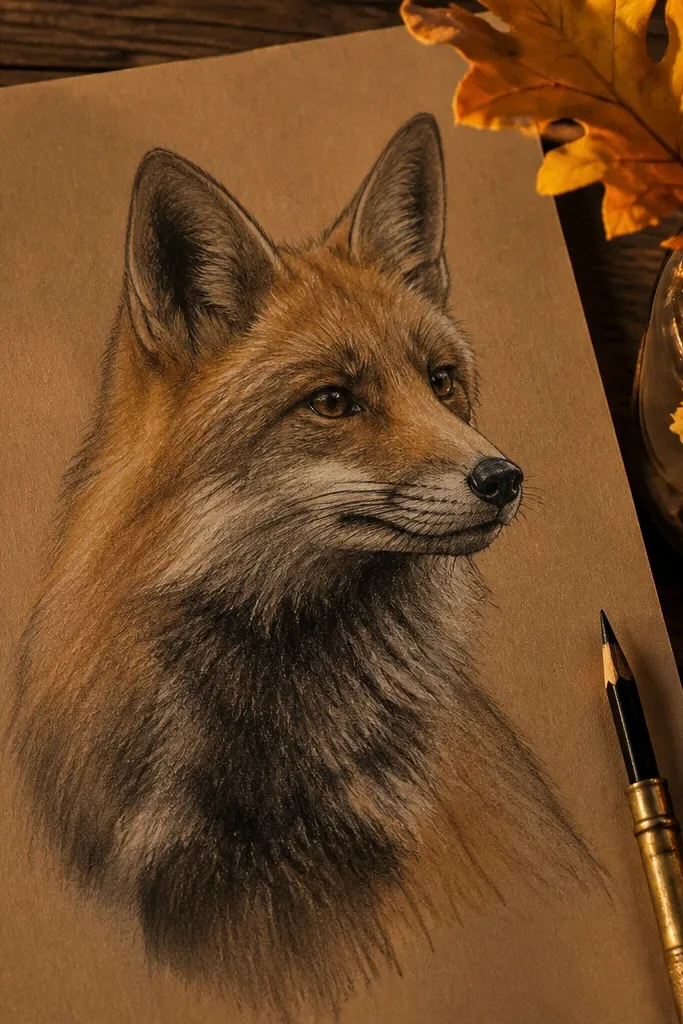
Even with pencils only, you can get an autumn feel by layering warm-looking values: darker browns and lighter golden grays. Use a mid-tone base first, then deepen the shadow pockets under the ears and around the eye. The look stays photogenic because the face has a warm value range instead of flat gray. This project is good for year-round fox drawing because it teaches layering — you’re building depth in thin passes. It’s medium difficulty and takes around 35-45 minutes.
First, sketch the face construction lightly, then shade the whole head with HB in a light even layer. Second, pick two shadow areas — under the ear base and around the eye socket — and deepen them with 4B, leaving the muzzle slightly lighter. Finally, add fur direction marks only where the shadow meets the lighter fur, then soften the transition by lightly blending with a tissue or blending stump.
Layer in three passes: light, mid, dark. Stop after the dark pass so you don’t muddy the fox.
Don’t press hard on the first layer — it makes blending impossible and kills the warm look.
5. Cute Fox Kit with Big Eyes
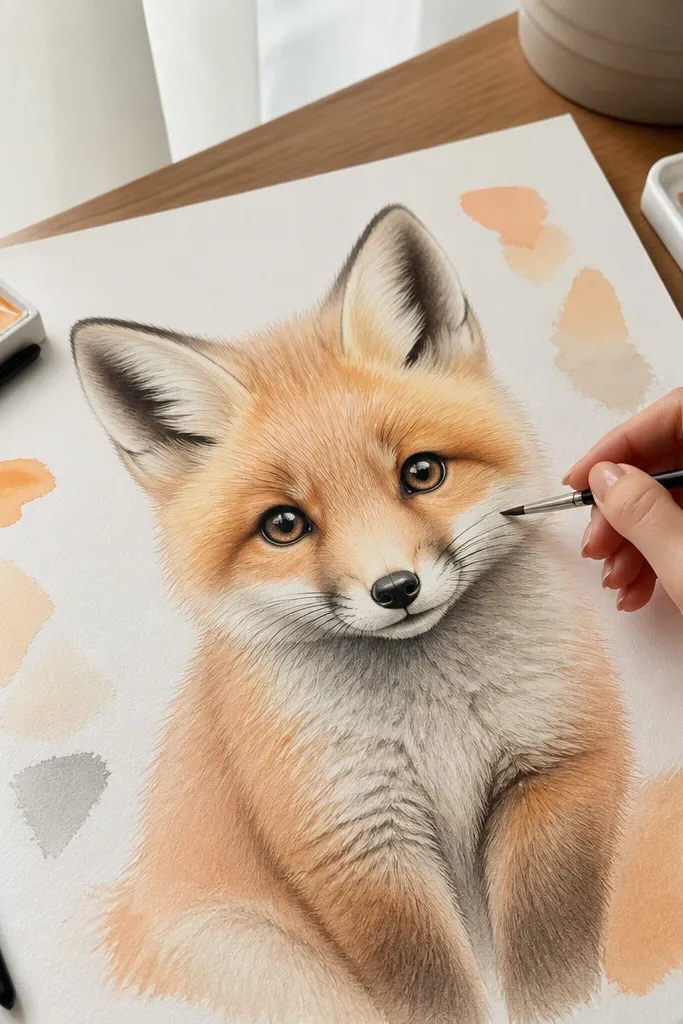
This style is about proportion control. Big eyes look adorable only when the muzzle stays proportionate and the cheeks aren’t over-rounded. Keep the eye line consistent with the construction plan, then enlarge the iris and keep the nose smaller. Use soft shading under the eye and along the inner ear for a gentle, plush feel. It’s perfect for quick practice because you can finish it fast while still learning structure. Skill level is easy and it’s great for sketchbook pages.
First, draw the head circle and a shorter snout wedge than you’d use for an adult fox, then place the eye line at one third of the head height. Second, draw the eyes large but keep them symmetrical, then add a small nose triangle at the end of the muzzle. Finally, shade the inner ear and the shadow under the eyes with HB to 4B, then add a few short fur strokes on the forehead.
Make the eye highlight a tiny crescent instead of a big dot for a more believable sparkle.
Don’t widen the jaw too much — it makes the kit face look like a different animal.
6. Sitting Fox with Tucked Tail
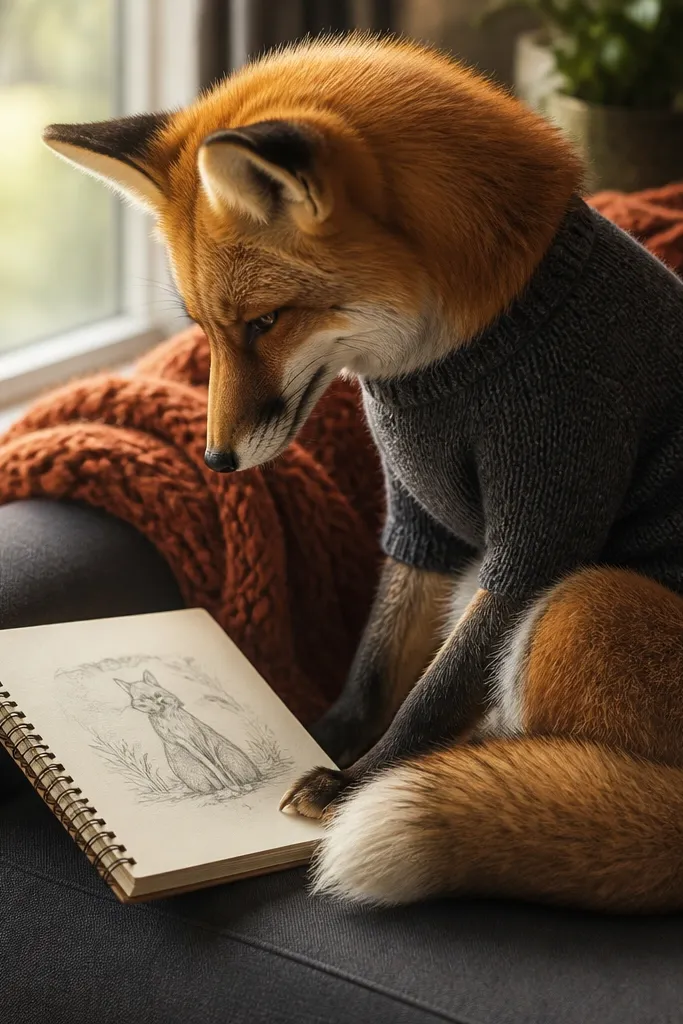
A seated pose gives you a chance to practice the torso shape and tail volume, not just the head. Keep the body simple: oval torso, small rounded hips, and a tail that overlaps the hind leg. The look is clean because the tail creates a strong silhouette. For year-round fox drawing, this pose works in every theme — you can add snow, leaves, or plain white background without redrawing the body. It’s medium difficulty and teaches foreshortening on the legs.
First, sketch a torso oval and a smaller hip oval, then add a ground line for the feet. Second, draw the head on top of the torso with the usual circle-and-wedge plan, then position the legs as simple rounded shapes tucked under. Finally, sketch the tail as a big curved shape that tucks behind the torso, then add fur direction strokes that follow the tail’s curve.
Pro tipUse one long outline pass for the silhouette before adding details — it keeps the drawing readable.
AvoidDon’t fully outline every fur edge — leave small gaps so the silhouette stays crisp.
7. Fox Face with 3 Value Zones
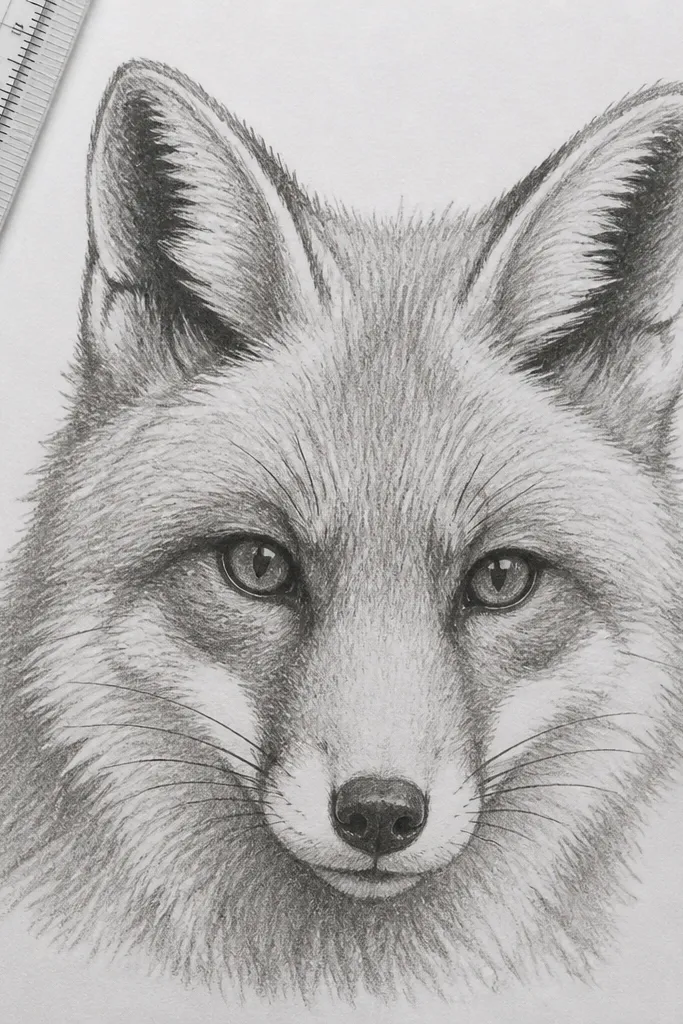
This is the fastest way to get a professional-looking fox face. You intentionally limit the drawing to three values: light fur base, mid shadows, and dark accents around the eye and ear folds. That constraint makes your fox look dimensional without getting lost in texture. It’s also a great year-round fox drawing method when you’re short on time. The look is bold and graphic, and it photographs cleanly because the contrast is clear.
First, draw the head construction and lightly block the muzzle and jaw curve. Second, shade the light base across the face, then add a mid-tone layer only in shadow zones: under the ear, under the eye, and along the cheek. Finally, add dark accents with 4B only where you need depth: eye socket crease, inner ear fold, and under-chin shadow.
Pro tipUse a kneaded eraser to carve back the light base along the muzzle ridge for a clean highlight line.
AvoidDon’t add dark fur everywhere — if everything is dark, nothing has shape.
8. Fox and Moon Night Sketch
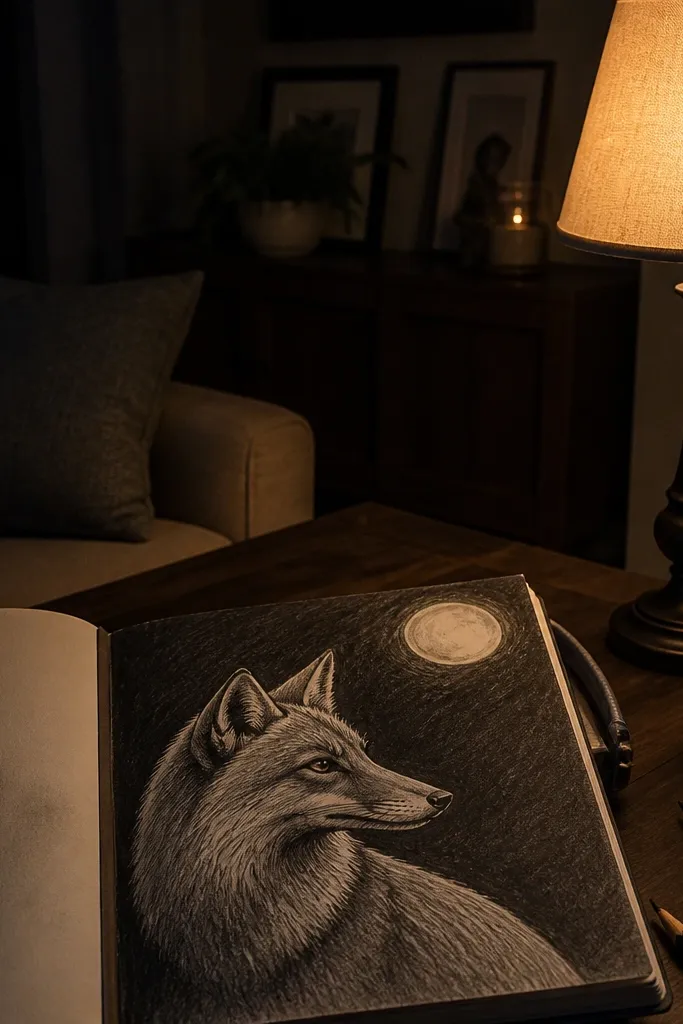
Night scenes make fox drawings feel instantly story-like, but you still keep the fox construction clean. Darken the background with light, even graphite so the fox outline pops. Then draw the fox with controlled pencil value — don’t over-darken the face, or it will sink into the background. Add a moon as a clean circle with a few crater marks. This project teaches contrast management, and it looks great in photos because the moon and silhouette read immediately.
First, shade the background area lightly with 2B in a smooth layer, leaving the fox area lighter. Second, draw the fox face construction and build shadows with HB and 4B, keeping the muzzle slightly brighter than the cheeks. Finally, draw a moon circle behind the fox and add a few crater shadows using 2B, then lightly erase a crescent highlight on the moon edge.
Use a paper towel to smooth background graphite so you don’t get patchy blotches.
Don’t press hard on the background — if it’s too dark, your fox details disappear.
9. Fox Snout Study with Nose Texture
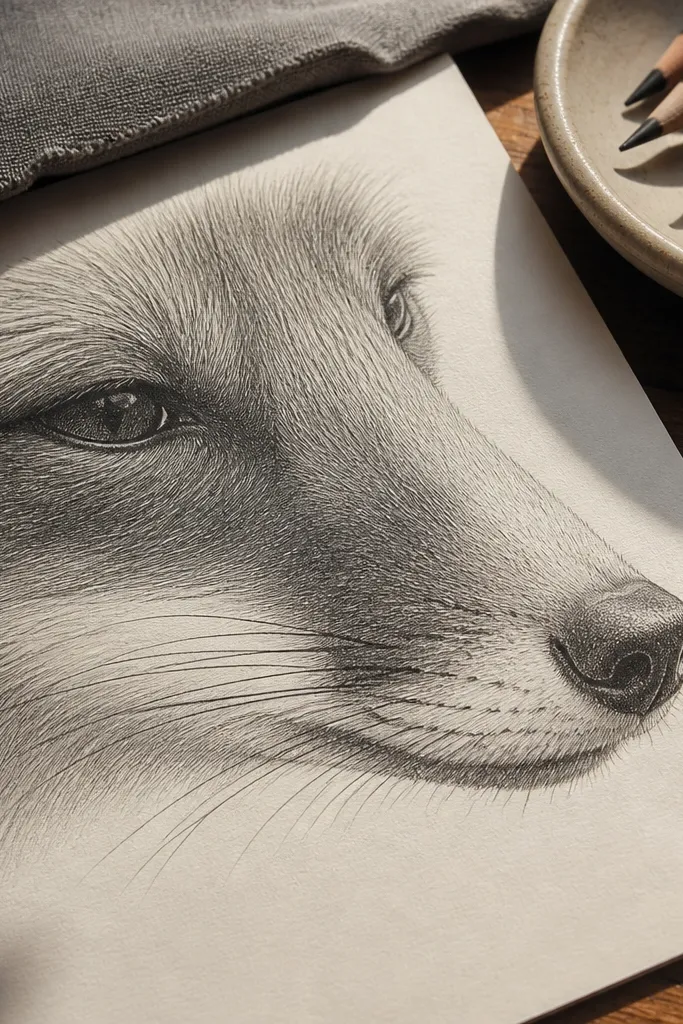
This is a focused study, and it pays off fast. The snout is where most fox drawings look “off,” because the nose has a subtle wedge shape and the muzzle fur wraps around it. Keep the nose dark and textured while leaving the muzzle lighter with short directional lines. If you build this correctly, every larger fox drawing improves instantly. It’s easy to finish in one sitting and it trains your hand to draw fur around a form.
First, draw an angled snout wedge and a small nose triangle at the tip, then add a curved mouth line that sits slightly below the nose. Second, shade the nose with 4B and add tiny texture strokes that follow the nose contour, not random scribbles. Finally, add a few fur lines that radiate from the nose base outward and upward, then lightly shade the cheek shadow with HB.
Pro tipDarken the underside of the nose and keep the top edge lighter for a more rounded look.
AvoidDon’t make the nose a perfect triangle — it reads unnatural.
10. Fox Ear Study with Inner Fold
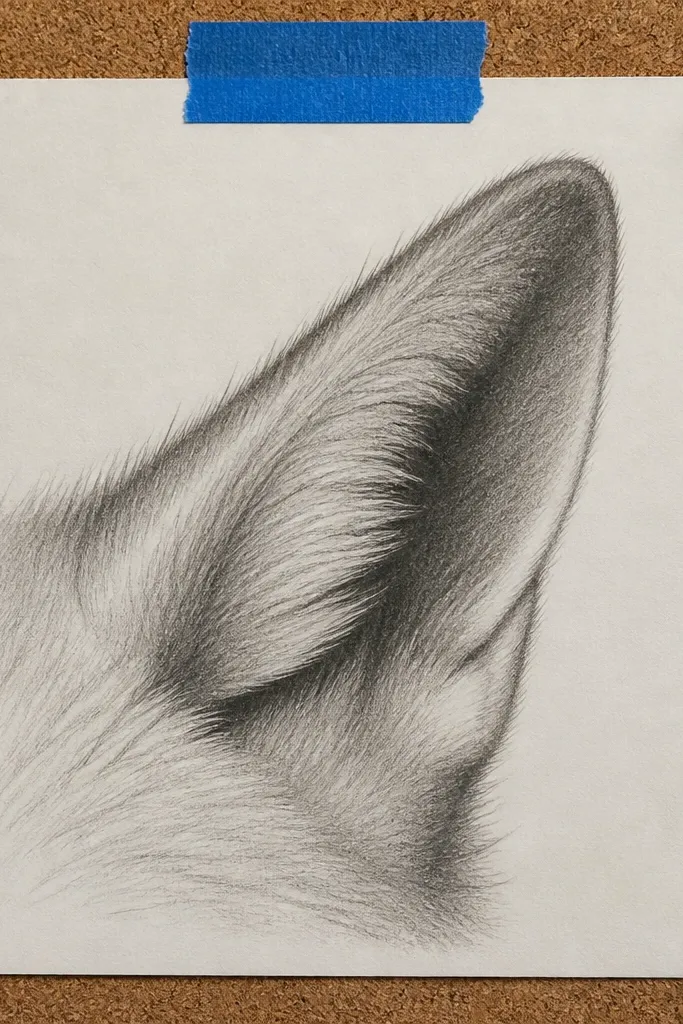
Ears are the easiest place to add realism. The inner fold creates a shadow pocket that makes the ear look like it’s made of soft tissue. Draw the ear as a triangle with a slightly curved outer edge, then shade the inner ear fold with a smooth gradient. Add a few outer fur strokes along the ear edge to frame the fold. This study makes your fox look better even in minimal drawings. It’s beginner-friendly and takes about 10-15 minutes.
First, sketch one ear triangle attached to a small head circle, then draw a curved line inside the ear that marks the inner fold. Second, shade the inner fold starting light near the base and getting darker toward the fold crease using HB to 4B. Finally, add a few short fur strokes along the outer ear edge and lightly erase the construction line at the ear base.
Pro tipUse a blending stump for the inner fold only; keep the outer edge sharper.
AvoidDon’t outline the inner fold with a thick dark line — it looks cut-out.
11. Fox Face with Side Light Shadow
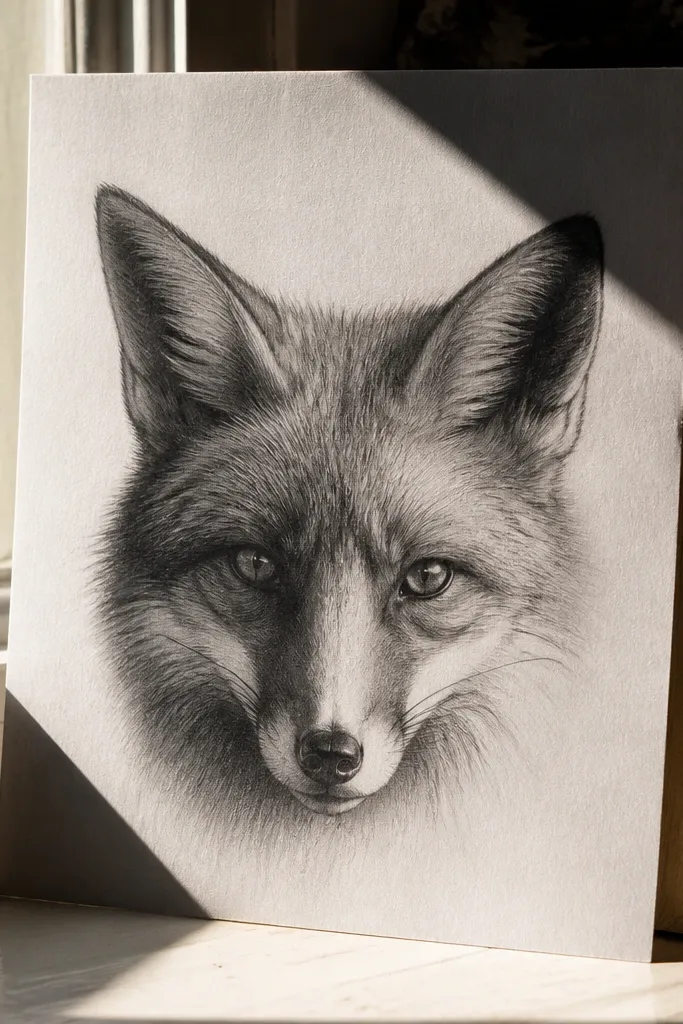
This one is about lighting direction. If you pick a light source (left or right) and commit, your fox looks instantly more dimensional. Shade one side of the face darker, then keep the other side lighter and add a clean highlight on the muzzle ridge. The look is dramatic and photogenic because the shadow shapes are bold. It’s medium-easy and perfect for year-round fox drawing because you can switch light direction each time you practice.
First, draw the head construction and decide your light side, then place the eye line and muzzle wedge as usual. Second, shade the shadow side with HB and deepen the eye socket and under-chin with 4B, leaving the light side mostly unshaded except for a few fur strokes. Finally, add a small shadow under the nose and a highlight line on the muzzle ridge by lightly erasing graphite.
Pro tipKeep your darkest value in three spots: eye socket, inner ear fold, and under-chin.
AvoidDon’t shade both cheeks equally — that kills the lighting effect.
12. Fox in a Circle Mandala Frame
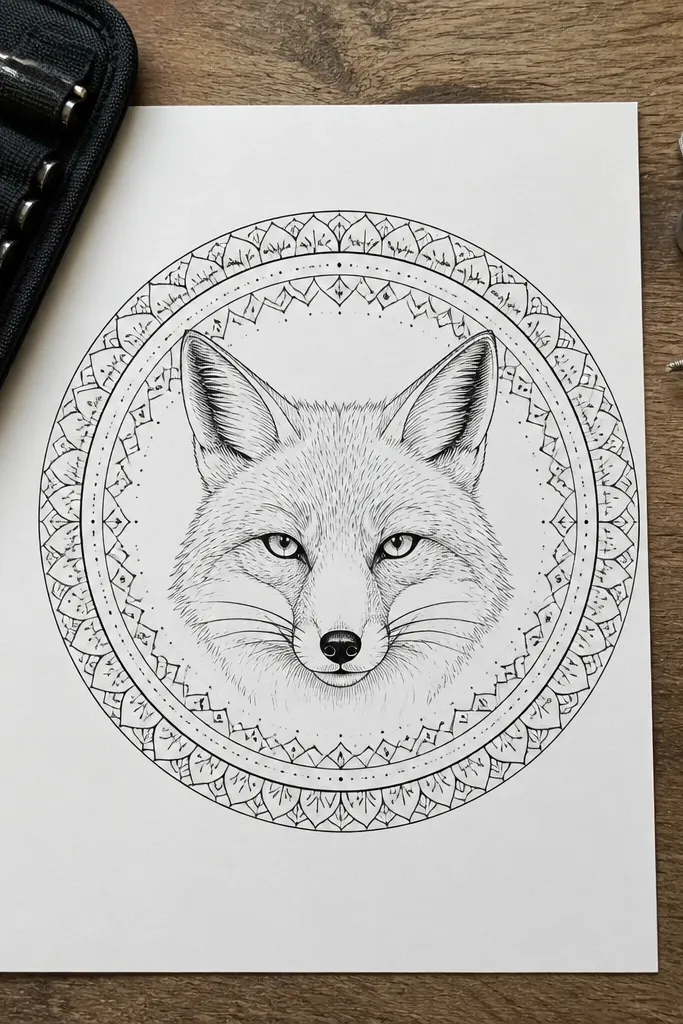
Mandala frames make fox drawings look finished without adding a full background scene. Keep the fox face clean and readable, then add repeating ring patterns around it. The aesthetic comes from symmetry: one neat circle grid, then gentle linework that doesn’t touch the fox outline. It’s a great year-round fox drawing option because you can redraw the same fox face and swap the ring pattern for different moods. It’s easy to medium, depending on how many rings you add.
First, draw the fox face centered, then lightly sketch a circle around it leaving a 1-2 cm gap. Second, add 3 to 5 rings inside the outer circle and fill each ring with one type of mark: dots, short dashes, or small curved lines. Finally, darken the fox outline lightly with HB and add fur strokes, then keep the ring linework lighter so the fox stays the focus.
Pro tipUse a ruler for the ring spacing, then freehand the ring marks so it still feels hand-drawn.
AvoidDon’t let the ring lines overlap the fox ears — the composition gets messy.
13. Fox in a Leafy Border (Fall Texture)
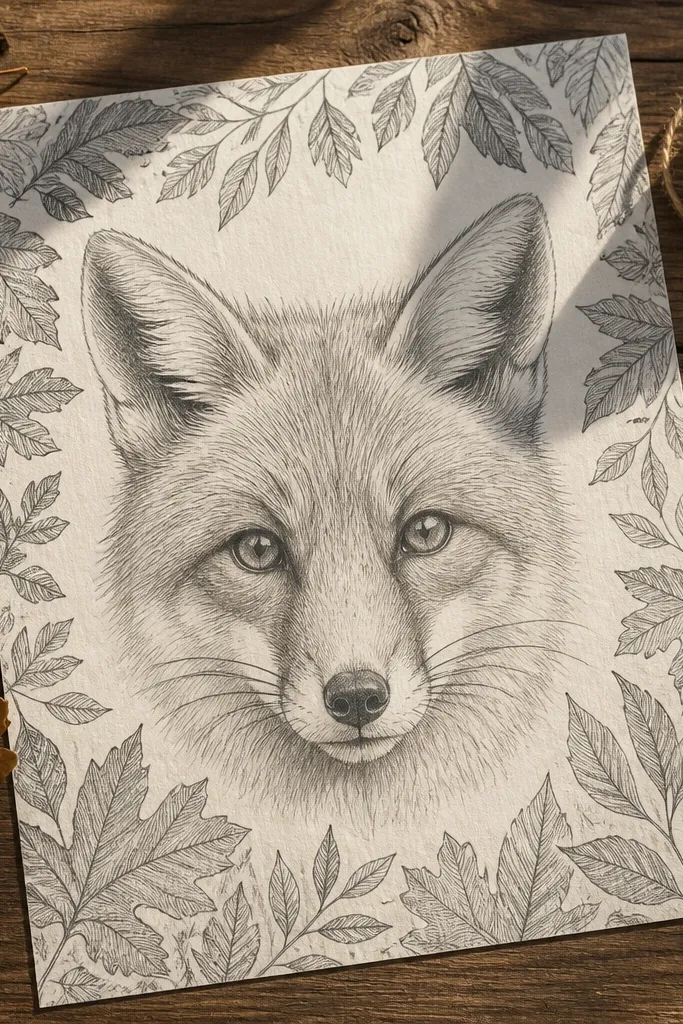
A border is a low-effort way to make the page look seasonal while keeping your fox skills in focus. Draw the fox face big enough to own the center, then add leaf shapes around the edges at varied sizes. Shade the leaves lightly so they frame the fox without stealing contrast. This project is photogenic because it creates a clear “poster” layout. It’s medium-easy and teaches you to vary pressure: light outlines for leaves, stronger values for the fox face.
First, sketch the fox face on the center of the page with the usual circle-and-wedge plan. Second, draw a thin border margin and fill it with leaf shapes that point inward, using two leaf sizes and one vein line each. Finally, add fur texture to the fox with directional strokes, then darken only the ear folds and eye socket for depth.
Make leaf outlines thinner than the fox outline so the fox reads first in photos.
Don’t shade every leaf the same — it turns into a gray frame that hides the fox.
14. Fox Portrait with Blended Fur Base
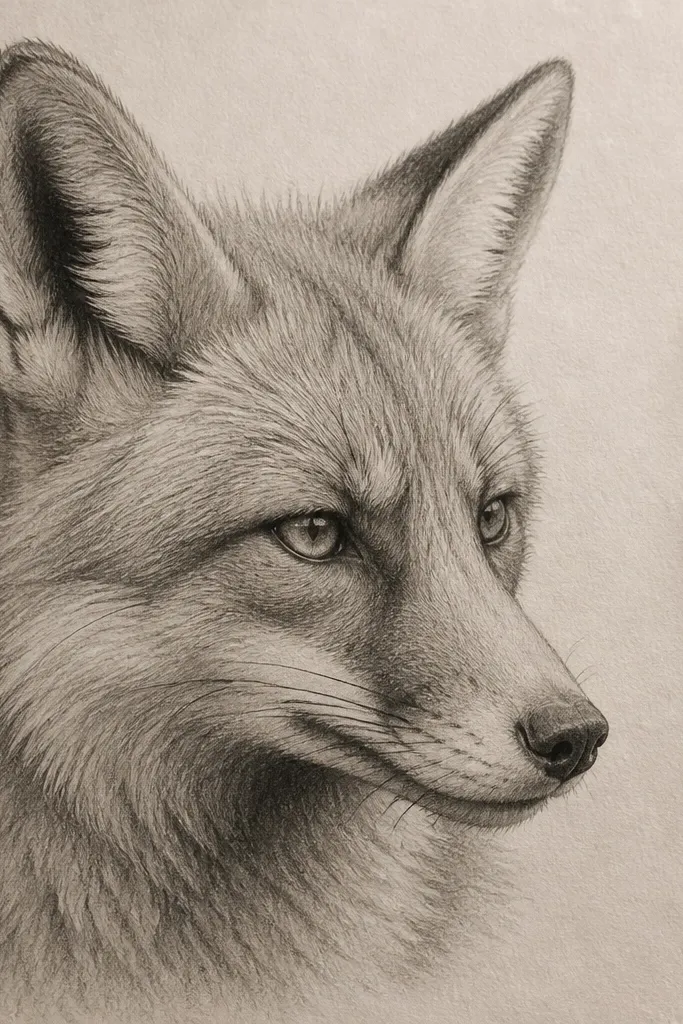
This style looks “finished” because the fur base is softly blended, then you add crisp fur direction marks on top. The trick is to blend only the mid-tone areas, not the darkest shadow pockets. Keep the muzzle and cheek transitions smooth, then place 4B only in the eye socket, under-chin, and ear fold. It photographs well because the face has a smooth value gradient. This is medium difficulty and works best on thicker paper so the graphite doesn’t tear.
First, draw the fox face construction lightly, then shade the whole head with HB in an even mid-tone. Second, blend the mid-tone areas using a blending stump, leaving the eye socket and inner ear fold unblended. Finally, add sharp fur strokes with a darker pencil (4B or 6B) that follow the face direction and stop at the shadow edges.
Pro tipBlend from light to dark — don’t scrub the dark areas or you’ll lose the contrast.
AvoidDon’t blend the eyes and nose shadows — they need crisp edges.
15. Minimal Line Fox with One Shadow Stripe
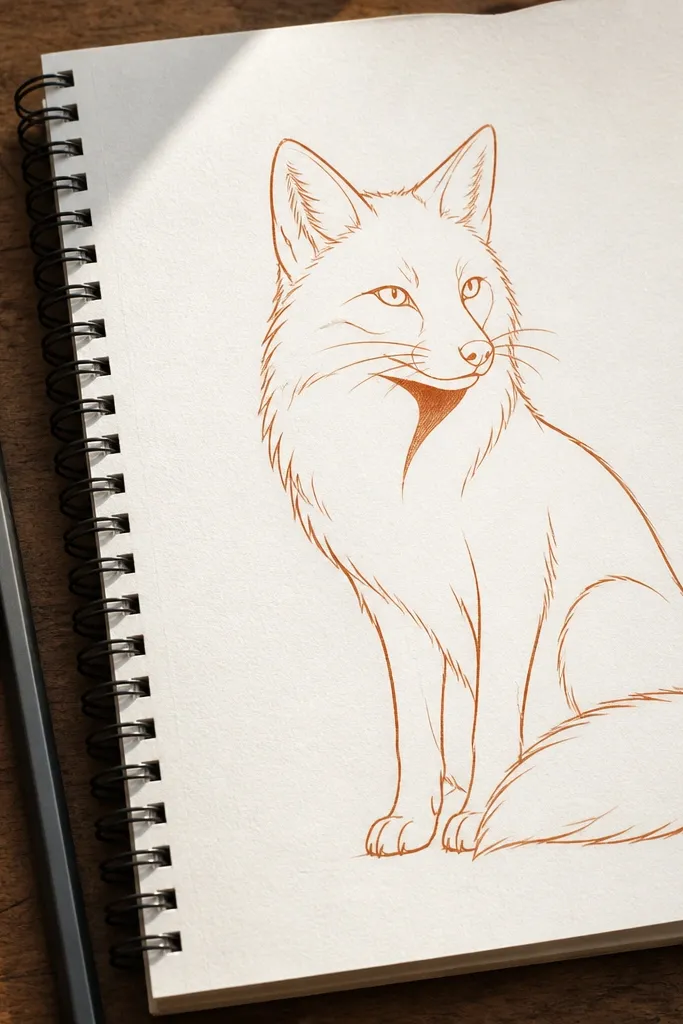
Minimal doesn’t mean flat. This look uses clean linework for the fox shape and just one strong shadow stripe under the chin. You keep the face readable with construction proportions, then you finish with one deliberate value element. The result is super photogenic on white paper and it’s perfect for quick year-round practice. It’s easy and takes about 15-20 minutes.
First, sketch the head circle and snout wedge lightly, then draw clean outlines for ears, muzzle, and jaw. Second, add the eye and nose with thin lines only, then erase construction lines once the outline looks right. Finally, shade a single shadow stripe under the chin using 4B and blend it slightly with a tissue.
Use a kneaded eraser to clean the outline so the lines look crisp, not gray-smudged.
Don’t add extra shading elsewhere — the one-stripe rule keeps the style consistent.
16. Fox Face in Crosshatch Technique
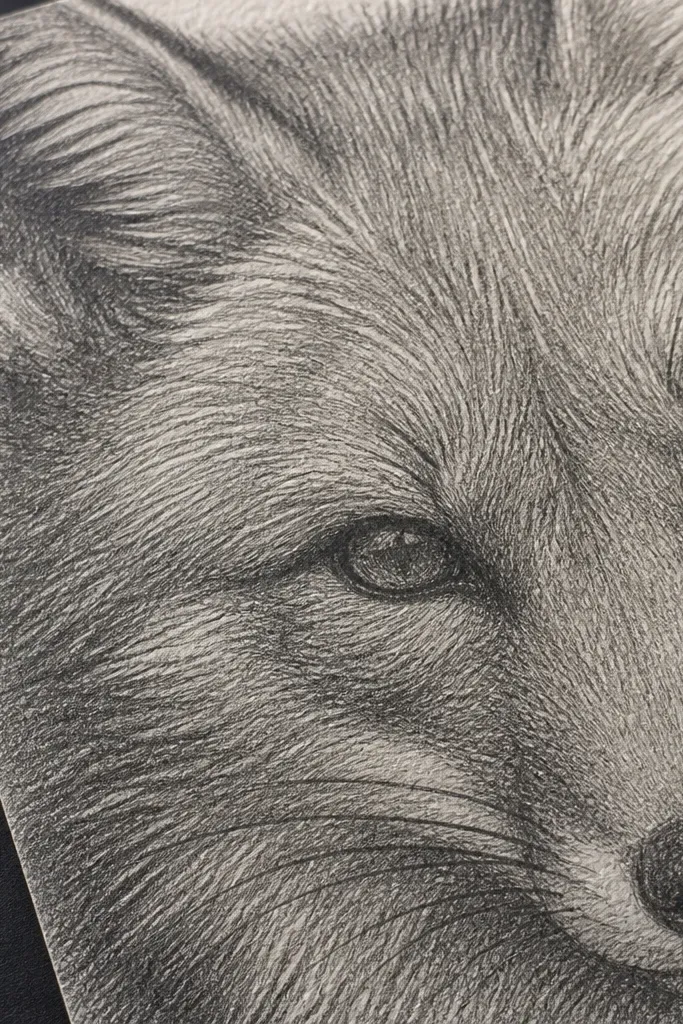
Crosshatching gives you texture without messy scribbles. The key is direction: use one hatch direction for the forehead, a different direction for the cheek, and cross only in shadow pockets. This makes the fur feel structured. The look is graphic and stands out in photos because the texture catches light. It’s medium difficulty and rewards patience.
First, draw the face construction and lightly block shadows with HB. Second, add hatching lines: use short lines around the eye socket and longer lines on the cheek, keeping the direction consistent. Finally, crosshatch only in the darkest areas (ear fold and under-chin) and soften the transition by stopping the crosshatch before it reaches the highlight.
Pro tipKeep hatch lines evenly spaced; uneven spacing makes the texture look accidental.
AvoidDon’t crosshatch the entire face — it becomes a gray mask.
17. Fox Tail Swirl with Spotty Fur Tips
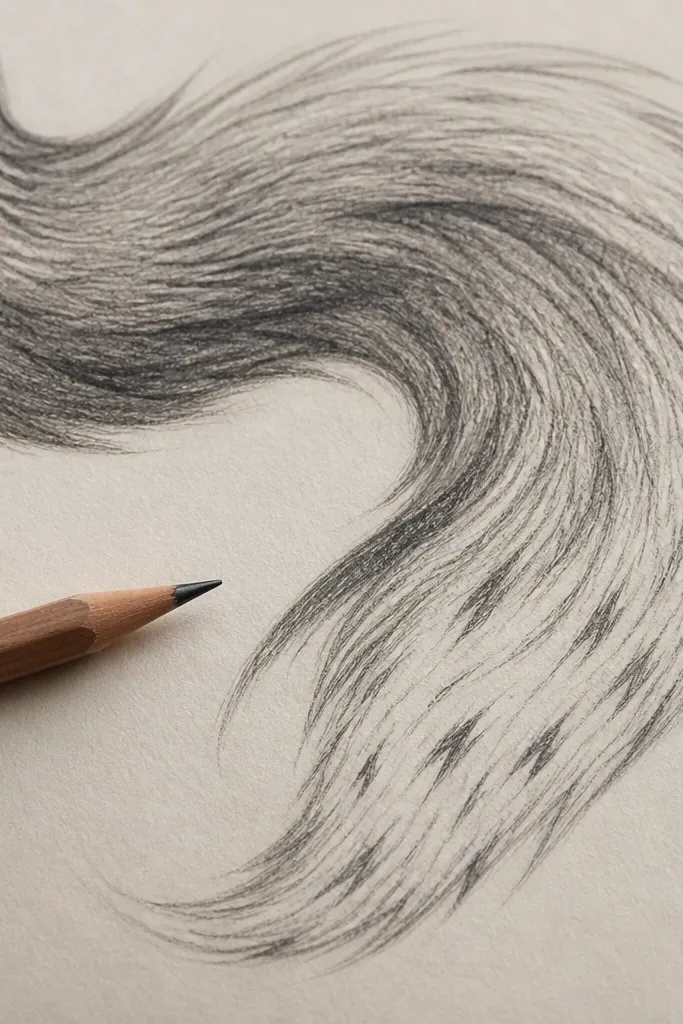
A tail study looks impressive because it’s one big shape with texture. Draw the tail as a flowing swirl, then add fur tips as small angled strokes that follow the tail curve. Leave gaps between strokes so the tail looks airy, not filled in. This project is great for year-round fox drawing because you can repeat the tail shape and swap the fluff level for different moods. It’s easy to medium and takes around 25 minutes.
First, sketch a curved tail line that loops into a swirl, then add a second outline to define thickness. Second, shade the underside of the tail with HB, then deepen the bottom edge with 4B. Finally, add fur tips along the top edge using short angled strokes, with darker tips only near the shadow edge.
Pro tipVary stroke length: longer tips on the outer edge, shorter tips closer to the body.
AvoidDon’t draw fur tips in perfect rows — it looks mechanical.
18. Fox with Snowflakes on the Background
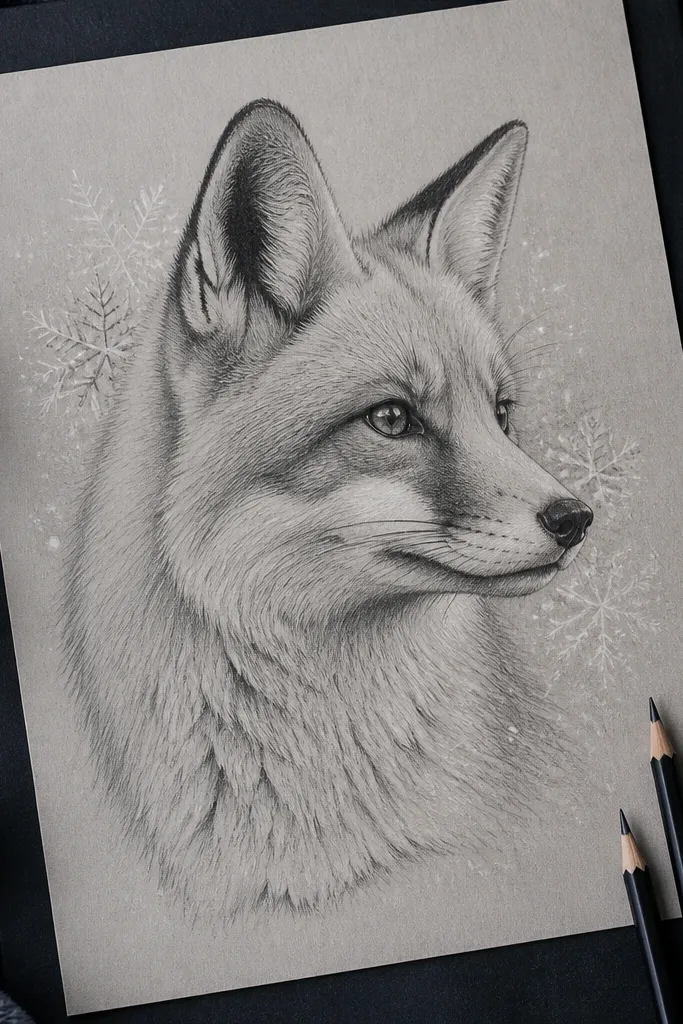
Snowflakes add sparkle without forcing you to draw a full winter scene. Keep the background lightly toned, then place a few snowflake clusters behind the fox so the composition feels alive. The fox should stay the darkest element, with the eye socket and ear fold as your value anchors. This makes the drawing pop in photos even when the background is simple. It’s easy and ideal for quick year-round practice.
First, shade a soft light gray background with HB and leave the fox face lighter. Second, draw the fox face construction and finish with shadow placement around the eye socket, inner ear, and under-chin. Finally, add snowflakes as simple six-line stars and a few partial flakes, then lightly erase around them so they look airy.
Pro tipKeep snowflakes smaller near the edges and slightly bigger near the center for depth.
AvoidDon’t make the background fully dark — the snowflakes won’t read.
19. Fox Face with Soft Pastel-Wash Look (Graphite Only)
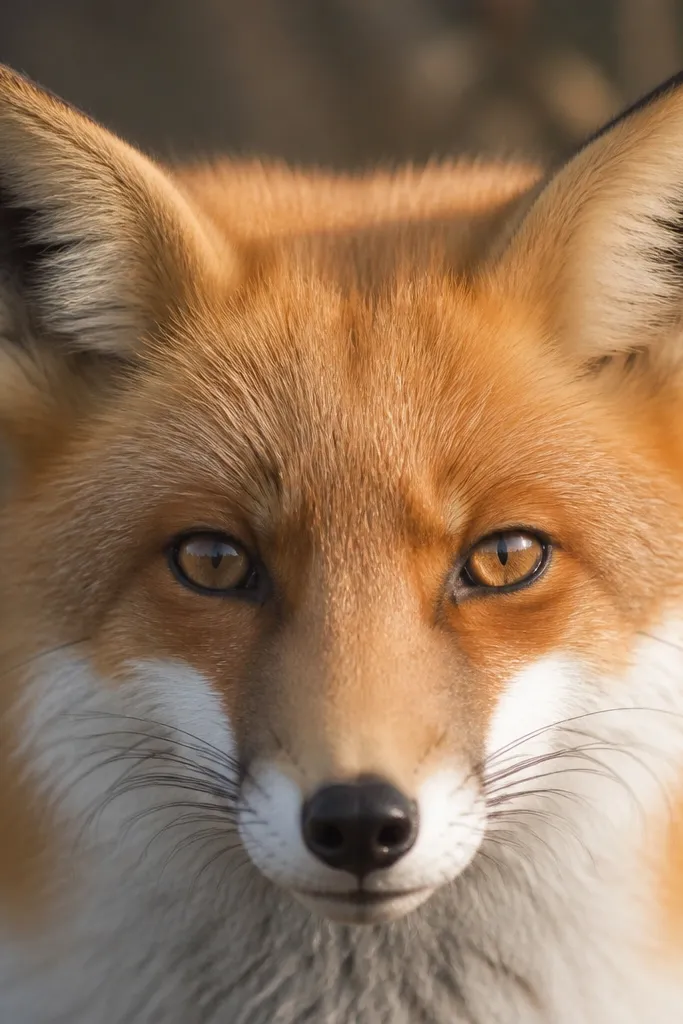
You can fake a pastel-wash look with graphite by using light pressure and blending. This style is forgiving when your lines aren’t perfect because the shading smooths everything together. Keep the eye socket and ear fold darker so the face still reads clearly. It’s photogenic because the values are gentle and the fur direction marks are subtle. This is medium-easy and works well on paper that can handle blending.
First, draw the fox construction lightly and erase the center line once the face is placed. Second, apply a light HB wash across the forehead and cheeks, then blend gently with a tissue. Finally, add fur direction marks with HB only, then deepen the inner ear fold and eye socket with 4B and stop.
Use a fresh tissue corner when blending so you don’t re-deposit dark graphite.
Don’t over-darken early — you can’t “un-wash” graphite once it’s blended.
20. Fox Portrait with White Gel Pen Whiskers
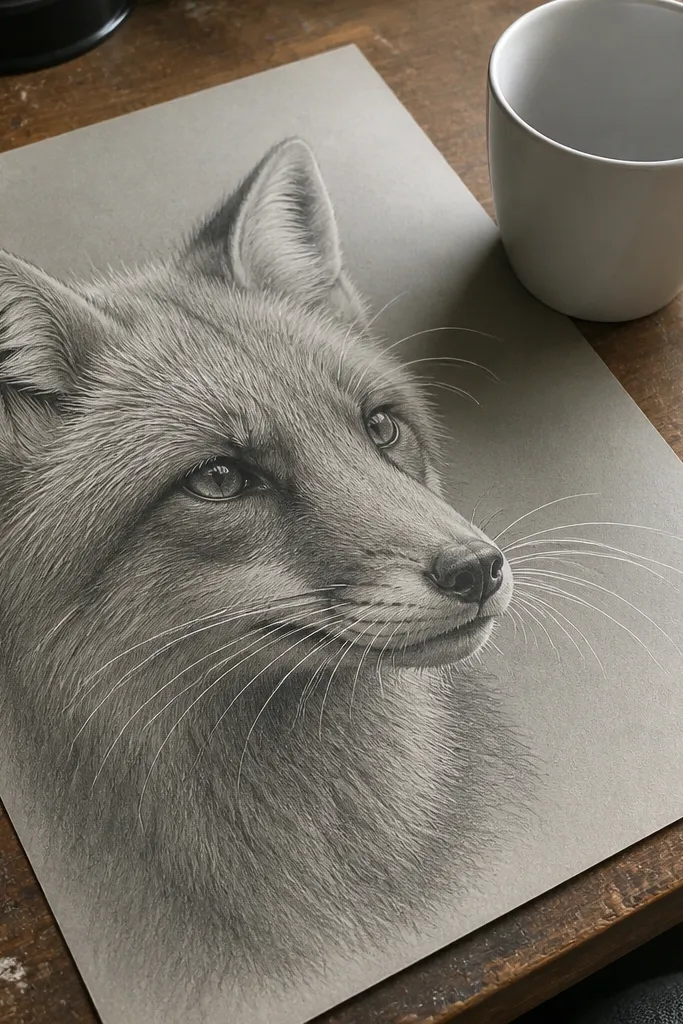
Whiskers are the fastest way to make a pencil fox look sharp. Use the usual construction to get the muzzle right, then add a few darker whisker base marks in pencil. Finish the whiskers with a white gel pen pulled in thin lines that follow the direction away from the muzzle. This style looks clean and modern, especially on toned paper. It’s medium-easy and takes about 30 minutes.
First, draw the fox face construction and build shadows with HB and 4B around the eye socket and under-chin. Second, add a few whisker base marks with HB — keep them light so the whiskers can stand out in white. Finally, use a white gel pen to draw 8-12 whisker lines, starting thicker at the muzzle and thinning as they go outward.
Pro tipLet the pencil shading dry untouched for a minute so the white pen doesn’t smear.
AvoidDon’t add too many whiskers — 8-12 clean lines look better than dense fuzz.
21. Fox Face with Cutout Style Outline
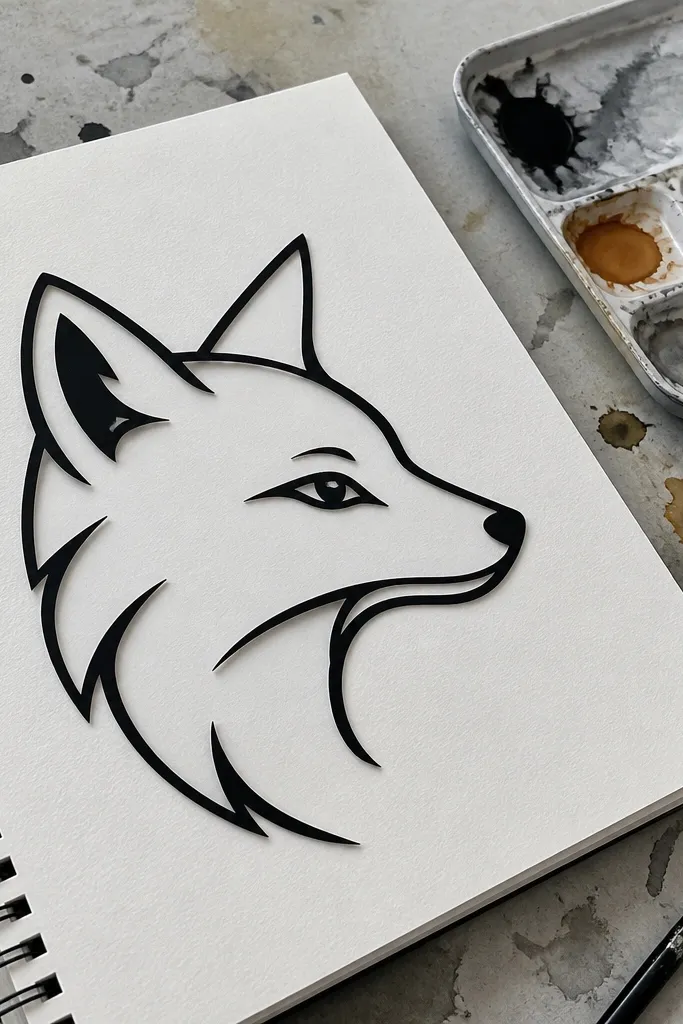
This is a graphic style using negative space. You draw the fox shape with bold outlines, then intentionally leave white space inside the muzzle and around the cheek to create a cutout look. Shadows go only where they create shape: under the ear base and around the eye. The result is crisp and photo-ready, with strong contrast and clean edges. It’s easy for beginners because you’re not relying on heavy fur rendering.
First, sketch the head circle and snout wedge, then commit to a bold outline only after the proportions look right. Second, erase interior construction lines and leave the muzzle area mostly white. Finally, add two shadow pockets in pencil: under the ear base and in the eye socket, then add a few fur strokes only at the cheek edge.
Use a kneaded eraser to keep negative space clean — smudges ruin the cutout effect.
Don’t fill the muzzle with gray — the negative space is the whole look.
22. Fox Sketch on Kraft Paper with Charcoal Depth
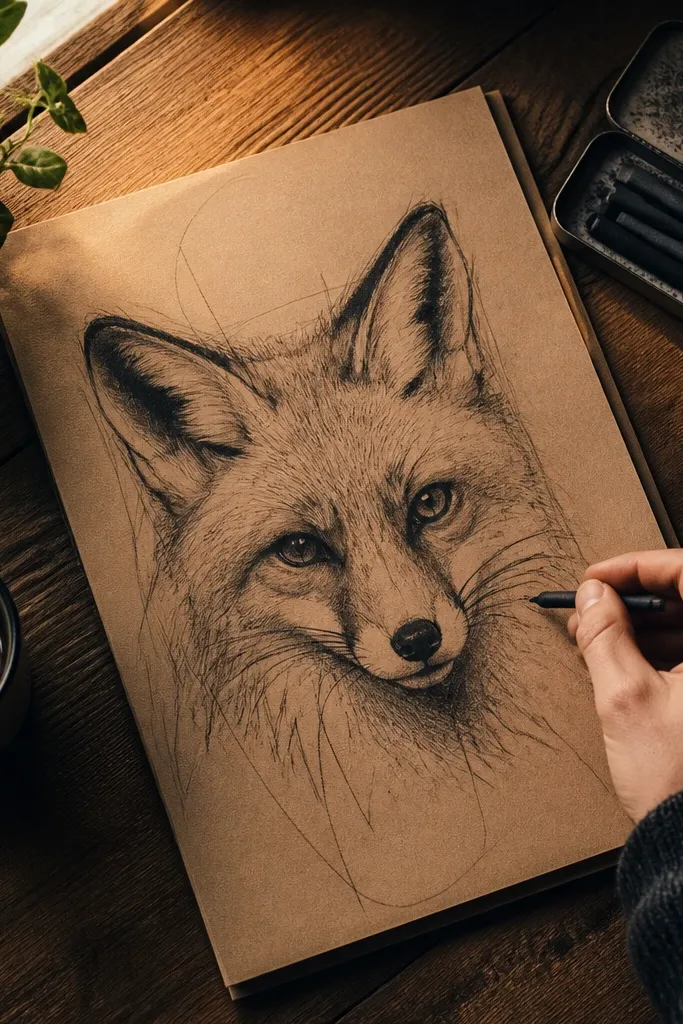
Kraft paper makes fox drawings look warmer instantly because the base tone is already golden. Use charcoal or a soft pencil for deeper shadows, and keep construction lines light so they don’t fight the paper color. The aesthetic is high-contrast and cozy: dark eye sockets, soft muzzle highlights, and ear folds that look dimensional. This is medium difficulty because charcoal can smudge fast, but the look is worth it. It’s great for year-round fox drawing because it adds “season warmth” even in winter themes.
First, lightly sketch the head circle and snout wedge with a light pencil so you can place features accurately. Second, use charcoal (or 6B) to darken the eye socket, inner ear fold, and under-chin shadow, keeping the muzzle lighter by leaving paper showing. Finally, add fur direction strokes with a soft pencil, then use a white gel pen for a few highlights on the nose and muzzle ridge.
Fixative helps, but even without it, keep your hand off the drawing by resting on a scrap sheet while you work.
Don’t blend everything — kraft paper + blended charcoal can turn into a muddy gray face.
23. Fox in a Minimal Window Scene
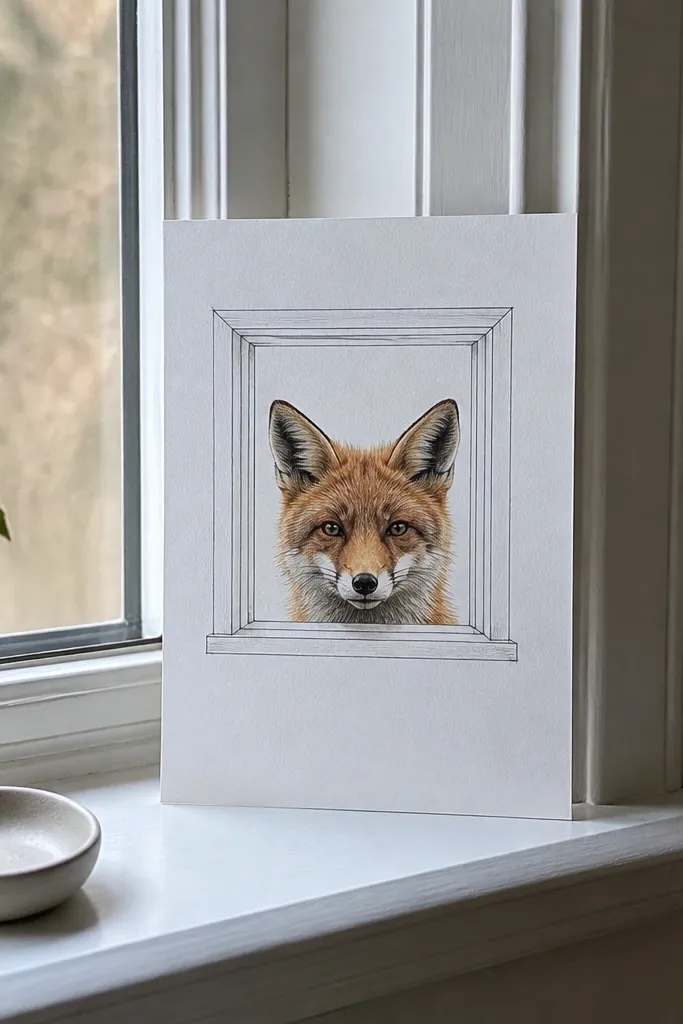
A minimal window frame makes your fox look like it’s peeking from somewhere, which reads well in photos. Keep the background simple: one rectangle border and a few light lines suggesting depth. Then focus your detail on the face only. This project is good for year-round fox drawing because it’s theme-flexible — you can draw the window as snowy, rainy, or sunny using just a few marks. It’s easy and keeps your energy on the fox proportions.
First, draw a rectangle frame and lightly sketch the fox face centered inside it. Second, add a simple depth cue behind the fox: one diagonal line or two faint horizontal lines, then shade lightly to create a wall feel. Finally, build the face with the standard construction plan and add shadows around the eye socket and under the ear, leaving the background mostly light.
Make the window lines thinner than the fox outline so the fox stays the subject.
Don’t over-detail the background — it pulls attention from the eyes.
24. Fox Face with Pointillism Dots
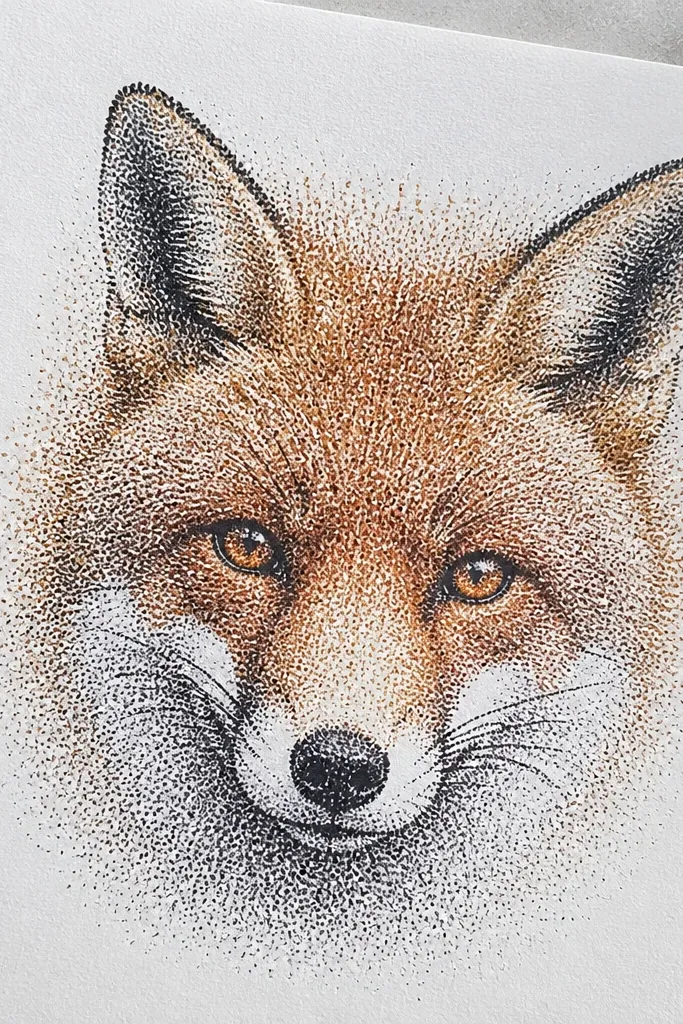
Pointillism looks crisp and modern, and it’s surprisingly forgiving. Instead of drawing fur strokes everywhere, you place dots more densely in shadow zones and leave dots sparse in highlights. The look is photogenic because the dot texture catches light and creates a soft fur impression. Use the classic construction so the eyes and muzzle stay accurate, then let the dot density do the work. This is medium difficulty, but it’s very controllable.
First, draw the fox face construction and outline lightly. Second, place dots for the base fur using HB, then increase dot density around the eye socket, inner ear fold, and under the chin. Finally, add a few clusters of darker dots using 4B for sharp accents and leave the muzzle ridge brighter with fewer dots.
Pro tipKeep dot size consistent — bigger dots in one area can look like you changed tools.
AvoidDon’t connect dots into lines — it stops reading as pointillism.
25. Fox Head with Paper-Cut Look Borders
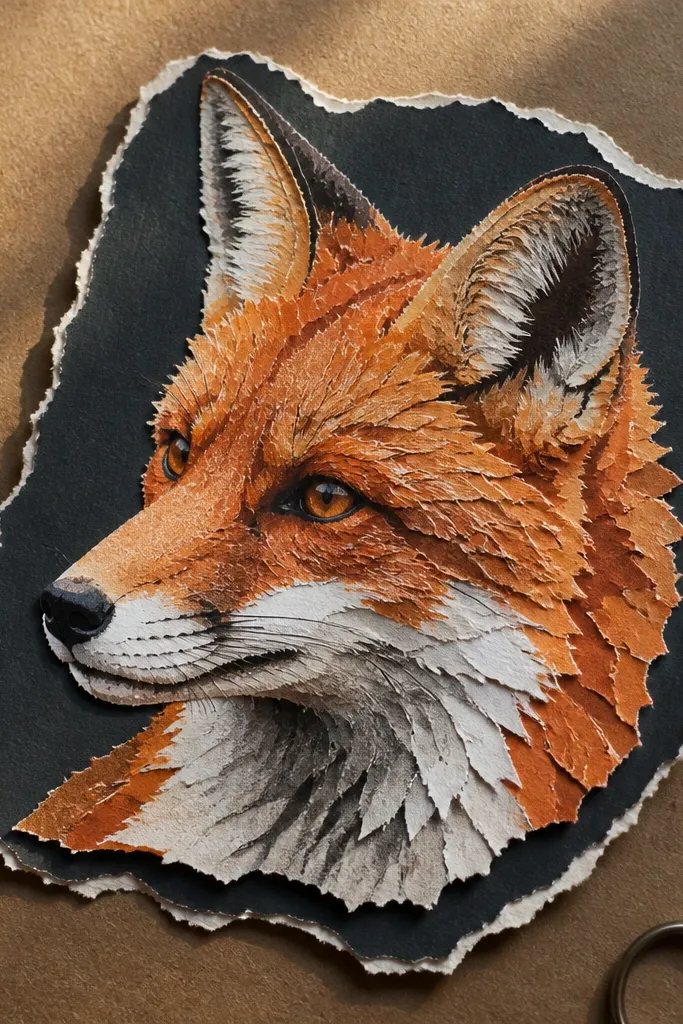
A torn-paper border makes your fox look craft-made and aesthetic without adding complex backgrounds. Draw the fox face cleanly first, then create a border that feels uneven and handmade. Keep the torn edges light and leave the interior face more detailed so the fox stays the focal point. This style is great for year-round fox drawing because borders can match seasons with just a few extra marks, like tiny leaf shapes or snow dots. It’s easy and looks impressive in photos.
First, draw the fox face construction and finish the face with outlines and shadow pockets. Second, trace a rough outer silhouette around the fox with light pencil, then sketch torn edges around that silhouette using irregular zigzags. Finally, darken the fox face shadows with 4B and keep the torn border mostly outline and light shading.
Use a ruler only for the page margin, not for the torn edge — straight lines look fake here.
Don’t over-shade the torn border — it should stay lighter than the fox.



